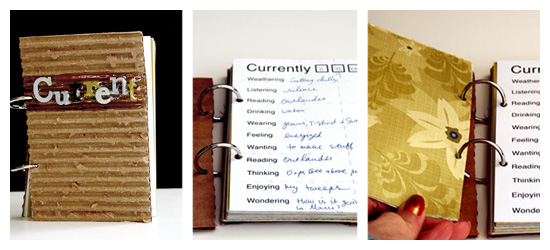
I saw this idea first on Elise Blaha’s blog and I fell in love immediately. Apparently, the first to start the awesome “Currents” movement is talented Tina Aszmus – kudos to her.
The idea of micro journaling is just perfect for someone who likes to record everyday life but feels overwhelmed about it [Me. Me. Me].
One of my favorite things is going over old journals and reliving the days I took the time to record.
One of my deepest regrets is getting rid of the journal I’ve had all through high school and through law school. I mostly wrote bad things in it. Bad experiences. I think most of it was filled with teen unrequited love (I believe that goes hand in hand with being a teenager).
At the time I got rid of it I thought it will be therapeutic to get rid of all the harsh memories and concentrate on all the happiness and loveliness I have in my life. But in retrospective, I do regret throwing it away, because it seems like I have thrown away parts of my life. Not to mention that some of my best writing was manifested there.
Anyhow, let bygones be bygones. [and it’s not like I can unearth it from the dumpster in Dublin]
This mini journal was so easy to make and I printed it on the back side of some OLD [even ancient] patterned papers. I got hooked on the idea of printing on patterned paper after I saw one of my workshop’s member, Mandy do that – amazingly! The only difference is that I printed mine on the back side of the pages and Mandy used double sided papers and printed her pages on the pattern.
Tools & Supply
- Word processing software (I’m not providing a printable, because it isn’t an original idea of mine)
- Old patterned paper
- Recycled cardboard
- Crop-a-dile
- Binding rings
- Chipboard letter stickers [mine are from Making Memories “5th Avenue” collection that I bought a while back]
How To
- Create a 4″ by 6″ page with your regular word processing software (make sure the page settings are set to the right size for easy printing) where you make a list of the categories you want to record
- Cut all your extra paper to 4″ by 6″ pieces (6 pieces out of each 12 by 12 sheet, unless you discard parts that have the company’s logo on it)
- Feed your cut paper through your printer, the same way you put a 4″ by 6″ photo paper in it to print photos.
- Cut 2 thicker 4″ by 6″ pieces for the cover. I used corrugated cardboard.
- Punch hols for the binding (or use any binding system that you love using).
- Bind all the pages together with binding rings or ribbon.
- Write. Write. Write. [Just put it on your desk, nightstand or purse and fill in a page whenever you have a minute – that’s all it takes].
Share
What do you think about the idea of micro journaling? Share your thoughts by leaving a comment.

Check out Creativity Prompt’s new and unique self paced workshop: “Make Your Own Planner”.
This workshop will show you how to make a beautiful handmade planner for the year 2012. Not only are you going to get the entire meticulously designed planner kit for instant download, but you will also get a high resolution video tutorial as well as step-by-step instructions to guide you on each step of the way. Either treat yourself with a fresh and creative start for the coming new year, or get it to create wonderful gifts for your family and friends.
Join now


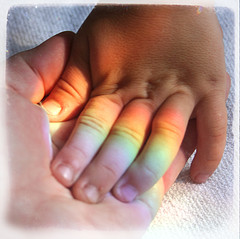
 This week’s journaling prompt is inspired by my mom, who read to me in confidence something she had written in a time of change.


 Many strong and capable women squinch to the thought of having their photo taken. There are many reasons for that reluctance. The two most common reasons are fear of being perceived as vein and self absorbed and inability to think about ‘self’ and always concentrating on others.
 Subscribe in a reader
 Subscribe by Email


