
I really liked the look of the die-cut greeting on my ‘Absolutely wonderful’ card, so I decided to create another one.
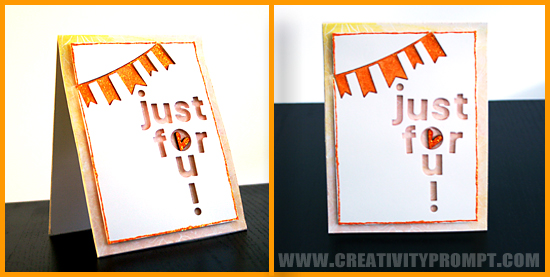
This time I used a banner die from Simon Says Stamps as well as my trusted Papertrey Ink letter dies. I also made a watercolor background, to shine through the negative spaces.
How did I make this card:
- I started out with the background, I stamped the background image with Versamark ink and white-embossed it with a heat gun.
- Then I used inexpensive watercolor set, that I got at my local Michael’s, and simply added a wash of light peach, pink and yellow colors. I used a ton of water which caused some warping, so I doubled up the card base with another sheet of cardstock underneath. I really like the result and will definitely try that again.
- Next, I cut a slightly smaller panel of cardstock and laid out the individual die-cuts on the panel, secured with some repositionable adhesive and ran it through my Cuttlebug.
- I attached the die cut panel to my card base with foam adhesive. Note that the banner die-cut had cut my panel into two pieces, so I adhered each one individually.
- Next I added a pop of color with a wood veneer heart by Studio Calico, which I dyed orange with the same watercolor set, then added some orange Stickles on top.
- I decided that my card need some more color so I covered the banner ‘positive’ with the same orange Stickles and adhered it flat on the card base, right under the ‘negative’ impression.
- I also ran a line of Stickles around the perimeter of my panel.
Supply
        |


