/** Font types */

Posts Tagged ‘Tutorial’

Hybrid Mini Album – Step By Step

Monday, September 6th, 2010

Hybrid Mini Album - Collage

On Friday my husband turned thirty.

My beautiful, wonderful, perfect husband has joined the thirty something group and I will join him in October.

I wanted to make a book telling him how awesome he is while incorporating photos from the last year in our life (and one from 29 years ago…)

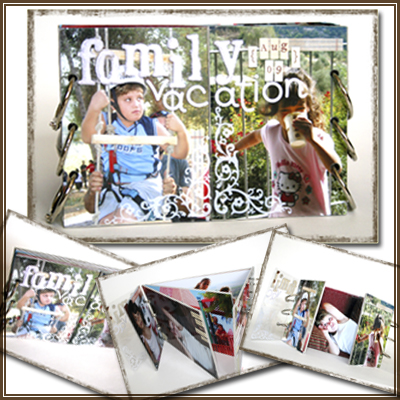
The easiest way for me to go about it was to make a hybrid mini album.

A hybrid is an album created partly digitally on the computer and partly traditionally with papers, adhesive and other scrapbooking goodies.

I created all the photo collages and titles for the album with Adobe’s Photoshop Elements 8.0 and the rest by hand, here is how I went about it:

Supply

In this album I was using a ton of different products I have had piled up in my office, so I will not tire you with the complete list. I will only highlight some of the main products I was using and loving.

Step By Step Instructions

Digital Part

  1. Open a letter size file with 300 DPI resolution.
  2. Use the rectangle shape tool to draw a 6 by 6 square in the middle of your page – that will be your page base. Choose a very faint color for the square, to save ink later…
  3. Create your design only on the 6″ by 6″ area. (I only used fonts, “Impact” in particular.)
  4. To print your design, click on the eye icon next to the layers with your page design, that will conceal everything but the 6 by 6 square.
  5. Print your page on plain copy paper. It will be used as your positioning guide later.
  6. Now conceal the square by clicking on the eye icon and reveal your design again.
  7. Adhere a 6″ by 6″ piece of cardstock to the printed rectangle on your copy paper. Use temporary adhesive to make its removal easier.
  8. Put your copy paper through your printer again, with the cardstock attached to it.
  9. Print your page design.
  10. Repeat. (You don’t have to print the positioning guide again if you don’t move the square on your screen.)
  11. For the photos I just cropped each photo individually to the size I wanted it and layered all the photos on a letter size document I then printed on photo paper.
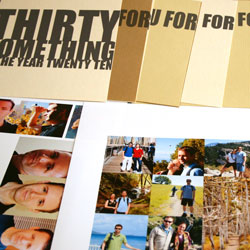
  12. raw materials

Traditional Part

  1. Crop all your photos.
  2. Design your pages, add letter stickers to add texture to the rather flat printed titles.
  3. You may also use the free journaling tags you can find here, on Creativity Prompt. They will help you add your journaling in an easy and polished way.
  4. After you finished all the pages design, gather all the pages in the order you want them to be and make sure no page is rotated.
  5. I also added two 6″ by 6″ acetate pages to protect the front and back cover pages.
  6. Use the crop-a-dile to punch holes for the book rings. Punch them at 1″, 3″ and 5″, about ½” from the edge.

Photos of the Finished Mini Album

Hybrid Mini Album Pages

Hybrid Mini Album Pages

Hybrid Mini Album Pages

Hybrid Mini Album Pages

Hybrid Mini Album Pages

Hybrid Mini Album Pages

Hybrid Mini Album Pages

Hybrid Mini Album Pages

Hybrid Mini Album Pages

Hybrid Mini Album Pages

Hybrid Mini Album Pages

Share

Do you use the computer to add titles or other elements to your scrapbook pages? Please share by leaving a comment here.
Welcome Little One Workshop
Check out Creativity Prompt’s new and unique self paced workshop: “Welcome Little One”. This workshop will provide you with everything you need, and then some, to make a fabulous handmade mini album to record the first moments of a new born baby.
Park Adventures And How To Use Fonts As Die Cuts

Wednesday, September 1st, 2010

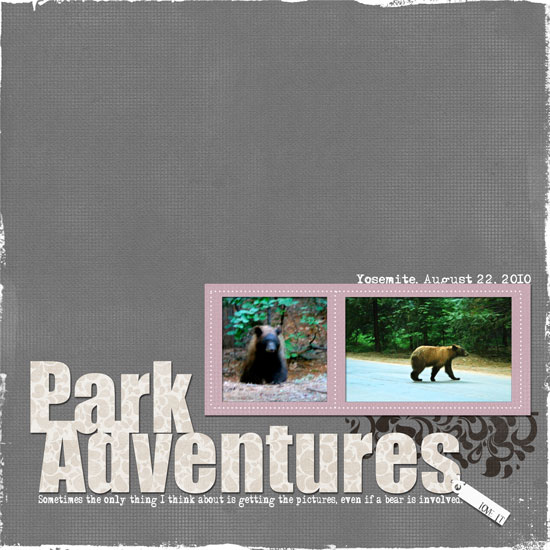
Park Adventures

[Fonts: Impact and Adler; Digital Kit: KD Crush by Karla Dudley.]

As a scrapbooker, or a memory archiver, I find myself doing things I would never imagine doing, just for the sake of collecting visual memories.

This layout is a wonderful example of such irrational behavior.

The pictures in the layout were taken with a regular 55mm lens – no tele lens, no zoom – I was standing right in front of the huge bear.

Gladly, I caught Mr. bear on a good day…
(I hope he isn’t traumatized by the insane human who ran after him with a camera)

How To Create Digital Letter Die Cuts

In this layout I used Karla Dudley’s newest digital kit, “KD Crush”, which will be available tomorrow at the Digichic online store. The kit is based on a natural color palette, just in time for fall and includes beautiful papers, brushes and elements (including an alpha set).

However, I used it a bit differently by masking the patterned paper to a regular true type font.

Here is how I made the title for my layout above:

  1. Choose any font, preferably a dominant one, such as “Impact” to give room for the digital patterned paper.
  2. Type down your title, each word separately to allow maximum control over its position.
  3. Decide what is the FINAL position and size of each letter in the title.
  4. Simplify all the title layers (by right clicking on each layer and selecting “simplify”).
  5. Merge the layers together (just select all the relevant layer and then right click on your selection and opt for “merge layers”. To select a couple layers together press the CTR or CMD key while clicking on the layers).
  6. Insert any patterned paper and make sure its layer is directly above the title layer.
  7. Mask the two layers together by pressing “CTR+G” or “CMD+G”.
  8. You may now merge the 2 layers together to add a drop shadow or leave it as is.

Share

Have you ever acted out of character just to take a picture or preserve a memory? Please share your story by leaving a comment here.

Welcome Little One Workshop
Check out Creativity Prompt’s new and unique self paced workshop: “Welcome Little One”. This workshop will provide you with everything you need, and then some, to make a fabulous handmade mini album to record the first moments of a new born baby.

How To Change the Color of the Journaling Tags

Wednesday, August 4th, 2010

I have been posting a lot of free printable journaling tags.

I have been asked several times how can you change the color of these tags with a photo editing software, such as Photoshop or Photoshop Elements and each time I answered individually.

It took me a while to figure out that my answer may interest many of you too, so here it goes:

  1. Open the pdf file with photoshop.
  2. Open a new layer underneath the file layer.
  3. Make sure your file layer is highlighted and pick the white in the file, using the magic wand tool.
  4. Press delete.
  5. From the menu bar choose “Edit” =>”Fill in layer” => choose “color” and change it to any color you want.
  6. Fill in the “preserve transparency” check box and click “apply” or “ok”.
  7. If the last 2 steps don’t work for you, try to press CTR+U or CMD+U and change the hue and saturation settings.

I hope that helps you guys 🙂

Have a great day.

Is It Spring Yet – Sharing A Layout And A Techniqe

Tuesday, April 6th, 2010

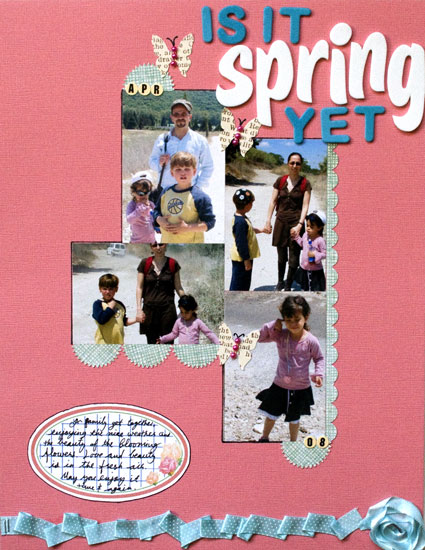
Is It Spring Yet

Supply

  • cardstock: Bazzill
  • Patterned paper: My Minds Eye “Home” (pale blue), Autumn Leaves (text)
  • Adhesive: Fabri Tac by beacon; Glue Glider Pro by Glue Arts; 2 Way Glue by EK Success.
  • Letter Stickers: American Crafts “Lullaby” Thickers (white), Generic from the Dollar bin at Target (turquoise), Jenni Bowlin Tiny Circle Stickers.
  • Tools: Punches: EK Success (scallop border punch), Martha Stewart (starburst); Stapler: Tiny Attacher by Tim Holtz.
  • Journaling tag: Creativity Prompt.
  • Ribbon: American Crafts (Dotted), Generic and o-l-d (seafoam thin satin)
  • Jewels: generic.

How To

Pleated Ribbon

  1. Attach the edge of your ribbon with 2 tiny staples.
  2. Apply a line of fabric glue. Fabri Tac is WONDERFUL. (I wish I was endorsed by Beacon. I am not)
  3. Pleat the ribbon along the glue line irregularly to create a messy look. don’t worry about the pleats opening up at this stage.
  4. Go back and apply a bead of glue underneath each “pleat” to keep it in place.

Ribbon Flower

Also Known as – what to do if you run out of ribbon while pleating but happen to have a similarly colored ribbon at hand…

  1. Put a drop of fabric glue where you want your flower center to be at and adhere the tip of your ribbon strip to it.
  2. Apply some more glue around the glued edge and start turning your ribbon around it, flipping the ribbon occasionally.
  3. Keep applying more beads of glue around and building your “flower” until you are satisfied with its size.
  4. Cut off the excess ribbon and tuck the end underneath one of the pleats with another bead of glue.

Share

Is it spring yet? Share your thoughts by leaving a comment.
If you give the techniques a try – pweeeeeze share 🙂

Make Your Own Planner Workshop
Check out Creativity Prompt’s self paced workshop: “Capture Your Dream”. In this workshop you will capture, follow and make your dream come true as well as document your journey in a fabulous mixed media mini album.

Build A Scene OR Paper Piecing Card – Creativity Prompt

Saturday, February 27th, 2010

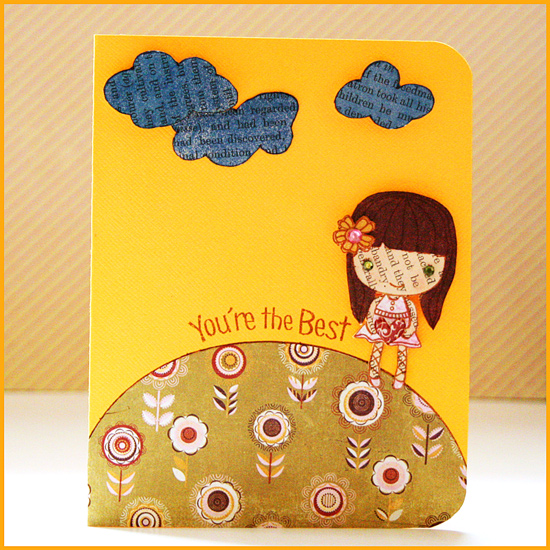
Paper Piecing Card

Way back, when I was a wee kid, my sister used to tell me the most wonderful made-up stories. I was completely mesmerized by her stories, not to mention extremely gullible…

My favorite stroy was about a magic typewriter, hidden in a secret compartment inside the wall (I used to spend HOURS looking for it). Everything you type on it with the words: “I wish” at the beginning, comes true. You could write short sentences such as ‘I wish I had ice-cream with hot chocolate sauce…‘ and immediately enjoy the treat, or you may materialize imaginary worlds, built from scratch with the power of your words (These were my favorite types of stories).

In crafts, as in creative writing or story telling, you may build imaginary worlds from scratch and go as far as your imagination and creativity go.

Go ahead and build a scene. Let your inner creative child guide you through the labyrinth of your vast imagination.

Step by Step Instructions

  1. Adhere a vintage text paper onto a plain, non-textured cardstock using glue stick.
  2. Stamp your image a few times on different patterned papers, including on the vintage text paper. Use as many patterned papers as the number of pieces you want to combine together.
  3. Cut each piece of your image with precision scissors.
  4. Start assembling the “scene”: Adhere the “flat” pieces with a glue pen and the dimensional pieces with foam dots.
  5. For the “hill” – cut a piece of patterned paper in a curve.
  6. Draw some freehand clouds on your leftover text paper and cut the out with precision scissors.
  7. Spritz your “clouds” with Glimmer Mist.
  8. Stamp or punch the little heart on a reddish patterned paper. Apply some Glossy Accent. Let dry and cut out. Adhere to the image with a foam dot.
  9. Stamp the greeting in a curve, by laying it that way on the acrylic block.
  10. Add some gems for the finishing touches.

Share

If you have any question, suggestion or remark – don’t hesitate to contact me – either leave a comment here, use the contact form or start a new thread on the Creativity Prompt Flickr Group!!!

I would also be very happy to see your own creations, so don’t be shy and share 🙂

Make Your Own Planner Workshop
Check out Creativity Prompt’s self paced workshop: “Capture Your Dream”. In this workshop you will capture, follow and make your dream come true as well as document your journey in a mixed media mini album.

The 10 Best Creativity Prompts in 2009

Friday, January 1st, 2010

In light of the coming new year, I backtracked a little bit and gathered the most popular posts on creativity Prompt in 2009.

Without further ado, here are the posts which attracted most of your attention and sparked a wonderful conversation – either on the blog or privately, via e-mails.

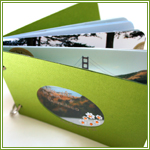
  1. Make a Hybrid Board Book.
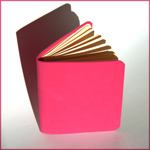
  2. Chunky Mini-Album.
  3. Waterfall Mini-Album.
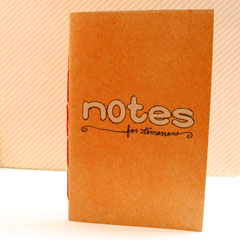
  4. Make A Notebook With A Simple Stapler.
  5. Make A Fabric Covered Hardbound Journal.
  6. Embellishing Paper Flowers.
  7. How To Use Those Paper Scraps.
  8. How To Make A Cute Box Of Drawers.
  9. How To Make a Drier Sheet Flower.
  10. How To Make THE QUICKEST Mini Album – EVER.

&

Another favorite compilation post was the holiday handmade gift guide: 10 Handmade Gifts Under 10 Minutes.

Share

What Creativity Prompt did you like the best? What types of projects are pulling you to create?

What project have you tried yourself? Share a link!

Happy New Year!!!

Make Your Own Planner Workshop
This year you can really make your dream come true!

“Capture Your Dream” workshop is a self-paced, six weeks long workshop, that will walk you through a journey of capturing your biggest dream and making it come true.

In the process of making your dream happen – with lots of inspiration and guided self-exploration, you will also create a mixed media mini album from scratch and learn many tips and techniques – including some photography pointers that will add character to your photos and will help you take better pictures of your projects.

The workshop includes 30 printable PDF lessons with step-by-step pictures and instructions as well as several printable templates you may use in other projects too.

I am confident you will enjoy it and find it helpful so I also offer full money back guarantee while the workshop lasts.

Make A Simple Notebook With Ribbon Binding – Creativity Prompt

Friday, December 25th, 2009

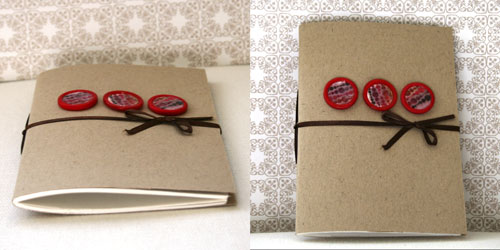
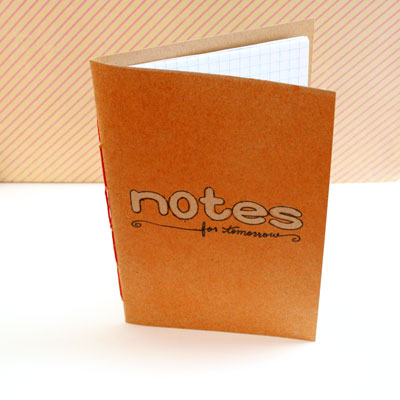
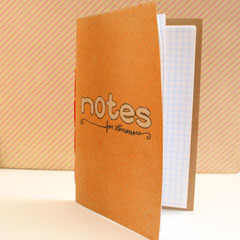
Notebook With Ribbon Binding

This project is also an easy one you can whip up in under 10 minutes. I love those type of projects and I can never have enough notebooks to sketch, doodle and write in. Can you?

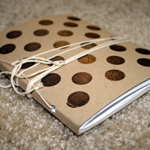
I used the ribbon for the binding, as an alternative to the linen thread or embroidery floss I normally use for binding and as an added bonus, the ends of the ribbon also provide a nifty closure for the notebook.

If you are interested in making this sweet and simple notebook, then keep on reading for the supply, video how to and step-by-step instructions. Enjoy!

Tools & Supply

How To

[Watch on YouTube. While you’re there, please comment, rate & subscribe]

Step-by-Step Instructions

  1. Cut your papers 8″ wide and 5½” tall. Fold in half to 5½” by 4″.
  2. Straighten the edges of the paper stack with a grid ruler, aligned with the edge of the paper and a craft knife.
  3. Cut your cardstock 8½” wide and 5½” tall and wrap around the paper stack to adjust the spine.
  4. Lay the paper stack over the cardstock cover and mark the piercing holes: one at the center and one to each side – 1″ apart.
  5. Pierce the papers and cardstock following the marks you created before.
  6. Thread the ribbon through the needle so both ends would meet and start the binding stitching from the inside out, through one of the outer holes.
  7. Then go in through the opposite hole.
  8. Tie the ends together in a double knot and thread the needle out through the center hole and in again through the same hole.
  9. Thread the needle through the loop the tied ends create and then underneath the first stitch.
  10. Thread the needle out through the center hole again.
  11. Cut the ribbon off the needle and use the ends to close the notebook.
  12. To embellish the notebook I adhered 3 buttons with a dab of Diamond Glaze to the center of the notebook’s cover and adhered three punched out circles of patterned paper to the button. I then secured the patterned paper with another layer of Diamond Glaze.

Share

If you have any question, suggestion or remark – don’t hesitate to contact me – either leave a comment here, use the contact form or start a new thread on the Creativity Prompt Flickr Group!!!

I would also be very happy to see your own creations, so don’t be shy and share 🙂

Make Your Own Planner Workshop
“Capture Your Dream” workshop is relaunching as a self-paced workshop. Isn’t this the perfect time for you to capture your dream and make it happen?

Creativity Prompt – Whip Up Quick Handmade Holiday Gifts – 10 Gifts In Under 10 Minutes

Friday, December 11th, 2009
Quick Handmade Holiday Gifts
[Photo by: Ginny]

The holidays are practically here and with all the preparations involved you may feel a little bit behind. As the holidays get closer, the lines at the stores get longer and the stress level – higher.

Let me help you by compiling a list of 10 handmade gifts that can be whipped up in less than 10 minutes. That is even quicker than driving to the store or than browsing online stores.

Each image is linked to the full video + step by step tutorial:

10 minute book - openedA Cute Box Of DrawersSimple Stitched Notebook
A SIMPLE Fabric Covered Mini AlbumStapled NotebookGate Fold Mini-AlbumHow To make An Accordion Brag Book
THE QUICKEST Mini AlbumHow To Make An Art JournalKraft No-Stitch NotebookWhat are you making this year?

…and one more gift idea –

Make Your Own Planner Workshop
Do you have last minute gift giving challenges? Check out the new “Make Your Own Planner” workshop and you may solve them…

Creativity Prompt – A Simple Stitched Notebook

Friday, December 4th, 2009

Simple Stitched Notebook

This week I have a cool project – super duper simple and the results are fabulous. For a no bulk notebook that you can carry around freely, without worrying about wear & tear, I have a cool masking technique for you with a color spray and some chipboard letters.

I also have a fantastic tip for threading your embroidery floss through the needle in a split second, you wouldn’t want to miss that… 🙂

Tools & Supply

How To


[Watch on You Tube. Please rate & comment.]

Step-by-Step Instructions

  1. Cut your papers and cardstock to size & fold in half. Burnish the crease with a bone folder.
  2. Lay the paper stack over the cardstock piece and center it.
  3. Mark the placement of your piercing holes. Find the center and mark at ½” on each side and then go on and mark in 1″ increments.
  4. Pierce all your marked holes, all the way through the papers and the cardstock. Make sure they are aligned together and that the piercer goes through the crease.
  5. Thread your needle with the embroidery floss. TIP – To thread your needle in a split second (no exaggeration here) simply stick a small piece of tape to the end of your floss, fold it over and cut the excess. That will prevent the fraying of the floss and will also provide a slight stiffening effect for a quick and smooth threading.
  6. Start stitching your notebook from the top hole, from the inside – out. Make a simple running stitch, going through each hole – once in and once out. After you go through all the holes, go back through the holes, switching direction, so the stitch will look like a backstitch. When you go through the last hole, tie the ends together in a strong knot.
  7. For a no-bulk embellishment, adhere the chipboard letters with a temporary adhesive. Make sure the adhesive isn’t protruding outside or it will affect the impression of the letters.
  8. Lightly spray from about 10″ above your notebook cover. Spritz the color mist as many times you want until you get the effect you are looking for. [The chipboard letters may be reused in another project, by the way…]
  9. Before removing the letters go over them with a black or white marker, that will create a nice outline and will add visual interest. Just make sure to hold your letters tight, as the temporary adhesive isn’t strong enough and they may move around.

Simple Stitched NotebookSimple Stitched Notebook

Share

If you have any question, suggestion or remark – don’t hesitate to contact me – either leave a comment here, use the contact form or start a new thread on the Creativity Prompt Flickr Group!!!

I would also be very happy to see your own creations, so don’t be shy and share 🙂

Make Your Own Planner Workshop
Check out the new “Make Your Own Planner” workshop and you may solve this year’s holiday gift shopping problem. An affordable workshop that keeps on giving…


Make Your Own Planner Workshop
“Capture Your Dream” workshop is relaunching as a self-paced workshop. Isn’t this the perfect time for you to capture your dream and make it happen?

Cards. Cards. Cards.

Thursday, December 3rd, 2009

This week I was determined to dig deep into my stash and make stuff with forgotten products, side by side with some new products and toys I bought lately. Mix old with the new and get into the holidays’ spirit…

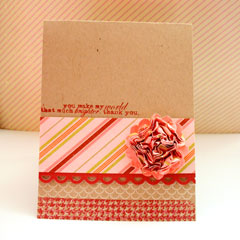
Card
Old: Chatterbox patterned paper, Scalloped circle punch, ink: Palette hybrid in Pure Poppy and vintage Cream by Papertrey Ink.

New: American Crafts cardstock, Bazzill kraft cardstock, Apron Lace border punch by Fiskars, Stamps: Papertrey Ink “Retro Basic Backgrounds”, Ali Edwards “You” for Technique Tuesday, Glitz Design “distress 2”.

Techniques: 1. The striped paper was cut diagonally for a diagonal design. 2. For the flower I punched a gazillion scalloped circles (ok, just 10) and attached them together with a brad. Then I crumpled each layer to create a super-dimensional flower.

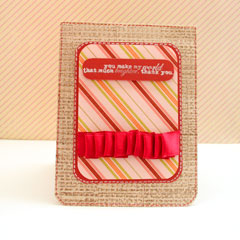
Card
Old: Chatterbox patterned paper, wire rimmed ribbon, ink: Palette hybrid in Dark Chocolate and vintage Cream by Papertrey Ink, red felt marker, white gel pen.

New: American Crafts cardstock, Bazzill kraft cardstock, Corner Chomper, stamps: Ali Edwards “You” for Technique Tuesday, Glitz Design “distress 2”.

Techniques: 1. I pleated the ribbon, the wire rim helps it stay put. Then I took a strip of a strong double-sided adhesive and attached it to the cardstock and adhered the pleated ribbon to it. 2. For the layered, distressed background, I first stamped a generic houndstooth pattern in a cream colored ink, let it dry and then stamped a text pattern with brown ink over it.

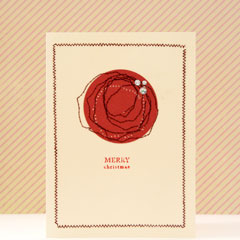
Card
Old: Cream card, red-brown thread, Palette hybrid ink in Pure Poppy by Papertrey Ink, Kaiser Craft’s clear rhinestones, Fiskars 2″ circle squeeze punch.

New: Brother LS2125I Sewing Machine, American Crafts cardstock, Stamp: Papertrey Ink “Mixed Messages”.

Techniques: This is my first trial ever at sewing, so I’m pretty proud of the semi-straight border 🙂 1. The border is sewn with a zig-zag stitch. 2. the circle was punched with a 2″ circle punch and adhered to the card with temporary adhesive. Then I sewed freely inside and around the circle to create a rose-like abstract pattern. I also made one run with no thread, for a dotted-punctured effect.

Share

Have you been hoarding products that has been collecting dust in the back of the shelf? Have you used your scraps/old supply lately? What have you been doing? Have you been experimenting with a new toy or technique? Share! I love a good discussion 🙂

Make Your Own Planner Workshop
“Capture Your Dream” workshop is relaunching as a self-paced workshop. Isn’t this the perfect time for you to capture your dream and make it happen?


Make Your Own Planner Workshop
Check out the new “Make Your Own Planner” workshop and you may solve this year’s holiday gift shopping problem. An affordable workshop that keeps on giving…