/** Font types */

Posts Tagged ‘technique’

Monochrome Texture Technique Highlight

Wednesday, June 27th, 2012


Monochrome Texture Technique Highlight

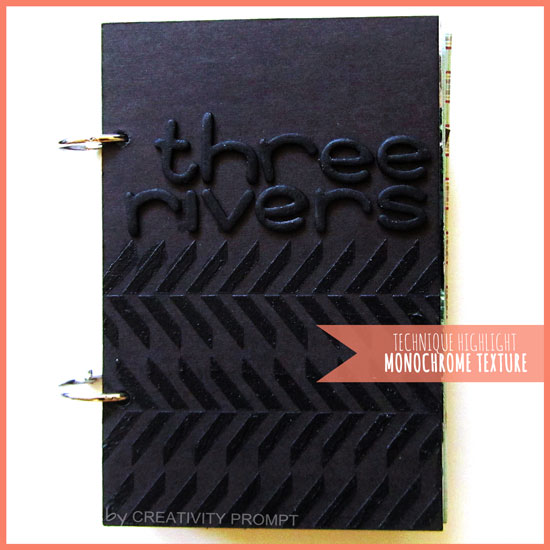
A lot of you commented and liked the monochromatic texture on the cover of my most recent travel mini album.

I am a great believer in giving credit where credit is due and in this case the credit belongs to my talented friend, Alexandra.

I was thinking about using a modeling paste with my stencils for a while but didn’t do anything about it UNTIL I saw this AMAZING page and technique highlight by Alexandra on creating your own background with masks. In this tutorial Alexandra created a gorgeous white on white texture using a modeling paste and one of Studio Calico’s masks.

After seeing how striking the result is I had to give it a go too.

Here is how I did it:

Supply

[Click on the image to find the product at Simon Says Stamp]
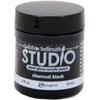
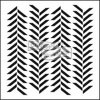
Liquitex MODELING PASTEBlack acrylic - Claudine Hellmuth Studio PAINTThe Crafter's Workshop MINI HERRINGBONE 6 x 6 Template

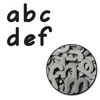
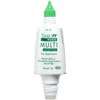
Maya Road DEBORAH MINI CHIPBOARD AlphabetTombow MONO MULTI Liquid Glue

How-To

Title

  1. Paint raw chipboard letters the same color of your background. Use a few thin layers of paint and let dry completely between layers, rather than slather on a thick layer of paint. Make sure to paint the sides of the letters as well to avoid the raw chipboard’s color peeking through.
  2. Let dry completely. Thin layers get completely dry very quickly.
  3. Adhere to your cover with a strong liquid adhesive that dries clear. Again, use minimal amount of glue. Just dot it a few times rather than applying thick lines of glue to avoid spilling.

Textured Pattern

  1. Affix the template to your background with a repositionable tape, such as painter’s tape or a washi tape.
  2. Mix the modeling paste with acrylic paint to create the same color as your background – skip this step if your are working on a white background.
  3. Apply a layer of the paste-paint mix with a spatula to make sure it spreads evenly on top of the template. Make sure that you apply pressure only vertically so you won’t accidentally push the paint underneath the template and mess up your pattern. If you don’t have a spatula you can use an old credit card or a plastic ID card. I’ve got a lifetime supply of fake credit cards from all the spam mail we receive in our mail box daily…
  4. If you want to create an imperfect pattern, mask off some of the template with the same low-tac tape you used to affix the template. Skip this step if you only wish to mimmic the template, as is.
  5. Remove the template carefully and let it dry completely.
  6. Marvel at your beautiful textured pattern. [Oops. Obviously this step is optional]

Share

Are you going to give this technique a go? Have you ever tried it? I would love to hear about your experience and any suggestion you may have!
JM-S2 | Signs
Bring life to your projects with handmade epoxy stickers.

Just $3.00 per package.
6 stickers in each package.
Each sticker measures approximately ¾â€ by ¾â€.


Cards. Cards. Cards.

Thursday, December 3rd, 2009

This week I was determined to dig deep into my stash and make stuff with forgotten products, side by side with some new products and toys I bought lately. Mix old with the new and get into the holidays’ spirit…

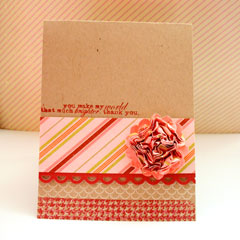
Card
Old: Chatterbox patterned paper, Scalloped circle punch, ink: Palette hybrid in Pure Poppy and vintage Cream by Papertrey Ink.

New: American Crafts cardstock, Bazzill kraft cardstock, Apron Lace border punch by Fiskars, Stamps: Papertrey Ink “Retro Basic Backgrounds”, Ali Edwards “You” for Technique Tuesday, Glitz Design “distress 2”.

Techniques: 1. The striped paper was cut diagonally for a diagonal design. 2. For the flower I punched a gazillion scalloped circles (ok, just 10) and attached them together with a brad. Then I crumpled each layer to create a super-dimensional flower.

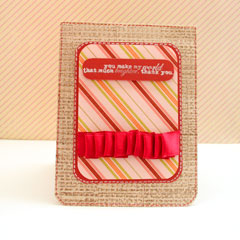
Card
Old: Chatterbox patterned paper, wire rimmed ribbon, ink: Palette hybrid in Dark Chocolate and vintage Cream by Papertrey Ink, red felt marker, white gel pen.

New: American Crafts cardstock, Bazzill kraft cardstock, Corner Chomper, stamps: Ali Edwards “You” for Technique Tuesday, Glitz Design “distress 2”.

Techniques: 1. I pleated the ribbon, the wire rim helps it stay put. Then I took a strip of a strong double-sided adhesive and attached it to the cardstock and adhered the pleated ribbon to it. 2. For the layered, distressed background, I first stamped a generic houndstooth pattern in a cream colored ink, let it dry and then stamped a text pattern with brown ink over it.

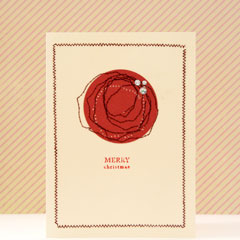
Card
Old: Cream card, red-brown thread, Palette hybrid ink in Pure Poppy by Papertrey Ink, Kaiser Craft’s clear rhinestones, Fiskars 2″ circle squeeze punch.

New: Brother LS2125I Sewing Machine, American Crafts cardstock, Stamp: Papertrey Ink “Mixed Messages”.

Techniques: This is my first trial ever at sewing, so I’m pretty proud of the semi-straight border 🙂 1. The border is sewn with a zig-zag stitch. 2. the circle was punched with a 2″ circle punch and adhered to the card with temporary adhesive. Then I sewed freely inside and around the circle to create a rose-like abstract pattern. I also made one run with no thread, for a dotted-punctured effect.

Share

Have you been hoarding products that has been collecting dust in the back of the shelf? Have you used your scraps/old supply lately? What have you been doing? Have you been experimenting with a new toy or technique? Share! I love a good discussion 🙂

Make Your Own Planner Workshop
“Capture Your Dream” workshop is relaunching as a self-paced workshop. Isn’t this the perfect time for you to capture your dream and make it happen?


Make Your Own Planner Workshop
Check out the new “Make Your Own Planner” workshop and you may solve this year’s holiday gift shopping problem. An affordable workshop that keeps on giving…

Journaling Prompt – New Technique: Volcano Eruption

Wednesday, September 23rd, 2009

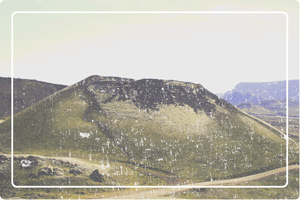
Volcano at Landmannalaugar, IcelandI took this picture in Landmannalaugar, Iceland about a year ago. I climbed this volcano, which for me represented the battle of will over mind. (Most people just ran up and down…)

While taking this personal challenge I was thinking about the intensity of the eruption and the meaning of the eruption – both physical and metaphorical.

Journaling. Real openhearted journaling is a lot like a volcano eruption.

Your inside is burning and feels like it is going to explode and once you let it out – burning magma is pouring out. Once you really let loose and allow your best and worst feelings to come out, you can no longer control the flow.

However, as the emotional build-up is completely dissolved and all there is left is rubble you can then start afresh.

For this week’s journaling prompt try the volcano eruption journaling technique.

Step 1: Erupt. Go to whatever “quiet place” that works for you. Take a pen and a paper pad (or your journal) and start writing about a subject that has been smoldering in your mind lately. Write non-stop for an hour or so. Let your feelings and thoughts loose. Allow yourself to rant, to judge, to over analyze, to have pity, to envy, to covet, to wet your journal pages with salty tears (if it comes to that). WRITE – without editing, without thinking, without boundaries. Just write EVERYTHING.

Step 2: Start afresh. Take a break. Breathe deeply. Sip a tall glass of green tea or a fat mug filled to the rim with hot chocolate or a frothy cappuccino. Take a walk. Go to sleep. Steer clear of your journal for a while and relax. Then come back, read what you have written and come up with a positive and constructive thing to write for every negative scribble that erupted before.

Share

Have you tried the volcano eruption technique? How did it work for you? Leave a comment on this post and share your thoughts and experience.