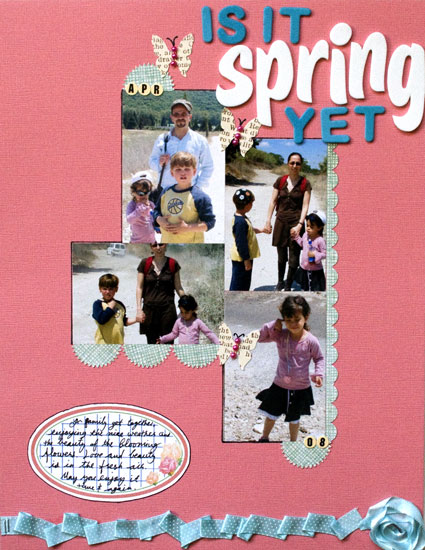
Supply
- cardstock: Bazzill
- Patterned paper: My Minds Eye “Home” (pale blue), Autumn Leaves (text)
- Adhesive: Fabri Tac by beacon; Glue Glider Pro by Glue Arts; 2 Way Glue by EK Success.
- Letter Stickers: American Crafts “Lullaby” Thickers (white), Generic from the Dollar bin at Target (turquoise), Jenni Bowlin Tiny Circle Stickers.
- Tools: Punches: EK Success (scallop border punch), Martha Stewart (starburst); Stapler: Tiny Attacher by Tim Holtz.
- Journaling tag: Creativity Prompt.
- Ribbon: American Crafts (Dotted), Generic and o-l-d (seafoam thin satin)
- Jewels: generic.
How To
Pleated Ribbon
- Attach the edge of your ribbon with 2 tiny staples.
- Apply a line of fabric glue. Fabri Tac is WONDERFUL. (I wish I was endorsed by Beacon. I am not)
- Pleat the ribbon along the glue line irregularly to create a messy look. don’t worry about the pleats opening up at this stage.
- Go back and apply a bead of glue underneath each “pleat” to keep it in place.
Ribbon Flower
Also Known as – what to do if you run out of ribbon while pleating but happen to have a similarly colored ribbon at hand…
- Put a drop of fabric glue where you want your flower center to be at and adhere the tip of your ribbon strip to it.
- Apply some more glue around the glued edge and start turning your ribbon around it, flipping the ribbon occasionally.
- Keep applying more beads of glue around and building your “flower” until you are satisfied with its size.
- Cut off the excess ribbon and tuck the end underneath one of the pleats with another bead of glue.
Share
Is it spring yet? Share your thoughts by leaving a comment.
If you give the techniques a try – pweeeeeze share 🙂

Check out Creativity Prompt’s self paced workshop: “Capture Your Dream”. In this workshop you will capture, follow and make your dream come true as well as document your journey in a fabulous mixed media mini album.


