/** Font types */

Posts Tagged ‘mini-book’

Travel Mini Album Featuring Journaling Mates

Monday, June 25th, 2012

Travel Mini Album

It’s been a while since I last posted a creative project.

As I have told you before, my right hand has been on the mend.

I wanted to get back on track as soon as possible and finish what I had started before said procedure was done.

A couple days after my sutures were removed seemed like a good time to get back on track.

Oh no. That was not a good idea.

By the time I finished with this album I was literally bleeding…

You can’t blame me for lack of determination, right?

Anyhow I wanted to spotlight a few of the different ways I used my Journaling Mates ×ƾn this album.

DirectionDirection. One of the most obvious ways to use the Journaling Mates is to employ the images to direct the eye. Here I used an obvious arrow [JM-R2] to lead the eye in the direction I want it to go, but you may use any lines in the graphics to do the same thing for you – the airplane’s head [JM-R2], the index finger in the vintage hand image [JM-R2]“, etc.
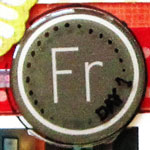
Indicate timeIndicate time. Another obvious use of the calendar Journaling Mates [JM-R1] is for indicating the time. It comes especially handy in travle albums where you wish to convey the passage of time and remember what happened on each day. You can either use the sticker as is or you can add more details to it with a permanent marker or doodle around it. Like I did on this example. These stickers may be useful in projects such as “Project Life“, “Week In The Life” and “December Daily” where the passage of time is a main theme.

TextureTexture. One of my favorite things to do with these stickers is to use them to add texture to an otherwise flat page. The epoxy stickers are slightly raised and are shiny which is a perfect combination to add to a page filled with only two-dimensional pieces such as photos, patterned paper and flat letter stickers.
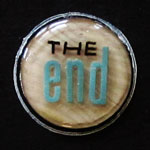
Combine ProductsCombine Products. Now that I’ve showed you how I use the stickers to add texture to two-dimensional stickers I will show you how I use these alphabet stickers to add interest to the Journaling Mate sticker itself. Here I used a woodgrain background sticker [JM-R2] and wrote ‘the end’ on it using a permanent pen and the same Lily Bee alphabet stickers. As I adhered this specific sticker on the back cover I also added a layer of Glossy Accents to it. To make sure your ink won’t bleed, once in contact with the Glossy Accents, first make sure it is completely dry and also give it a test-drive on a random piece of plastic packaging before using it on the sticker itself.
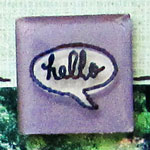
Outline and WriteOutline and/or write on it. There is another cool way to alter your stickers and add interest as well as adding context and personalizing it is by using a permanent pen to outline the images on the sticker – giving it a doodled, handmade look and also writing messages or greeting on it, just like I did on this speech bubble sticker [JM-S2]. What’s nice about this technique is that the three-dimensionality of the sticker adds movement and the outline seem a bit offset without the need to painstakingly draw an offset line. This technique would also make a very cute specialized card!
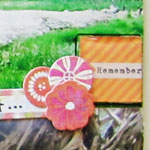
LayeringLayering. Working with layers of embellishments is very trendy right now and the Journaling Mates are perfect as either a base layer, like here, or a top layer. Their dimensionality comes in lieu of the trusty old 3D foam adhesive. By layering cute stickers on top of the sticker I created the same dimensionality without using additional products to raise the stickers.
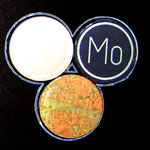
GroupingGrouping. There is no rule against using more than one sticker per page… I love to group similar embellishments together to create a focal point and the Journaling Mates are no exception. Here I used both calendar [JM-R1] and general travel stickers [JM-R2] together to finish off the album.
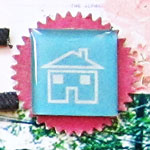
MattingMatting. One of the easiest ways to add visual interest and to emphasize the sticker is by sticking it on a mat of a contrasting colored paper. Here I used a pinking circle punch to create the fun mat but you can use any shape and any tool to create your mat.
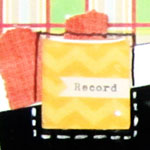
DoodlingDoodling. Last but not least is a fun idea you can use on any embellishment or element you have on your page. Doodling adds lightness and a ton of personality to a page. You do not have to start drawing intricate patterns. Just go with simple lines (or dashed lines) alternating between pen tips and colors. Again, the three-dimensionality of the Journaling Mates comes in handy as tracing it is totally fool-proof, just nest the tip of the pen on the foot of the sticker and trace. It cannot get any easier than that. Me thinks.

If you like it –

The Complete Album

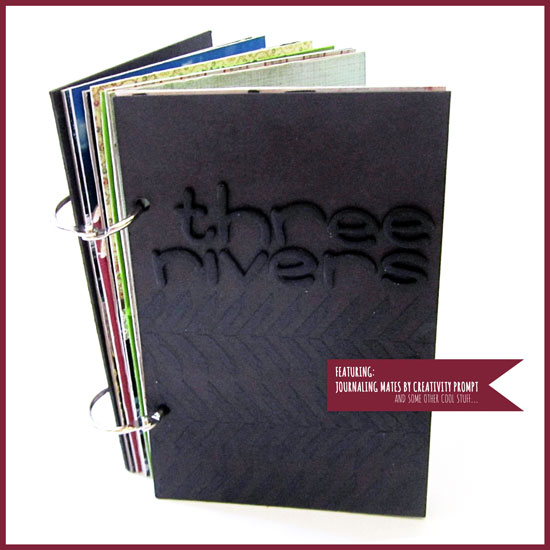
Three Rivers Mini album

Whether You Are … I Will Always Love You – Mini Album Tutorial

Friday, March 9th, 2012

Mini Album Page

This is what I call a ‘just because’ mini album.
I didn’t make it for a special occasion.
I didn’t make it to document a specific event or trip or day [although the pictures were all taken at the same time, on a ferry in Alaska].
I just had a crafty date and we decided to make mini albums with mini photos and I happen to really like this goofy set of photos of my husband making faces to protest against me taking pictures of him… The idea for the mini album just presented itself – no matter how my husband is at a certain moment – I always and will always love him.

Individual Layouts & Supply

This is a very minimalistic mini album. The reason is threefold: 1. Because I love minimalism. 2. I didn’t want to use anything chunky on the pages themselves, other than on the cover. 3. We wanted to complete the project in one crafty-date, after a full day of work.

Mini Album Page

This is the cover page. I used a couple of dimensional flowers by Basic Grey from the Sweet Threads collection. The paper is by Lily Bee Design from the Head Over Heels collection (how suitable…). The fabric letter stickers are Thickers by American Crafts.

Mini Album Page

The paper is by Lily Bee Design from the Head Over Heels collection and the photo ‘mat’ is one of my free printables… The black letter stickers (on all the pages) are from various Lily Bee letter stickers sheets. The cool flower stickers are actually a border sticker by Crate Paper [from their Portrait Collection], cut into 2 pieces…

Mini Album Page

Here I also used the same Lily Bee papers and stickers as well as a paper by My Mind’s Eye from the Everyday Flair collection.

Mini Album Page

Super simple page… I simply used my free printables and the same Lily Bee’s paper and stickers.

Mini Album Page

Same here…

Mini Album Page

More of that Lily Bee paper as well as a few stickers from Basic Grey’s Sweet Threads collection. Plus a couple of my free printables to add visual interest.

Mini Album Page

Same. Same, with some old and thin strips of fabric tape and additional paper from Lily Bee’s Memorandum and My Mind’s Eye Everyday Flair collections.

Mini Album Page

Here I used Crate Paper’s Emma’s Shoppe paper as well as a small mat from My Mind’s Eye Everyday Flair and the same Lily Bee’s letter stickers.

Mini Album Page

Some more paper from Lily Bee’s ‘Head Over Heels’, a strip of an old Anna Griffin paper tape and letter stickers by Prima.

Mini Album Page

Same good ol’ Lily Bee’s ‘Head Over Heels’ paper and same good ol’ Lily bee’s letter stickers. Can you see the lame pun?

Mini Album Page

To spice it up I used Lily Bee’s ‘Head Over Heels’ paper and Prima letter stickers. Just to make it a bit different…

Just kidding.

It’s always quick and easy to use the same collection for a project, that way everything is tied together.

The chipboard I used to make the actual album is by Grafix and the size is just perfect. I cut each sheet in two and it corresponds to a half sheet of patterned paper from a 6″ by 6″ pad or an 1/8th of a 12″ by 12″ sheet of patterned paper. It doesn’t get easier than that…

How To Make The Body of the Album

  1. Cut a sheet of cardstock to a 3″ wide strip.
  2. Score the strip, lengthwise, every ½”. I am using Martha Stewart’s scoring board – it makes scoring at specific increments really easy.
  3. Fold the scored strip in an accordion fold (peaks and valleys) and attach each chipboard page to the edge of each fold.
  4. Cut the extra folded cardstock when you have enough pages for your album (I needed 12 pages for mine).
  5. To make the spine sturdier, adhere the back side of the folds together.
  6. Adhere patterned paper to each page.
  7. Adhere a piece of 3″ by 3″ pattern paper at the spine and over the edges of the cover pages – apply adhesive only on the edges, and not where the spine is.

Easy Peasy.

How To Make A Hardcover Mini Album With Plain Envelopes

Wednesday, May 18th, 2011

Hardcover Envelope Book

My husband thinks it’s silly but I think it’s super-duper cute, you’ll be the final judges…

Supply

Step by Step Instructions

Steps

Start by folding each envelope in half and then cutting the edge of the envelope’s flap, in an angle, at the half point.
Steps

This is how your envelope will look like after its flap was cut.
Steps

Next, channel your inner seamstress, stack all the envelopes together and sew the spine at the crease line. You can also pierce 2 holes in the spine and tie it by hand with an embroidery floss, or fasten it with a staple. Sewing is the fastest way to assemble the signature, even for me (you will understand that remark shortly).
Steps

This is how your envelope stack will look like, if you are a terrible seamstress. Just like me. Who had to put it through the machine several times… I assume you may only be better than I am at that, because I am the worst, ever.
Steps

If you have sewing accidents… fix the spine with a layer of strong liquid glue.
Steps

Or just secure the pages with a folded piece of patterned paper that you adhere to both pages’ edges.
Steps

Now let’s move on to the cover, shall we? Given that you use business envelopes, cut 2 pieces of chipboard at 4½” by 5″ each. If you use any other envelope, just cut the cover a bit larger than the size of half an envelope (because they will be folded in half).
Steps

Then Choose your cover fabric. I had this fat quarter collecting dust and just waiting for this project. So I used it. Use any scrap that covers both pieces of chipboard, a spine and then some.
Steps

This is the ratio of fabric/ cover. Just so you will get the hang of it. Cut each edge at a triangle and adhere the flaps to the inner part of the cover with strong liquid glue. You can be messy, it will all be concealed momentarily.
Steps

Now, attach your sewed signature by applying a generous amount of liquid glue and adhering to the inner part of the cover. Do it one side at a time and be careful of unwanted spills that may ruin your envelope pockets. Because we use envelopes to embrace and utilize their pockets, right? right.

Embellish and place top secrets and cherished memories in the pockets.

Done.

[Are you still with me or were you lost due to the length of this unearthly post? Please comment and tell.]


Make Your Own Planner Workshop
Check out Creativity Prompt’s self paced workshop: “Capture Your Dream”. In this workshop you will capture, follow and make your dream come true as well as document your journey in a fabulous mixed media mini album.


Welcome Little One Workshop
Check out Creativity Prompt’s new and unique self paced workshop: “Welcome Little One”. This workshop will provide you with everything you need, and then some, to make a fabulous handmade mini album to record the first moments of a new born baby.

Micro Journaling – Current Journal

Monday, November 15th, 2010

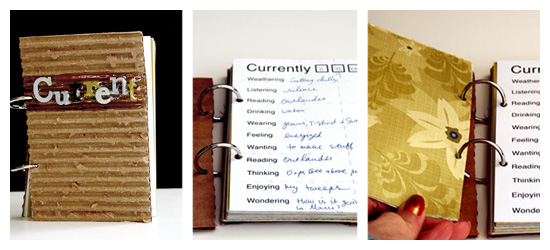
Current Journal

I saw this idea first on Elise Blaha’s blog and I fell in love immediately. Apparently, the first to start the awesome “Currents” movement is talented Tina Aszmus – kudos to her.

The idea of micro journaling is just perfect for someone who likes to record everyday life but feels overwhelmed about it [Me. Me. Me].

One of my favorite things is going over old journals and reliving the days I took the time to record.

One of my deepest regrets is getting rid of the journal I’ve had all through high school and through law school. I mostly wrote bad things in it. Bad experiences. I think most of it was filled with teen unrequited love (I believe that goes hand in hand with being a teenager).

At the time I got rid of it I thought it will be therapeutic to get rid of all the harsh memories and concentrate on all the happiness and loveliness I have in my life. But in retrospective, I do regret throwing it away, because it seems like I have thrown away parts of my life. Not to mention that some of my best writing was manifested there.

Anyhow, let bygones be bygones. [and it’s not like I can unearth it from the dumpster in Dublin]

This mini journal was so easy to make and I printed it on the back side of some OLD [even ancient] patterned papers. I got hooked on the idea of printing on patterned paper after I saw one of my workshop’s member, Mandy do that – amazingly! The only difference is that I printed mine on the back side of the pages and Mandy used double sided papers and printed her pages on the pattern.

Tools & Supply

  • Word processing software (I’m not providing a printable, because it isn’t an original idea of mine)
  • Old patterned paper
  • Recycled cardboard
  • Crop-a-dile
  • Binding rings
  • Chipboard letter stickers [mine are from Making Memories “5th Avenue” collection that I bought a while back]

How To

  1. Create a 4″ by 6″ page with your regular word processing software (make sure the page settings are set to the right size for easy printing) where you make a list of the categories you want to record
  2. Cut all your extra paper to 4″ by 6″ pieces (6 pieces out of each 12 by 12 sheet, unless you discard parts that have the company’s logo on it)
  3. Feed your cut paper through your printer, the same way you put a 4″ by 6″ photo paper in it to print photos.
  4. Cut 2 thicker 4″ by 6″ pieces for the cover. I used corrugated cardboard.
  5. Punch hols for the binding (or use any binding system that you love using).
  6. Bind all the pages together with binding rings or ribbon.
  7. Write. Write. Write. [Just put it on your desk, nightstand or purse and fill in a page whenever you have a minute – that’s all it takes].

Share

What do you think about the idea of micro journaling? Share your thoughts by leaving a comment.

Make Your Own Planner 2012
Check out Creativity Prompt’s new and unique self paced workshop: “Make Your Own Planner”.
This workshop will show you how to make a beautiful handmade planner for the year 2012. Not only are you going to get the entire meticulously designed planner kit for instant download, but you will also get a high resolution video tutorial as well as step-by-step instructions to guide you on each step of the way. Either treat yourself with a fresh and creative start for the coming new year, or get it to create wonderful gifts for your family and friends.
Join now

Free Workshop – Giving Thanks Journal

Tuesday, November 2nd, 2010

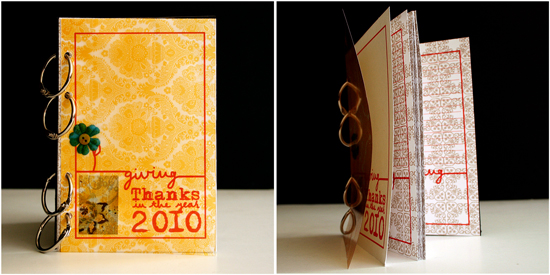
Thanksgiving Journal

Thanksgiving Day is quickly approaching and I thought that a great way to give thanks is to collect all the things and all the people we are grateful for and write about them in a mini journal.

This Giving Thanks journal is what I came up with. It is 4″ by 6″ so it fits perfectly with 4″ by 6″ standard size photos and therefore quick and easy to put together.

I made the journal kit for you and created a video showing you how to put the journal together – in REAL TIME. You wouldn’t believe how easy it is to make.

Feel free to use it as many times you need, for personal use only and don’t forget to link back here, if you show your project online 🙂

The Journal Kit

To download each of the journal pages – right click on the link below and opt for “save target as”:

  1. Cover page. [Print once on 4″ by 6″ piece of cardstock]
  2. Insert page. [Print as many time as you want, on 4″ by 6″ paper. You can also use the backside of your photos to print on]

Supply

  • Cardstock – to print the journal pages on. You can also use patterned paper or the back side of your photos for the inner pages. Each sheet of 12″ by 12″ patterned paper yields 6 pieces of 4″ by 6″ paper.
  • Cover pieces – I used 4″ by 6″ transparency and 4″ by 6″ piece of chipboard.
  • Hole punch
  • Small binding rings (or ribbon, twine, etc.)
  • Pencil

How To


[Go here to watch on YouTube and while there, please rate, comment and subscribe.]

Step by Step Instructions

  1. Print the journal pages. You need 1 cover page and as many inserts as you please. It is simpler to first cut all the pages to 4″ by 6″ and then use them with your printer, the same way you would use photo paper.
  2. Punch all the punching holes by aligning the black punching marks with your hole punch. Make sure both the mark and the hole punched are centered together – then punch.
  3. To punch the chipboard piece (and your insert photos) align any of the punched pages with the chipboard piece and mark all the holes with a pencil. Then repeat the previous step with the chipboard.
  4. Put together all your pages and bind with the binding rings.

Share

What are you thankful for this year?

If you enjoyed this workshop you would probably enjoy the more elaborate “print and assemble” workshops by creativity prompt.

Try “Welcome Little One” if you are expecting a new baby to enter your life or the life of a loved one and “Make Your Own Planner 2012” to create your very own industrial chic planner.

Video Tutorial – How To Make A Mini Book Out Of Soap Wrap

Monday, September 13th, 2010

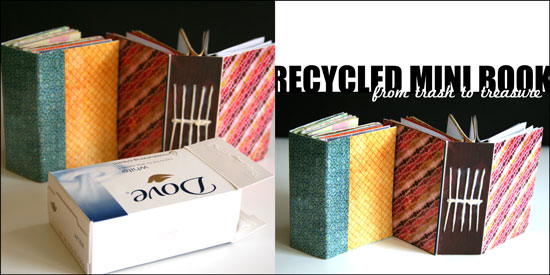
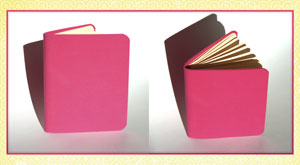
Recycled Mini Book

The Story

You know how much I love recycling and turning my trash into treasure so it’s no surprise that I came up with this project after my bathroom got filled with empty boxes of soap.

When Amy from Mod Podge Rocks e-mailed me and asked if I wanted to use some of the Plaid products on my future projects I knew this mini book idea would be perfect for the test run. The funny thing is that just before Amy e-mailed me, I already bought a huge bottle of Mod Podge Gloss for paper just the week before so I had a chance to try out 2 other products that got sent to me by the company: Mod Podge Hard Coat and Mod Podge Sparkle.

I really, really, really loved the Mod Podge Hard Coat. I initially chose it for another project. I accidentally ruined a set of coasters I had and thought the Hard Coat formula will be perfect to restore them. However I used this as a top coat for the mini book and it is amazing. It is a bit thicker than the original formula and it dries clear into a hard coat (just as its name suggests…) that seals the cover and secure the binding of the book. I really recommend this for book makers.

The Sparkle formula has fine glitter in it and it adds a fun glittery top coat to any surface. What i like about it is that it adds the glitter without the mess that usually goes with it… You just need to apply it with a foam brush and the glittery particles doesn’t rub off of it after it dries up.

The recycled mini book can be made out of any box, of any size, so I purposefully left out exact measurement, so you can use the same technique on any empty box that comes your way.

So if you feel like playing along and learn how to make this recycled mini book, keep on reading.

Tools and Supply

This project uses MINIMAL supply, as it’s mostly recycled.

How To


[Go here to watch on YouTube and while there, please rate, comment and subscribe.]

Step by Step Instructions

  1. Flatten the box by carefully disconnecting the connecting flaps at the bottom and inside the box. You may also use a craft knife for that.
  2. Use your scissors to cut off the flaps, as well as the inner flap and the short edge attached to it, so you are left with 3 sections: 2 cover sections and a spine, already creased for you…
  3. Measure the width and height of the cover sections and the spine and cut pieces of patterned paper at the same size for the cover. If you want to conceal the binding you will need one piece the size of the cover section and the other size larger by the width of the spine plus an additional inch. If you choose to conceal the binding, adhere the outer cover papers at the end.
  4. Apply a thin layer of Mod Podge to the cover section and the spine, lay the pattern paper on top of it and apply an additional layer of Mod Podge on top to seal it off. Put it aside to dry.
  5. Take a plain copier paper, the same width and height of the spine and mark 3 horizontal lines on it – one at the center and two additional ones, about an inch apart. If you work on a larger box, you may want to add more lines, equally separated from each other.
  6. Next mark equally separated vertical line, each line stands for one signature. I used 5 signatures, so I drew 5 vertical lines, one at the center and the rest in ¼” intervals.
  7. Cut your signature inserts to double the width of the cover section and the same height and fold each signature of paper inserts in half.
  8. Line up the paper guide with the inner crease of the signature and poke holes on the crease next to each of the 3 horizontal lines. these holes will help later with the binding process.
  9. After the inner cover is layered with paper with a base and top coat of Mod Podge and completely dry, line up the paper guide with the inner spine and poke a hole at each of the intersections of the horizontal lines with the vertical lines.
  10. Start binding the signatures together. Take the first one, insert the needle through the center hole and into the center hole of the signature, than to the upper hole and back from the bottom hole, into the center hole to the outer cover – repeat on all the signatures.
  11. Once you finish binding all the signatures together, weave the thread through the center line of threads until it meets the initial loose end and tie them together in a tight knot. Cut the excess thread and tidy up the knot to look as smooth and straight as possible.
  12. Lastly, apply a layer of Mod Podge Top Coat on top of the outer cover and the spine, it will secure the binding as well. You may also apply an additional layer of Sparkle Mod Podge if you want a fun glittery finish to your mini book.
  13. Enjoy!!!

Share

If you have any question, suggestion or remark – don’t hesitate to contact me – either leave a comment here, use the contact form or start a new thread on the Creativity Prompt Flickr Group!!!

I would also be very happy to see your own creations, so don’t be shy and share 🙂

Make Your Own Planner 2012
Check out Creativity Prompt’s new and unique self paced workshop: “Make Your Own Planner”.
This workshop will show you how to make a beautiful handmade planner for the year 2012. Not only are you going to get the entire meticulously designed planner kit for instant download, but you will also get a high resolution video tutorial as well as step-by-step instructions to guide you on each step of the way. Either treat yourself with a fresh and creative start for the coming new year, or get it to create wonderful gifts for your family and friends.
Join now

Make Your Own Planner Workshop
Check out Creativity Prompt’s self paced workshop: “Capture Your Dream”. In this workshop you will capture, follow and make your dream come true as well as document your journey in a fabulous mixed media mini album.

Hybrid Mini Album – Step By Step

Monday, September 6th, 2010

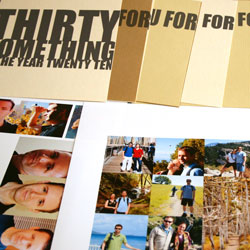
Hybrid Mini Album - Collage

On Friday my husband turned thirty.

My beautiful, wonderful, perfect husband has joined the thirty something group and I will join him in October.

I wanted to make a book telling him how awesome he is while incorporating photos from the last year in our life (and one from 29 years ago…)

The easiest way for me to go about it was to make a hybrid mini album.

A hybrid is an album created partly digitally on the computer and partly traditionally with papers, adhesive and other scrapbooking goodies.

I created all the photo collages and titles for the album with Adobe’s Photoshop Elements 8.0 and the rest by hand, here is how I went about it:

Supply

In this album I was using a ton of different products I have had piled up in my office, so I will not tire you with the complete list. I will only highlight some of the main products I was using and loving.

Step By Step Instructions

Digital Part

  1. Open a letter size file with 300 DPI resolution.
  2. Use the rectangle shape tool to draw a 6 by 6 square in the middle of your page – that will be your page base. Choose a very faint color for the square, to save ink later…
  3. Create your design only on the 6″ by 6″ area. (I only used fonts, “Impact” in particular.)
  4. To print your design, click on the eye icon next to the layers with your page design, that will conceal everything but the 6 by 6 square.
  5. Print your page on plain copy paper. It will be used as your positioning guide later.
  6. Now conceal the square by clicking on the eye icon and reveal your design again.
  7. Adhere a 6″ by 6″ piece of cardstock to the printed rectangle on your copy paper. Use temporary adhesive to make its removal easier.
  8. Put your copy paper through your printer again, with the cardstock attached to it.
  9. Print your page design.
  10. Repeat. (You don’t have to print the positioning guide again if you don’t move the square on your screen.)
  11. For the photos I just cropped each photo individually to the size I wanted it and layered all the photos on a letter size document I then printed on photo paper.
  12. raw materials

Traditional Part

  1. Crop all your photos.
  2. Design your pages, add letter stickers to add texture to the rather flat printed titles.
  3. You may also use the free journaling tags you can find here, on Creativity Prompt. They will help you add your journaling in an easy and polished way.
  4. After you finished all the pages design, gather all the pages in the order you want them to be and make sure no page is rotated.
  5. I also added two 6″ by 6″ acetate pages to protect the front and back cover pages.
  6. Use the crop-a-dile to punch holes for the book rings. Punch them at 1″, 3″ and 5″, about ½” from the edge.

Photos of the Finished Mini Album

Hybrid Mini Album Pages

Hybrid Mini Album Pages

Hybrid Mini Album Pages

Hybrid Mini Album Pages

Hybrid Mini Album Pages

Hybrid Mini Album Pages

Hybrid Mini Album Pages

Hybrid Mini Album Pages

Hybrid Mini Album Pages

Hybrid Mini Album Pages

Hybrid Mini Album Pages

Share

Do you use the computer to add titles or other elements to your scrapbook pages? Please share by leaving a comment here.

Welcome Little One Workshop
Check out Creativity Prompt’s new and unique self paced workshop: “Welcome Little One”. This workshop will provide you with everything you need, and then some, to make a fabulous handmade mini album to record the first moments of a new born baby.

Creativity Prompt – How To Make An Art Journal

Friday, September 25th, 2009

How To Make An Art Journal

A good quality art journal with sturdy signatures may burn a hole in our pocket. However, by using just 5 high quality cardstock pieces, you can make your own art journal for a fraction of the price – not to mention the cute foam cover you get…

If you are interested in watching how to make one of these cute art journals, than keep on scrolling…

Tools and Supply

How To


[music is by Josh Woodward (with permission)]

Step by Step Instructions

  1. Cut your cardstock to 8″ by 5″ signatures.
  2. Fold the signatures in half. For a sharp crease use a bone folder.
  3. Poke holes along the crease line of each signature. Start at the center and then continue each inch below and above the center.
  4. Sew your signatures together. Start at the top hole and go through each hole with a plain running stitch, after you went through the bottom hole go back through the top hole again.
  5. When attaching the second signature (and the ones after it) secure each stitch by going through the stitches on the spine before threading the needle through the holes.
  6. After you have made the last stitch on the last signature, secure the ends with a few knots.
  7. Cut the fun foam at 9″ by 5¼” for the cover.
  8. Attach the signatures to the fun foam with a generous layer of glue stick. Apply pressure on the journal for an hour or so to ensure good adhesion.
  9. Start painting and sketching in your new art journal…

Share

If you have any question, suggestion or remark – don’t hesitate to contact me – either leave a comment here, use the contact form or start a new thread on the Creativity Prompt Flickr Group!!!

I would also be very happy to see your own creations, so don’t be shy and share 🙂

Bonus Creativity Prompt – Mini Tag Book For Mother’s Day

Saturday, May 2nd, 2009

Mother's Day Mini Tag Book

Mother’s Day is coming soon so I came up with a fun project for FaveCrafts that I believe your mom will treasure.

The idea is to treat your mom as your valentine and write her micro love letters compiled together in a whimsical mini book.

For Step By Step instructions, just click on the Favecrafts banner below 🙂

FaveCrafts.com Crafts, Home Decor, Scrapbooking, Quilting, and More

Happy National Scrapbooking Day – Make something pretty …

Creativity Prompt – Make A No-Stitch Notebook

Friday, January 30th, 2009

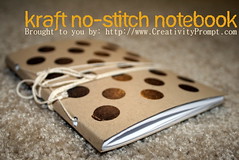
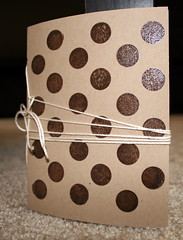
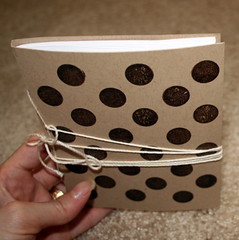
Kraft no stitch notebook After yesterday’s introduction to the new title on Creativity Prompt: “On The Catwalk” here comes a video tutorial on how to make the notebook, featured on yesterday’s post, using Papertrey Ink’s products.

This notebook is made without stitching and is super easy to make, yet it has this special “artisan” look that we all love. This is the notebook that everyone will ask: “Where did you get it from?”.

So,… Are you ready?

Tools & Supply –

How to –

Fabulous music is by: Josh Woodward.

Some additional peeks at the notebook –
[Click on the photo for a larger size]

side view
view from above

Enjoy!!!

If you have any question, suggestion or remark – don’t hesitate to contact me – either leave a comment, use the contact form or start a new thread on the Creativity Prompt Flickr Group!!!

I would also be very happy to see your own creations, so don’t be shy and share 🙂