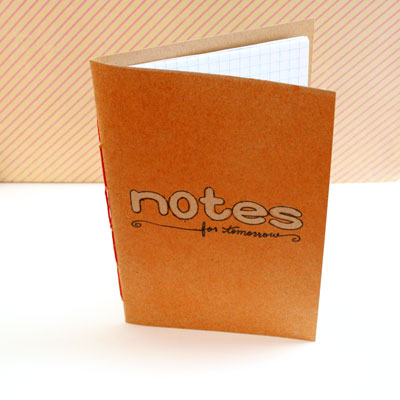
This week I have a cool project – super duper simple and the results are fabulous. For a no bulk notebook that you can carry around freely, without worrying about wear & tear, I have a cool masking technique for you with a color spray and some chipboard letters.
I also have a fantastic tip for threading your embroidery floss through the needle in a split second, you wouldn’t want to miss that… 🙂
Tools & Supply
- 8½” by 6½” piece of Kraft cardstock
- Stack of 8″ by 6″ plain paper (clear/lined/squared)
- Bone folder
- Needle + embroidery floss
- Chipboard letters (can be reused later)
- Removable adhesive
- Maya mist
- Black pen
- Grid ruler (for centering)
- Awl/ Paper piercer
How To
[Watch on You Tube. Please rate & comment.]
Step-by-Step Instructions
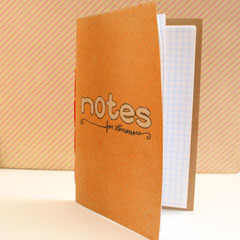
- Cut your papers and cardstock to size & fold in half. Burnish the crease with a bone folder.
- Lay the paper stack over the cardstock piece and center it.
- Mark the placement of your piercing holes. Find the center and mark at ½” on each side and then go on and mark in 1″ increments.
- Pierce all your marked holes, all the way through the papers and the cardstock. Make sure they are aligned together and that the piercer goes through the crease.
- Thread your needle with the embroidery floss. TIP – To thread your needle in a split second (no exaggeration here) simply stick a small piece of tape to the end of your floss, fold it over and cut the excess. That will prevent the fraying of the floss and will also provide a slight stiffening effect for a quick and smooth threading.
- Start stitching your notebook from the top hole, from the inside – out. Make a simple running stitch, going through each hole – once in and once out. After you go through all the holes, go back through the holes, switching direction, so the stitch will look like a backstitch. When you go through the last hole, tie the ends together in a strong knot.
- For a no-bulk embellishment, adhere the chipboard letters with a temporary adhesive. Make sure the adhesive isn’t protruding outside or it will affect the impression of the letters.
- Lightly spray from about 10″ above your notebook cover. Spritz the color mist as many times you want until you get the effect you are looking for. [The chipboard letters may be reused in another project, by the way…]
- Before removing the letters go over them with a black or white marker, that will create a nice outline and will add visual interest. Just make sure to hold your letters tight, as the temporary adhesive isn’t strong enough and they may move around.
Share
If you have any question, suggestion or remark – don’t hesitate to contact me – either leave a comment here, use the contact form or start a new thread on the Creativity Prompt Flickr Group!!!
I would also be very happy to see your own creations, so don’t be shy and share 🙂

Check out the new “Make Your Own Planner” workshop and you may solve this year’s holiday gift shopping problem. An affordable workshop that keeps on giving…

“Capture Your Dream” workshop is relaunching as a self-paced workshop. Isn’t this the perfect time for you to capture your dream and make it happen?


