/** Font types */

Posts Tagged ‘hybrid’

Hybrid Card – Using Digital Alpha Sets

Wednesday, June 2nd, 2010

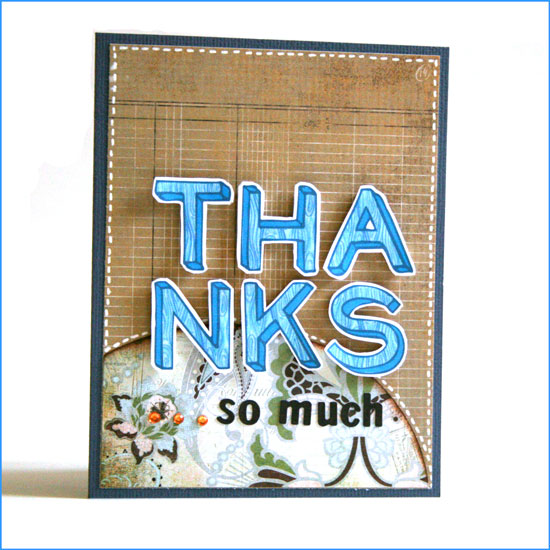
Hybrid Thanks Card

[Supply: You Are Amazing (woodgrain alpha) by Shimelle Laine for Two Peas In A Bucket, Basics + Cappella (patterned paper + small alpha stickers) by Basic Grey, Rhinestones by Kaiser Scrapbooks, Earthtones cardstock by American Crafts, White gel pen by Uniball, Foam dimensionals.]

Step By Step Instructions

Using Digital Alphas

  1. Open a new document in Photoshop Elements: Width: 8.5″ Height: 11″ DPI: 300.
  2. Use the rectangle shape tool and add a rectangle, sized 4.25″ by 5.5″. By doing that you make sure the size of your alphas will be perfect.
  3. Open up all the different letters you need for your greeting from the kit. Use the move tool to drag and drop them on your new document.
  4. Before positioning the letters you need to resize them. To do that, line them all up in one straight line – regardless of the way you want to put them on your card.
  5. Pick all the layers with the letters (Just click on the layer with your CTR/CMD button pressed down) – make sure they are all highlighted.
  6. Pick the move tool ,then press align and opt for the center alignment.
  7. While your layers are still all highlighted – click on one of the edges of the word and drag the cursor towards the center. This way you are resizing the letters proportionally.
  8. After you get to a size you are please with, position the letters the way you want them on the card. The rectangle shape you drew earlier will help you keep the proportions and size right.
  9. Conceal the layer with the rectangle shape by clicking on the eye icon and print your page on a white, smooth cardstock.
  10. The alphas on Shimelle’s new kit have a faint outline that you can use as cutting guidelines.

Assembling The Card

  1. Cut the patterned background paper to 5.25″ by 4″, adhere to your cardstock base.
  2. Cut the accent piece of patterned paper in a curve (using an ellipse cutter – I used Coluzzle) – make sure the base is 4″ wide.
  3. Ink up the top edge of your curved paper and adhere it to the bottom of the patterned paper you adhered before.
  4. Adhere the individual letters with foam dimensional stickers. Cut the foam adhesive down to size if needed.
  5. Add the letter stickers and the rhinestones.
  6. Give the card to a friend to show that you care and to say thank you…

Share

Who would you like to say thanks to? Have you made a hybrid card before? Share by leaving a comment here 🙂

Gate Fold Thank You Card – Because You Care

Wednesday, March 24th, 2010

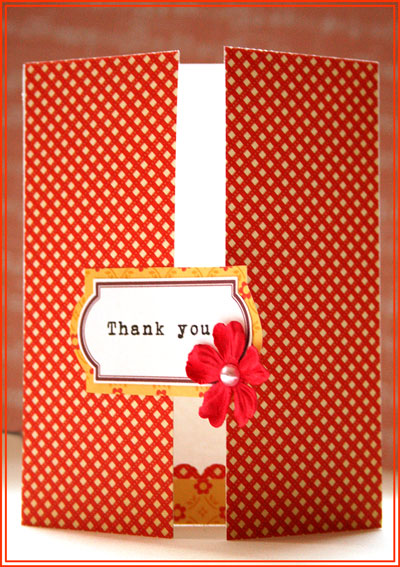
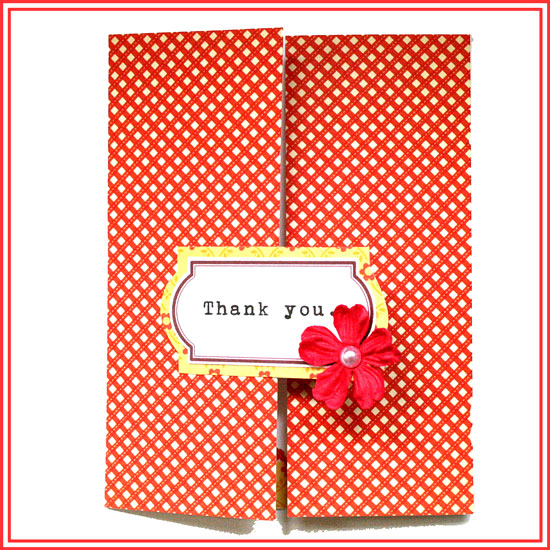
Thank You Card

I caved in. I admit it.

I thought a scoring board is redundant. Unnecessary.

But I bought one anyway…

…and i LOVE it!!!

When I buy new patterned paper, I usually store it immediately in my very own papers’ necropolis. However, when I buy new tools – I usually try them right away (sometimes they’re getting buried too). Same happened here, as soon as I got Martha Stewart’s scoring board I had an urge to score me some cards – it was so easy, so addictive.

So here I am, living with a small stack of blank, prescored cards and not doing anything with them. For a couple day. Then came the epiphany – use a journaling label for the greeting!

Simple. Easy. Striking. (If you don’t mind me sayin’…)

Thank You Card

Step By Step Instructions

  1. Cut your cardstock base at 8½” by 5½”. Score at 2 1/8″ and at 6 3/8″.
  2. Cut 2 panels of patterned paper, 5½” by 2 1/8″ each. I used Cosmo Crickt’s 6″ by 6″ Material Girl paper pad.
  3. Adhere the above panels to the panels at the front of the card.
  4. To print on the journaling label, I first printed the greeting on a plain paper (Erika Ormig font, 60Pt.) Then I adhered the label with removable adhesive to the plain paper, on top of the greeting and ran it through the printer again. [This specific labels set will be posted on the blog on Friday, so stay tuned]
  5. I adhered the printed label on another piece of patterned paper from the same pad and cut around it, leaving a nice fat gap. I used Fiskars spring-action scissors for that. They are very easy to manipulate around the curves.
  6. I applied adhesive to only half of the greeting “tag” and adhered it to the left panel – centering it between the two panels.
  7. Then I stuck on a Prima flower and a pearl and called it a happy day.

Share

Have you bought a cool tool lately? What is your favorite tool? Please share – I want to know 🙂

Make Your Own Planner Workshop
Check out Creativity Prompt’s self paced workshop: “Capture Your Dream”. In this workshop you will capture, follow and make your dream come true as well as document your journey in a mixed media mini album.

Hybrid Cards – Mix Fancy With Funky

Tuesday, February 23rd, 2010

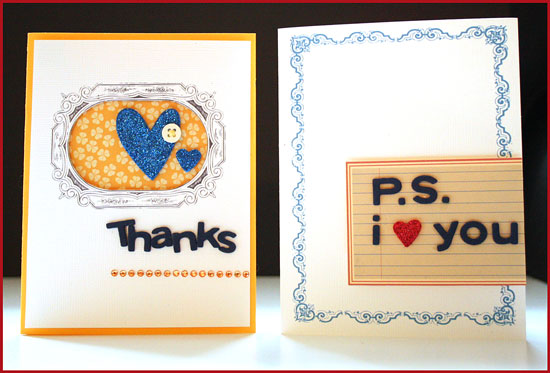
Hybrid Cards - Mix Fancy With Funky

I was looking at Shimelle’s new kit: Write It Down Ornate Frames, which “aired” today on Two Peas In A Bucket, and thought it would be just perfect for making a bunch of hybrid cards.

At first I thought to edit them on photoshop, add the greeting with one of my gazillion fonts, print out, add a ribbon, or some gems and call it a day. A great way to make a bunch of coordinating classic cards.

Then I thought, lets take it up a notch… It would be really cool to mix Shimelle’s beautiful, classical, traditional ornate frames with some funky patterned papers and a funky – non-traditional – design, and that’s exactly what I did.

I hope you like it and will give it a try. (Shimelle’s kit costs just 99 cents…)

Step by Step Instructions

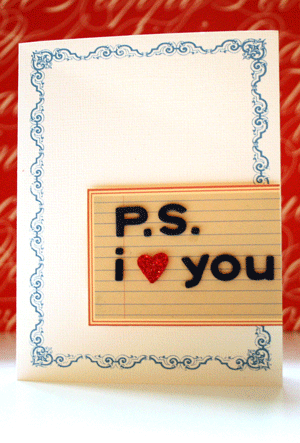
Hybrid I Love You Card

  1. Use a photo editing program to lay the frame on the right side of a letter size document. Size it to measure 4″ by 5¼”. Print out the document on textured white cardstock, using the borderless settings of your printer.
  2. Cut the cardstock in half – to 5½” and fold in half at 4¼” to create a standard size card.
  3. Print out Creativity Prompt’s free classic journaling tags on plain non-textured cardstock. Cut out one of the tags and cut off about an inch from its right edge.
  4. For the letters I used plain and glittered fun foam that I cut with my Cuttlebug, using QuicKutz Moonlight dies, and adhered it with Tombow Mono Multi glue you can also use American Crafts Thickers.
  5. Adhere the journaling tag to the bottom right edge of the card using foam squares.

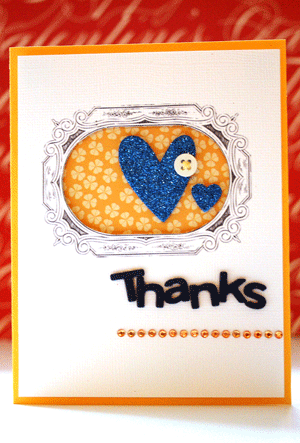
Hybrid Thanks Card

  1. Use a photo editing program to lay the frame on the right side of a letter size document. Size it to measure about 3½” wide (keep its proportions). Print out the document on textured white cardstock, using the borderless settings of your printer.
  2. Cut the cardstock to 5¼” by 4″.
  3. Use a craft knife to cut off the oval center of the frame.
  4. Cut a textured yellow cardstock to 8½” by 5½” and fold in half at 4¼” to make a standard size card.
  5. Cut a piece of a funky patterned paper at 3½” by 3½”.
  6. Lay the printed cardstock on the yellow card base and trace the oval window with a pencil. Adhere the patterned paper where the window will lay, over the pencil marks.
  7. For the letters I used plain and glittered fun foam that I cut with my Cuttlebug, using QuicKutz Moonlight dies, and adhered it with Tombow Mono Multi glue you can also use American Crafts Thickers.
  8. Adhere the printed cardstock with foam squares.
  9. Adhere the hearts. I Cut the heart with a Cuttlebug die from the glittered fun foam. (I used a VERY old punch for the small heart)
  10. Adhere the button (I would have used a yellow button if I had one…) with a couple mini glue dots.
  11. Adhere the line of yellow gems below the greeting.

Share

If you have any question, suggestion or remark – don’t hesitate to contact me – either leave a comment here, use the contact form or start a new thread on the Creativity Prompt Flickr Group!!!

I would also be very happy to see your own creations, so don’t be shy and share 🙂

Make Your Own Planner Workshop
“Capture Your Dream” workshop is relaunching as a self-paced workshop. Isn’t this the perfect time for you to capture your dream and make it happen?

Super Quick Holidays Cards + Free Template (Update)

Saturday, November 21st, 2009

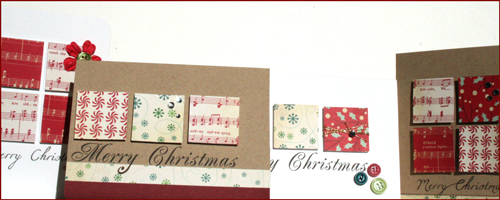
Super Quick Christmas Cards

Yesterday I posted a video tutorial and a free template on making super quick handmade cards for Christmas.

A reader has reminded me that some people may want to make handmade cards for other holidays, or for non-religious holidays, which is so true. I celebrate Hanukkah, for instance. Though I do send Christmas cards for my close Christian friends.

So I decided to make 2 more templates – one for Hanukkah and one for general holidays greetings for all of you to enjoy:

Enjoy!

I’d love to see the cards you’ve created, so please share.

Make Your Own Planner Workshop
Check out the new “Make Your Own Planner” workshop and you may solve this year’s holiday gift shopping problem. An affordable workshop that keeps on giving…