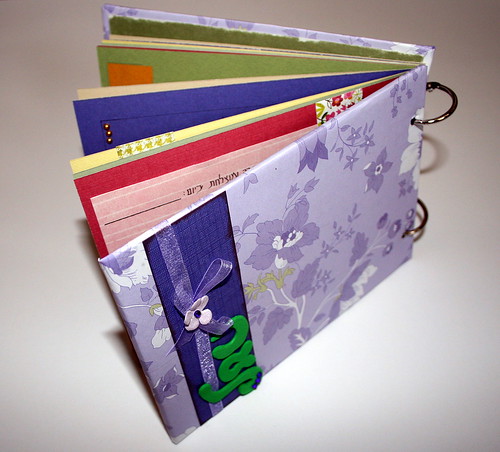
What is a guided album? let me show you but lets start with a story.
A good friend of mine has recently given birth to her third child. A baby girl named: Noa. Having two more children to take care of (and a job to come back to after the short maternity leave) means she has zero time on her hands. A guided album is the result of me thinking “what can I possibly give my friend for Noa’s birth?”
A guided album is an opportunity. It is a chance to preserve your memories and document your thoughts and feeling without going through the effort of making a traditional scrapbook.
A guided album is basically a mini album with journaling prompts written on premade journaling tags and a designated space to stick uncropped 4″ by 6″ pictures on.
A guided album can be a perfect gift for a busy mom, a bride to be or to serve as a “pregnancy pal”. (Just adjust the journaling prompts to the occasion). You can also make a guided album for yourself, as an incentive to preserve more memories, thoughts and emotions. Make it in advance, on your free time, for a busier time to come.
This week’s creativity prompt is to make a guided album.
Supply –
- Chipboard
- Patterned paper
- Cardstock
- Double sided tape
- Binding rings
- Journaling stamps
- Embellishments – bling, paper flowers etc.
(you can also use a used cardboard box).
Tools –
Instructions –
- Cut all the pieces of cardstock, chipboard and patterned paper to size:
- 2 Cover pieces – cut chipboard at 5″ by 7″
- 2 pieces of patterned paper to cover the chipboard – cut at 6″ by 8″
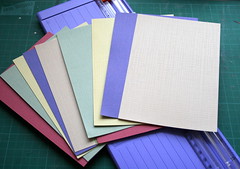
- 2 pieces of cardstock, for the inside of the covers – cut at 4¾” by 6¾”
- Inner pages – cut as many cardstock pages as you wish, at 4¾” by 6¾”
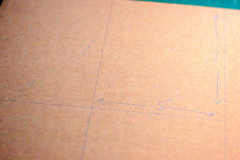
- Cover the chipboard pieces with the patterned paper.
- First adhere the chipboard to the center of the patterned paper.
- Then cut all the corners of the patterned paper, allowing a gap of 1/8″ between the chipboard edge and the base of the triangular cut.

- Fold and adhere the remaining patterned paper’s flaps to the chipboard.
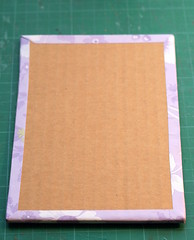
- Adhere the two cardstock pieces to the inner side of the chipboard cover, to give it a finished look.

- Punch 2 holes on each cover, a ¼” from the middle edge and an 1″ from the top and bottom edges.
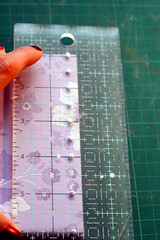
- Use the punched cover as a guide for marking the inner cardstock pages.
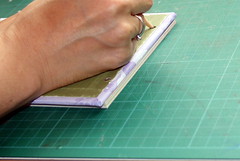
You can then punch them all together with the Crop-A-Dile.
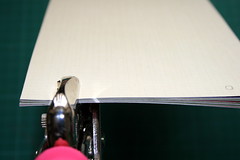
- Attach the binding rings and make sure they run through all the inner pages and both covers.

The framework of the album is pretty much done…
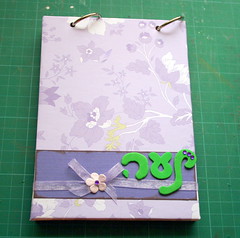
Now we will proceed to what makes this a “guided album” … - On each 2 pages spread, designate one page for a standard size picture (to eliminate the need to adjust and crop the photo) and one page for journaling.
- Photo page – Take a standard size photo as a template and position it wherever you wish, then trace lightly with a pencil around your template. Avoid positioning the photo where the punched holes are, so you or your recipient won’t have to repeat the punches.
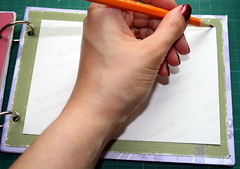
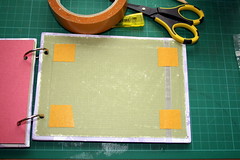
Apply 4 strips of double sided tape to the corners of the pencil marks and leave the top cover on. This way, your recipient can just peel off the top cover and use it as photo-tabs, for a quick and easy assembling.
- Journaling page – Write a journaling prompt and include a journaling tag (or stamped image) to write on.
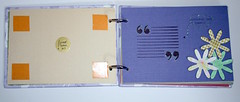
- Photo page – Take a standard size photo as a template and position it wherever you wish, then trace lightly with a pencil around your template. Avoid positioning the photo where the punched holes are, so you or your recipient won’t have to repeat the punches.
Some journaling prompts to consider –
- Birth details: date/name of hospital/ weight/ height/ eye color/ hair color; etc…
- Thoughts and feelings during the last week before giving birth. Worries/ hopes; etc…
- The birth experience itself.
- The first moments at home, with the new baby.
- How did the siblings greet the new baby? What do they wish for the new baby?
- A letter from dad.
- A letter from mom.
- First bath.
- First smile.
You can browse the entire guided album here.
(To join the Creativity Prompt Flickr group click on the link at the right side bar.)
Share
How did you find the idea of the guided album? What would you use it for? Please share your thoughts by leaving a comment on this post.
Giveaway
Only two more days are left. To enter leave a comment here and give me some feedback.
