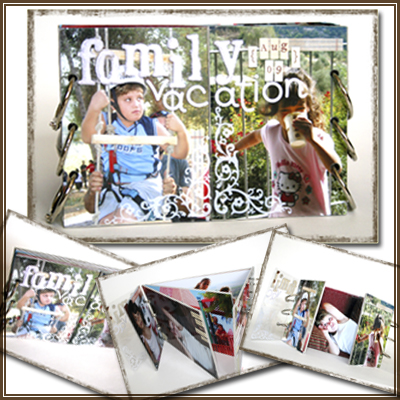
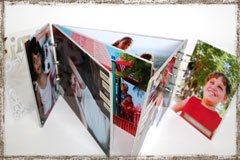
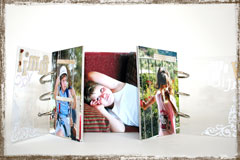
 How would you like to put together a beautiful mini album – from start to finish – in about an hour?
Sounds good, doesn’t it?
You know what, let me throw in a special feature that will turn your mini album from a beautiful albeit simple board-book into an intricate gate-album that is guaranteed to extract some “oohs and ahs” [I am pretty sure it’s a technical term. Please correct me if I’m wrong].
Are you interested? Yes? Then keep reading.
Oh, wait. Have I mentioned there’s a video tutorial included in the package?
Tools and Supply
- 2 Heavy-weight acetate or acrylic sheets – 4″ by 6″ each.
- 5 pieces of heavy-weight chipboard (about an 1/8″ thick) – 4″ by 6″ each
- Ruler
- Craft knife
- Glue Stick
- Brayer
- Crop-A-Dile
- 6 Binding rings
- Embellishments: [Needless to say, these are the ones I used. The sky is the limit for you]
- Letter stickers – Making Memories, American Crafts, Doodlebug Designs
- Word Stickers – Making Memories, 7Gypsies
- Journaling tags – 7Gypsies
- Rub-ons – American Crafts
How To
[Music with permission is by Josh Woodward from his album “Here Today”]
Step By Step Instructions
- Cut all your acetate and chipboard pieces to size and arrange them according to the following chart:
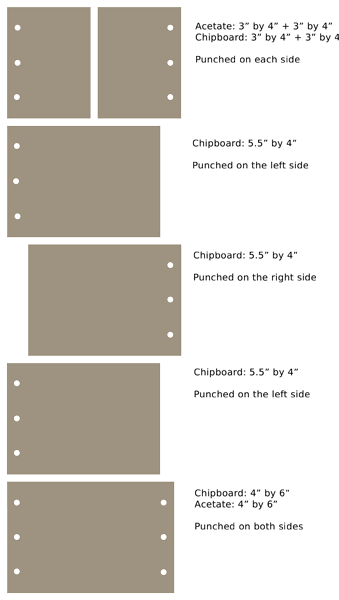
The top and bottom acetate (or acrylic) pieces protect your photos. You may leave those pieces out if you wish.
- Mark a 1/4″ line – lengthwise – on the respective edges and mark 3 dots on that line – 1 dot in the center and 2 other dots 1″ above and below the center one. Punch these marks with a Crop-A-Dile.
After you have punched 3 holes on each side on one piece, you may use it to mark the holes on the other pieces and punch them accordingly.
- Adhere each photo to the chipboard with a generous application of glue stick. Start with one side, use a brayer to insure strong adhesion, and re-punch the holes before moving on to adhering the photo to the backside.
You may replace each photo with a 4″ by 6″ sheet of patterned paper or cardstock – whatever works best for your needs.
If the photo is bigger than the chipboard piece, trim the excess with a sharp craft knife.
Double check the orientation of each photo, before you adhere it.
- Assemble all your layers, following the chart above, and attach together with binding rings.
- Embellish!
Share
If you have any question, suggestion or remark – don’t hesitate to contact me – either leave a comment here, use the contact form or start a new thread on the Creativity Prompt Flickr Group!!!
I would also be very happy to see your own creations, so don’t be shy and share 🙂


