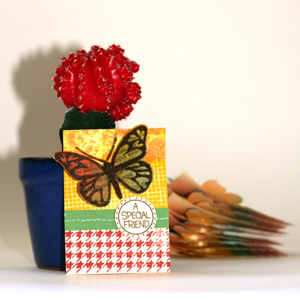
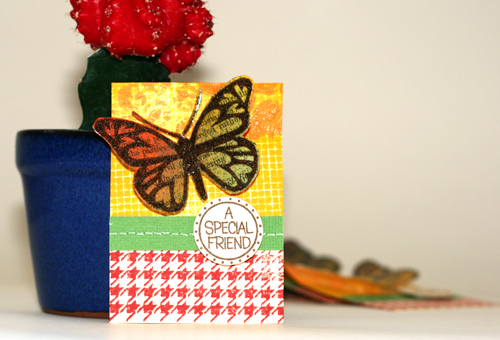
 An Artist Trading Card (aka: ATC) is basically a 2½” by 3½” piece of original artwork which is traded among artists.
Participating in an ATC swap is a great way to express yourself creatively without being overwhelmed with a huge blank canvas. It is also a great way to get to know other artists and expand your artistic world.
As soon as I heard that Hero Arts is arranging an ATC swap I knew I had to participate.
On this week’s creativity prompt I want to walk you through the process of creating my ATC for the swap.
If you want to find out how I made this ATC (plus learn some valuable tips and tricks) then keep on reading:
Step by Step Instructions
- Cut your cardstock to the traditional 2½” by 3½” size. To make the most out of an 8½” by 11″ sheet of cardstock, start by cutting it at 2½” lengthwise twice and then you’ll end up with a 3½” strip.
- Adhere a vintage text paper (from an old book. I used an old text book about Roman Law…) to another piece of non-textured cardstock with a glue stick.
- Color the vintage paper with distress ink using the foam applicator with a swirling motion, from the outside in. Blend a few colors together. I used: Broken China, Fired Brick, Peeled Paint and Mustard Seed.
- Stamp the heart winged butterfly image in dark brown ink over the colored vintage background. Try to stamp the images as close as possible, but leave a small gap between them. Let the ink dry completely.
- Mask off 2/3 of the ATC with a post-it note and stamp the houndstooth background stamp using one of the distress inks.
- Take off the post it and use it again, masking the part you’ve just stamped. Then stamp over it with the screen shadow stamp.
- Take a small piece of bubble wrap and apply a layer of distress crackle paint over it. Use the wet bubble wrap to “stamp” with it over the screen shadow background. Let dry.
- After the crackle paint is completely dry cover it with a thin layer of clear glue or glaze to prevent the paint from breaking and falling off.
- In the meantime stamp the circular greeting on another piece of non textured cardstock using the same dark brown ink (I used the Clear Design: Who Loves You – CL309 – stamp set by Hero Arts, but it is no longer available). Punch the greetings out with a 1″ circle punch.
- Cut a green textured cardstock to 2½” by ½” strips. Poke a line of holes, 1/8″ apart from each other, along the middle of the strip and “connect the dots” with a white gel pen. Adhere the strip to the border where the two different background patterns meet.
- Cut the butterfly images with precision scissors. I am using Fiskars spring action micro tip scissors and I absolutely love them.
- Cover the butterfly images with an embossing ink and dip it into a mix of 1 part glitter to 3 parts clear embossing powder. Set with a heat gun.
- Attach the circular greeting to the cardstock strip with a foam dot.
- Attach the butterfly above the strip in an angle using some mini glue dots behind its body and some pop up glue dots behind its wings.
- Don’t forget to add your name, date and signature on the back!

Share
Have you ever participated in an ATC swap? Are you interested in assembling an ATC swap group here on creativity prompt? If you are, please leave a comment and show your interest.
If you have any question, suggestion or remark – don’t hesitate to contact me – either leave a comment here, use the contact form or start a new thread on the Creativity Prompt Flickr Group!!!
I would also be very happy to see your own creations, so don’t be shy and share 🙂


