/** Font types */

My Little Princess Niece Is Seven

May 18th, 2010

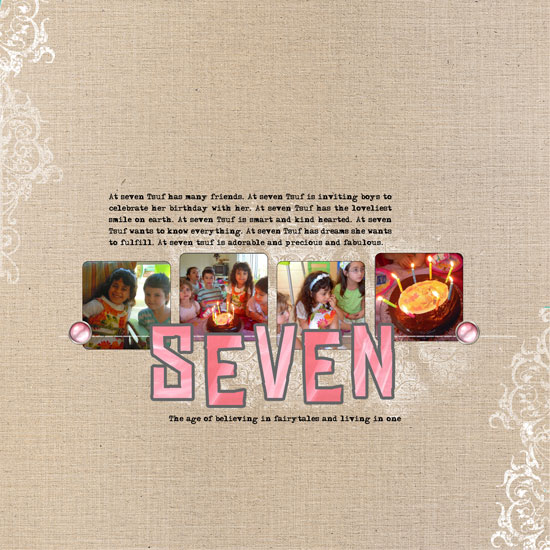
Seven

[Fonts: Adler; Digital Kits: Count To Four (alpha and template) by Shimelle Laine, Color My World by Rhonna Farrer, KD Capture and Record by Karla Dudley.]

Shimelle has released a gorgeous new digital kit which includes a template, on which the layout is based on, and a set of pink alphas. So cute.

A template is just perfect when you have absolutely no time and you want to make a winning page. Just clip your photos in place, resize, perhaps recolor. Add your journaling, title and a couple elements to add a bit of yourself and voilà.

I really love this template because it looks like a layout I would have designed myself. The rectangles, the typewriter font, the accents. I love it. (I admit, if it was my layout it would probably align in a straight line – but that’s the beauty of working with templates. I try something new and fall in love with it).

Can you believe my niece is seven already??? She’s growing fast!

Share

Have you used a template or made a layout based on a sketch before? Please share by leaving a comment.

Friday Freebie – Fancy Romantic Printable Labels

May 14th, 2010

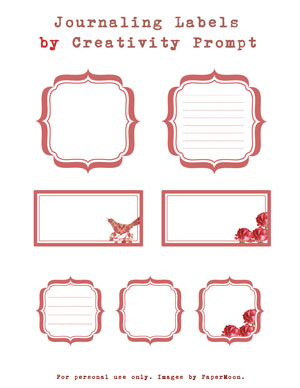
Free Journaling Labels
This week I am sharing a set of FREE fancy romantic journaling labels with you guys (for personal use only).

To download it simply click on the image (or the link) and if it doesn’t work try to right-click on it and opt for the “save target as…” option (it may be phrased a bit differently on different operating systems).

I hope you like it and have lots and lots and lots of fun with it.

I would love to get suggestion for future printables from you guys.

Make sure you didn’t miss the rest of the free printables on Creativity Prompt.

Share

What are you going to use these labels for? Leave a comment.

My Wedding Photo Book

May 10th, 2010

In less than a month, on June 4th to be exact, my husband and I will be celebrating our three year anniversary.

We got married in a Kibbutz in Israel, in a gorgeous garden in the woods and we also took some picture just before the ceremony at the village where Nadav’s parents are living – Addi.

I made a photo album just after the wedding, the day we got our photos from the photographer. I used a “custom made” program (the only one available at the time) where they offered pre-made templates and I just dragged the photos in and added the journaling.

When we moved to Dublin, Ireland – just a few months after our wedding, I left the photo book at my parents house. I didn’t want to ship it with all our belongings. Time have passed and in the meantime my parents got attached to the book and are treasuring it.

Just now, I finally took the time to make another photo album. This time I went for the “Digital Scrapbooking” option at Shutterfly, where you can design your own layouts with a photo editing software and control every single element that goes into your photo book. I love that idea.

I was working on my album for 20 hours in total (9 of which – sitting straight in front of the computer without getting up). Most of the time went for picking photos and writing all the journaling in reverse because Photoshop doesn’t handle Hebrew.

For a cohesive look I chose a color palette: Gray (#333333), Orange (#FF6600) & Kraft (from KD Capture and Record kit). I chose a bunch of digital kits that match the color palette and the idea behind the book (For instance, the stitching represents the connection between my husband and i). Clearly I went for Karla Dudley’s kits. I used: KD Digi Essentials, KD Digi Essentials 2, KD Jillian, KD Spring 10, KD Chesca, KD Blakely, KD Tweet, KD Capture and Record and KD Fly Girl.

If you want to take a peek at my finished book, you can do it here.

Have you used the Digital Scrapbooking option on Shutterfly? Have you used another service? Please share.

Friday Freebie – Squared and Lined Journaling Circles

May 7th, 2010

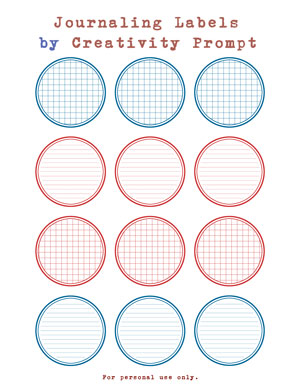
Free Journaling Labels
This week I am sharing a set of FREE squared and lined journaling circles which you can print and punch with a 2″ circle punch and use perpetually (for personal use only).

To download it simply click on the image (or the link) and if it doesn’t work try to right-click on it and opt for the “save target as…” option (it may be phrased a bit differently on different operating systems).

I hope you like it and have lots and lots and lots of fun with it.

By the way this set was designed by popular demand so PLEASE feel free to make suggestions.

Just leave a comment telling me what would you like to see on the next set of printables.

Make sure you didn’t miss the rest of the free printables on Creativity Prompt.

Think Outside the Box – Literally + Selective Coloring With Photoshop Elements

May 6th, 2010

One way to get out of a creative rut is to use our stash – not as intended…

Use a “girly” collection for a boy’s layout or vice versa [as I did below].
Use a Christmas collection for a 4th of July layout.
Use a travel collection for a wedding.
Use patterned paper as a background and plain cardstock as an accent.
Use paper flowers as journaling blocks.
Use a winter themed paper for a summary layout.

Just ignore what the “box” says and create.
Free your mind.

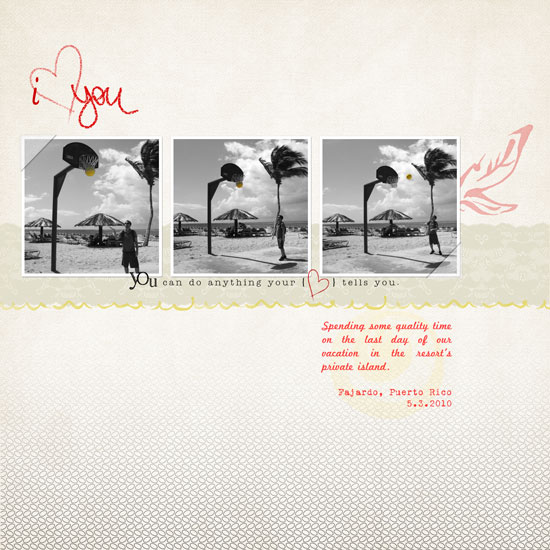
In this layout I used Karla Dudley’s new kit KD Fly Girl for a manly layout of my husband shooting hoops at the beach:

i Heart you

[Fonts: Marketing Script, VTPortableRemington; Digital Kits: KD Fly Girl by Karla Dudley.]

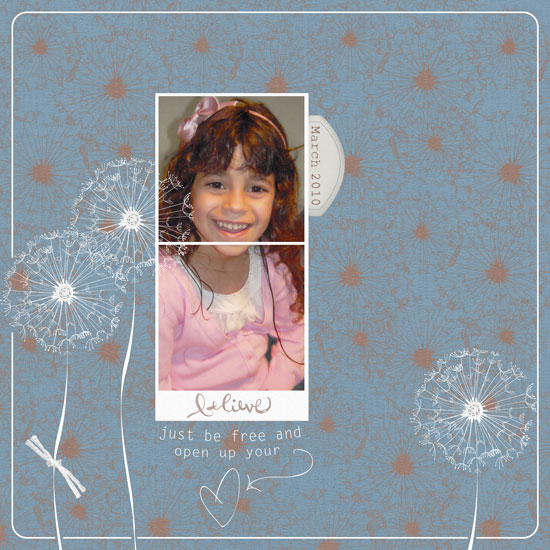
And in this layout I used Karla’s KD Fly Boy kit to create a girlie-girl layout featuring my princess niece:

Believe

[Font: Rough Typewriter; Digital Kits: KD Fly Boy by Karla Dudley.]

Photoshop Elements Tip – Selective Coloring

On my “I heart You” layout I turned my photos to black and white (by de-saturating them) and kept just the vibrant yellow color of the ball.

The azure sky and turquoise ocean are beautiful, but they are distracting from the story I want to tell.

By removing the color of everything but the ball – I am drawing attention to it and hinting that the focus of my story is there.

There are 3 ways to get that look – choose the one most comfortable to you:

Method 1

  1. Duplicate the photo’s layer (press CTRL+J on a PC or CMD+J on a MAC).
  2. Make sure your upper layer is highlighted and de-saturate the colors all the way to the left (press CTRL+U on a PC or CMD+U on a MAC).
  3. Make sure your upper layer is highlighted and choose the eraser tool (work with the default circular brush). Lightly erase just the object whose color you’d like to retain.
  4. Merge both layers when you’re done.
  5. [P.S. This is also how I “colored” the heart red on the kit’s PNG file.]

Method 2

  1. Duplicate the photo’s layer (press CTRL+J on a PC or CMD+J on a MAC).
  2. Make sure your upper layer is highlighted and de-saturate the colors all the way to the left (press CTRL+U on a PC or CMD+U on a MAC).
  3. Make sure your upper layer is highlighted and choose the Quick Selection Tool. Click on the object whose color you wish to retain until it is highlighted completely by the marching ants. If you “slip” just unselect by pressing ALT on a PC or OPT on a MAC while simultaneously clicking on the part you don’t want selected.
  4. Press delete.
  5. Merge both layers together.

Method 3

  1. Choose the Quick Selection Tool. Click on the object whose color you wish to retain until it is highlighted completely by the marching ants. If you “slip” just unselect by pressing ALT on a PC or OPT on a MAC while simultaneously clicking on the part you don’t want selected and duplicate your selection (press CTRL+J on a PC or CMD+J on a MAC).
  2. Deselect (press CTRL+D on a PC or CMD+D on a MAC)
  3. Make sure your lower layer is highlighted and de-saturate the colors all the way to the left (press CTRL+U on a PC or CMD+U on a MAC).
  4. Merge both layers together.

Share

Are you using your stash in an untraditional way? Please share your ideas/ projects with us.

I Am Back. Am I?

May 5th, 2010

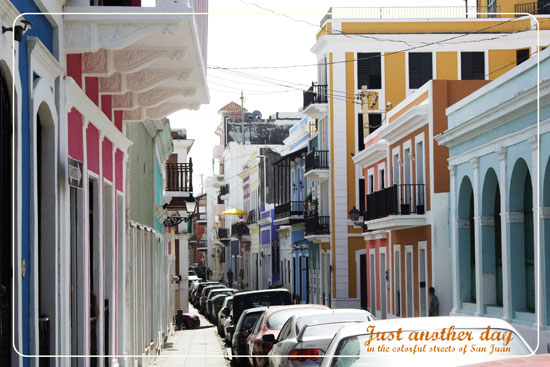
San Juan Puerto Rico

[fonts: Special Type and Marcelle Script]

My husband and I just came back from a 5-day excursion in Puerto Rico.

This vacation was far more needed than planned.

We were both tired and unmotivated and decided to blatantly ignore our busy schedules and never-ending to do list and just order the tickets and go.

“We will deal with the consequences once we are back, refreshed and filled with good energy”, was our mantra.

The trip was AMAZING. We fell in love with the colorful streets of San Juan, the friendly Puerto Ricans and the refreshing food and drinks.

We stayed at a beautiful resort in Fajardo, called: El Conquistador and got a beautiful room with an ocean view (Though we hardly stayed there – we mostly hiked and went sight seeing around the beautiful island).

Now I am back. Tackling my to do list with a shorter deadline but a much broader smile.

So far I have only managed to upload the photos we took on our first day in Puerto Rico. Feel free to take a peek.

Share

Have you ever gone on an unplanned vacation? [would like to think we’re not the only ones…]

Picture Imperfect – Creativity Prompt

May 3rd, 2010

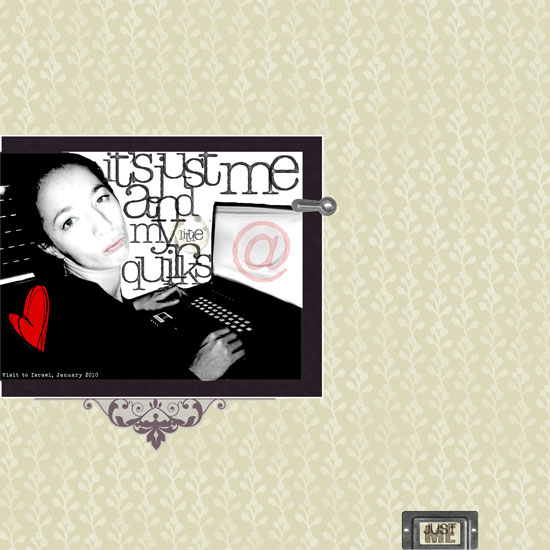
Me And My Little Quirks - Picture Imperfect

[Fonts: Urania_Czech; Digital Kits: KD Digi Essentials 5 (alpha brushes and coffee stains), KD Jillian (patterned papers) – all by Karla Dudley.]

In telling your story, the first thing you need to tackle is embracing imperfection.

Our true story, life story, isn’t about all the moments we were meticulously dressed, our make up perfectly applied and our hair glamorously done.
Our true story is about real – day to day – life.

It is the way we are when we wake up in the morning after a sleepless night.
It is the funny faces we allow ourselves to make only when we are surrounded with loved ones.
It is the way we deal with hardships.
It is the things we struggle with and eventually achieve.
It is the glow we have after completing a workout in the early hours of the day.
It is the laughter in our eyes when we make it to the top of the hill or when we meet a long lost friend.
It is about looking in the mirror and smiling because we accept ourselves the way we are.

This is who we truly are!

This picture was taken with Nadav’s cell phone camera.
I was jet lagged after a looooong flight and setting up my laptop at his parents’ guest room.
I was tired, cold, a bit dehydrated and making a goofy face (on purpose).
The picture is far from being perfect but it represents me. It portrays a side of me I want my future kids to see.

So I made a layout out of it.

Go ahead and embrace your imperfect pictures. Let them tell a true story.

Design Drill Down

As both me and the photo’s quality were sub par (hello understatement of the year…) I worked around it, making the photo look more “artistic” and “organic”.

I turned it to black and white, cranked up the levels settings, used funky alpha brushes instead of just a font and blurred and manipulated the background plus i added a touch of color to highlight my “true colors”…

The heart, lips and e-mail symbol make a visual triangle of red and the purple mat against the yellow background helps the photo pop up – as it is the main element.

The embellishment under the photo mat softens the quirky look and the bookplate “grounds” the page and also conveys the theme… Its small size is also purposeful story-wise.

There is also contrast between the soft and traditional look of the background pattern and the embellishment and the modern, funky look of the photo, myself and alphas.

Share

Have you scrapped an imperfect picture that tells a true story lately? share your thoughts with me and leave a comment.

Capture Your Dream Workshop – Special || REGISTRATION CLOSED

May 2nd, 2010

Workshop - Capture your Dream

Capture your dream is a self paced workshop designed to help you identify your dream, capture it in a beautiful handmade mini-album and pave your way to make your dream come true.

In this workshop you will complete a mixed-media mini-album, which you will create from scratch with things you have lying around in your house or things you can find in your local craft or office supply store.

Each project is propped up by a pdf file with clear step-by-step instructions, packed with valuable tips and techniques and backed with supporting photos.

As always the inspiration and journaling prompts are going to make you think and ponder. You will get fantastic insights not only to your deepest dream but also to the means of making it happen.

Boosted with inspiration prompts, stimulating journaling and motivated by meaningful creative projects, you will capture your dream and follow it toward realization.

“Capture Your Dream” will show you…

  • How to make your own fabric covered and embroidered mini-album.
  • How to use different mediums for your album’s pages (i.e. felt, transparency, cardstock and more.)
  • Different ways to include your journaling on your scrapbook pages.
  • Different ways to add layers, texture and interest to your layouts.
  • How to inject meaning into your projects with tactile and visual similes.
  • How to get chronological perspective through journaling.
  • How to communicate and work side-by-side with your dream.
  • and many more…

I am offering personal guidance and support to each participant on each step of the way, everything to make you feel like I am sitting right by your side.

Do you want to capture your dream in a significant and expressive way? Join now and get one step closer to making your dream come true!

  • The workshop is self paced. You will receive the first segment (Introduction & Supply List) immediately after registering.
  • The duration of the workshop is 6 weeks (5 lessons per week). That’s 30 lessons delivered right to your inbox!!!
  • Format of the lessons – Downloadable pdf. files – including templates, instructions, supporting photos and supply list with live links to the products.
  • Price – Only USD 25.00 Throughout May 2010

Hurry up and register now to secure a place in the workshop. Unfortunately, I need to limit the number of participants in order to provide the individual attention each participant deserves.

P.S.: You are going to LOVE this workshop… OR your money back!

I am so confident you are going to love this workshop that I am offering you a full money back guarantee. If for any reason you are not fully satisfied with the workshop, just send me an e-mail and I will refund 100% of your purchase. No questions asked.

Frequently Asked Questions

Q: The workshop is pretty intensive what if I’m too busy for 5 lessons per week? OR I’m going on vacation soon and would miss some of the lessons.

A: No problem. The format of the lessons allows you to take them at your own pace, whenever it is convenient to you. You can take one lesson every day or take several lessons during the weekend or in an afternoon. I will still be available for you to answer questions and offer support.

Q: Will there be a special forum for the workshop’s members? I’d like to connect with other members.

A: Absolutely. The workshop is going to have a private forum for its members and you are welcome to participate in it, ask questions, communicate with other members, share thoughts and even include links to your workshop related work. I will be active on this forum too 🙂

Q: Will I have to buy special tools and supplies for the workshop?

A: As scrapbookers you probably have most of the tools and supply needed for the workshop. About 10 days before the workshop starts I will send each participant a complete tools and supply list.

Q: What if I don’t like the workshop?

A: I cannot imagine this happening 😉 Now seriously, in case you are not happy with the workshop for any reason, drop me an e-mail by the end of the workshop and I will refund 100% of the purchase price.

Testimonials

  • “Sad not to be getting any more of your e-mails. I am still working on my mini album and will let you know when I post on my blog. Just wanted to let you know that I learned a lot of new techniques from your course. I don’t like to sew, so I adapted those parts and did with paper instead. Also, I feel like I now have an organized plan for my dream which is one of the most difficult parts to do. Sometimes you just don’t know how to actually begin to do something. Putting it down on paper helped me a lot.”
  • “It was wonderful and I recommend it to EVERYONE! You are fantastic … always quick with a kind word … and help! Thanks so much!”
  • “Today I was looking through my childhood memories when my 12 year old daughter joined me. It was so nice to share these memories and my dreams with her. A wonderful side effect of the workshop!”
National Scrapbooking Day Blog Hop

May 1st, 2010

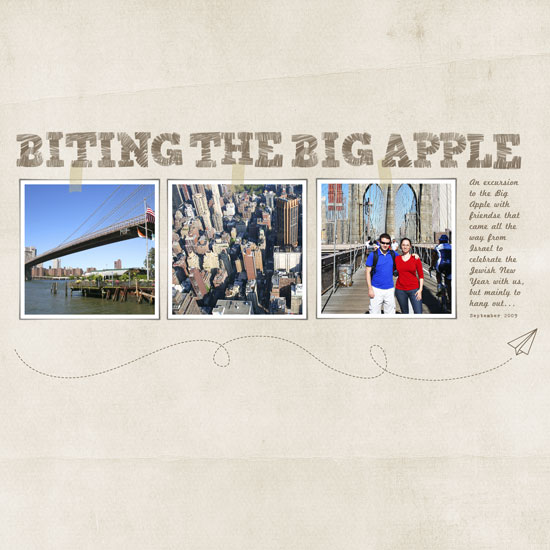
Biting the Bog Apple layout

[Fonts: Erika Ormig, Marketing Script; Digital Kits: KD Frame Essentials 1, KD Digi Essentials (masking tape), KD For The Boy (background paper), KD Fly Boy (paper airplane), KD Stamp Alphas 1 – all by Karla Dudley.]

Today is National Scrapbooking Day and to jump start the day some creative bloggers and I have gathered together in a special blog hop.

Each of us is sharing a layout with her interpretation to the subject – “Cross Country Road Trip”.

Go on and browse all the blogs to see their amazing layouts, to leave some loving and appreciative words behind and to participate in the drawings (On the table there are a copy of my e-book Unleashing The Creative Child Within You and My Mind’s Eye LUSH minibook with papers and who knows, you may hop and find some more goodies in your way)…

We invite you to join us and create a layout (all paper, all digital, or hybrid) about a trip to anywhere in the 50 United States [or anywhere else if you’ve never been to the States] and to submit a direct link to your wonderful layout on Rosann’s blog by May 15th at 11:59pm EST for a chance to win the goodies.

If you are new to my blog, make sure to pick up some of the FREE printables I am giving away each Friday. I’m sure you’d love yesterday’s woodgrain journaling labels!

Blog Hop Order

  1. Rosann => Submit your layout here for a chance to win!
  2. Jana
  3. Terri
  4. Kim
  5. Sharon
  6. Lacey
  7. Karen
  8. Avital => YOU ARE HERE

Enjoy!

Friday Freebie – Woodgrain Circle Journaling labels

April 30th, 2010

Free Journaling Labels
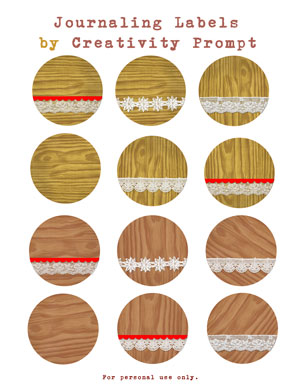
This week I am sharing a really special – at least for me – set of FREE woodgrain journaling labels with you guys (for personal use only).

I had another set of graph circle journaling labels lined up for this week, but in light of NSD (National Scrapbooking Day) tomorrow, I designed a special set for you to play with. I scanned and manipulated digitally all the images from a vintage piece of wallpaper I’ve had for YEARS and a few bits of old lace. I really hope you’ll like it!

To download it simply click on the image (or the link) and if it doesn’t work try to right-click on it and opt for the “save target as…” option (it may be phrased a bit differently on different operating systems).

Have lots of fun with it tomorrow [or anytime].

Make sure you didn’t miss the rest of the free printables on Creativity Prompt.

Share

Are you planning something special for National Scrapbooking Day?
How are you going to use these labels? Share your ideas with me and my wonderful readers.