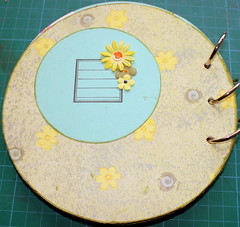
I love making my own mini-albums. The handmade album is unique and filled with love and attention.
By definition, the handmade album is going to be a “one-of-a-kind”, even if you make a hundred of them – because as long as it is not mass produced by machines it is going to turn up a wee-bit different each time you make it.
Apart from the handmade album’s singularity, there are two more things that make me happy about making my own mini-albums:
- Recycling. By making my own albums (and journals) I get to reuse stuff that otherwise would go to the bin and clutter the world… I can recycle boxes, notepads covers, chipboard which is used for flattening shirts and linens in their packaging. I get to literally turn trash into treasure, and I LOVE it.
Flexibility. When I am making something from scratch I am the one setting up the rules. I decide what shape it’ll be (or that it is going to be made out of multiple shapes). I decide what size is it going to be (or multiple sizes – to fit my own personal needs). I decide which materials I am going to use (hence the opportunity to recycle). I am the boss 🙂
In this week’s creativity prompt, I am calling you to use your flexibility and create a circular mini-album for yourself or as a gift for a loved one.
Tools –
Materials –
- Cardboard (Recycle. Recycle. Recycle)
- Cardstock – for the album’s inserts
- Glue-stick
- Loose leaf rings.
(for embellishing your album you can use whatever you have in your stash – patterned paper, paper flowers, buttons, glitter, ribbon etc. The sky is the limit when it comes to embellishments. You can be creative and do some recycling for creating your embellishments as well…)
Instructions –
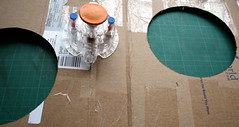
- Start by making the album’s cover. Cut 2 circles from a cardboard box (mine are 6″ in diameter). Because of the thickness of the cardboard, the circle cutter won’t go all the way through, but it’ll help you in creating a nice groove that you can follow cut all the way through with either the utility scissors (very sharp) or the craft knife.
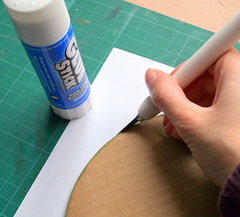
- Next you need to cover the cardboard circles with patterned paper. Apply a generous amount of glue with your glue stick and stick each of the cardboard circles to a sheet of patterned paper. Then flip it over and cut the excess of the paper with either the utility scissors or your craft knife (what ever works better for you).
Alternatives: you can paint the cardboard with acrylic paints and a sponge brush or cover it with modge-podge or leave it as it is for a natural-recycled look.
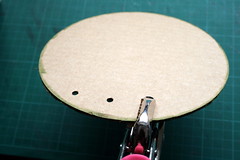
- Punch the holes for your album with the trusty Crop-a-Dile. Make sure your hole is no farther than a ¼” from the edge, otherwise the pages of the album won’t turn easily (I’m speaking from my own experience here… You can see that in the picture below).
- Cut the insert circles from your cardstock, using the circle scissors again. You can cut them a little bit smaller than the covers. You may use multiple colors of cardstock to make it more interesting visually.
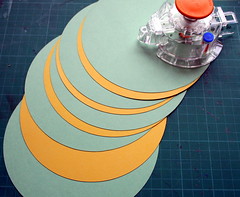
- Next punch the holes in your inserts. Use your punched covers as a guide and trace the holes lightly with a pencil. Using the Crop-a-dile, you can punch all your pages at ones to make it quicker and to insure even lining. (Don’t forget the ¼” rule from step 3 above!!!)
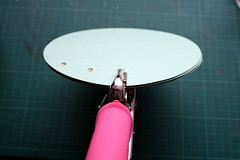
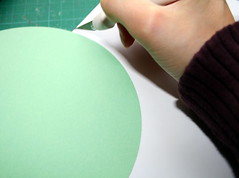
- It’s time for the fun part – embellish!!! You can cut any excess by flipping the circle over and use your utility scissors or craft knife.
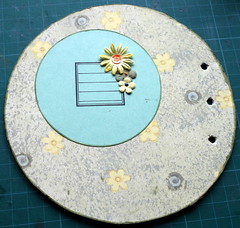
- When all your album pages are done, thread them through with the loose leaf rings (you can also use ribbon or thread as an alternative binding method).
Share –
I would love to see your own interpretation to the circular mini-album.
Share you creations by leaving a link in the comment section below or by adding the pictures to the Flickr’s Creativity Prompt group pool.
Feel free to share your thoughts about this project. I’d love to hear what you think about it.
Psst… You have got less than a week for a chance to win a copy of the book: Visual Chronicles by Linda Woods and Karen Dinino.
Enter the giveaway by leaving a comment here. Just follow the instructions and secure your place at the raffle.
Tags: mini-album, recycling, Tutorial


It’s highly unlikely that I would ever make something like that (I was sadly born with 2 left hands)… but I’m impressed! I like that it’s circle. Very cool.
Thanks. I like my flexibility. I can make whatever shape I like from recycled stuff and it makes me happy. I guess I am pleased very easily…
This looks like a fun one too. I don’t have any rings. Will have to pick some of those up. 🙂 I did pick up some very cool beads the other day. Wonder if I could find a way to work those into this. Hmm…
You can use a string instead of the rings and weave the beads through it… maybe…
thanks for your great idea. it’s lovely. i will try it soon!