/** Font types */

Archive for the ‘creativity prompt’ Category

Creativity Prompt – Embellishing Paper Flowers

Friday, March 13th, 2009

Embellishing flowers Embellishing embellishments? Have I gone crazy? No. Not really. I was just thinking how can I stretch my supply a little bit and get a personalized look and this is what I came up with.

Many crafters have heaps of plain paper flowers laying around, but only you will have the altered version of these flowers… Think about all the possibilities… Exciting, isn’t it? Some companies offer pre-embellished flowers, but embellishing them yourself isn’t only cheaper, but also more fun and creative.

In today’s video I suggest and show just a few options: sewing, adding bling, embossing, flocking, stamping and decoupaging – but the possibilities are really endless.

You can use the embellished flowers on cards, layouts as well as on wall art and other mixed-media projects.

How-To

[I apologize in advance for the quality of the editing. I am slowly learning to work with iMovie…]

[If you head over to YouTube, please rate, comment & subscribe]

On this video –

  • Stamping – Use pigment ink and press hard on the stamp, to get into all the folds and crevices.
  • Adding BLING – Apply some strong liquid adhesive that dries clear (like diamond glaze) and sprinkle beads, glitter or gemstones onto it. Allow it to dry and add a little bit of adhesive on top, to make sure it’ll stick.
  • Flocking – Similarly to adding bling, just apply some Diamond Glaze and pour in the flock. Tap on it gently with your finger to make sure the flock is applied evenly.
  • Decoupage – Choose a scrap of napkin or tissue paper that fits your flower. Use only the top layer of the napkin. Apply gel medium or Mod-Podge generously on the flower and adhere the napkin to it. Apply a second coat of gel medium on the covered flower. Allow it to dry and cut the excess with scissors.
  • Embroidery – Add some appeal to the flower with an embroidery floss. There are many options. On the video, I applied sequins to the flower, using a “French Knot“.
  • Embossing – Put the flower into an embossing folder and move it through a Cuttlebug machine (or another die-cutting & embossing machine). Make sure you pick an embossing design that fits in scale to the flower’s size.

More options –

  • Inking – change the color of the flowers with an ink pad or an even coat of acrylic paint.
  • Crackle Paint – Apply a thick layer of crackle paint on the flower and allow to dry.
  • Photo transfer – The idea is similar to decoupaging, but instead of napkins you use a photo, printed on transparency with an inkjet printer. Note that this technique isn’t as smooth as decoupaging and the printed design won’t be transferred as crisply. (Use a gel medium for this technique).

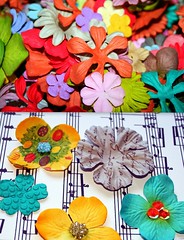
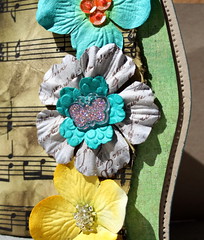
Take a closer look at the embellished flowers (click on the photo):

Embellished Flowers

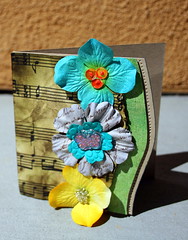
Here’s a card I have made with the flowers:

Card

[This card is based off CPS106.]

Share –

If you have any question, suggestion or remark – don’t hesitate to contact me – either leave a comment here, use the contact form or start a new thread on the Creativity Prompt Flickr Group!!!

I would also be very happy to see your own creations, so don’t be shy and share 🙂

Do you have more ideas for embellishing paper flowers? Please share!
Creativity Prompt – Recycle Styrofoam Into A Bulletin Board

Friday, March 6th, 2009

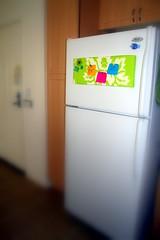
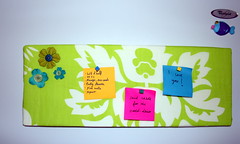
Recycled Bulletin Board This week I have another quick and easy, and most importantly – recycling – project for you.
Saying styrofoam is bad for the environment is quite an understatement. Nevertheless it is widely used for packaging and some other “really important” (NOT) purposes. Changing the world is done one step at a time, right? So our baby step today is reusing the styrofoam.

The styrofoam is light weight as well as soft enough to be pierced repeatedly (while chanting: “Bad styrofoam. Bad. Bad. Bad”) what makes it perfect to serve as a magnetic bulletin board! By salvaging a never-has-been-no-longer-will-be in use pillow cover we got ourselves the perfect recycling project and quite a nice addition to the fridge. (This looks much neater than a bunch of scraps scattered around).

If you recognize the fabric from the easy peasy hardbound journal tutorial, you are right… (and I haven’t used the rest of the sheets yet, so stay tuned).

Tools & Supply

How To –

Step By step Instructions –

  1. Measure a piece of fabric, about 3 inches larger than the styrofoam, both lengthwise and widthwise.
  2. Cut the fabric to size. You can use your scissors or cut a small slit ant rip along.
  3. Put the fabric on your desktop – right side down – and straighten it. You can use an iron if you feel much inclined. I don’t.
  4. Adhere the fabric flaps to the back of the styrofoam. I used Thermoweb’s Clear adhesive Lines but you can use a stapler, just as well (probably better). Start with the long flaps and then move to the shorter ones. Make sure they are pulled tight before adhering or stapling them.
  5. Tuck the edges of the small flaps in, as if you are wrapping a present. Then adhere or staple them to the back of the styrofoam.
  6. To embellish the bulletin board I threaded a string through some buttons and adhered the buttons to some paper flowers. I then adhered the flowers to the board with pop-up glue dots.

Recycled Bulletin Board
[Click on the picture above for a better view]

Share –

If you have any question, suggestion or remark – don’t hesitate to contact me – either leave a comment here, use the contact form or start a new thread on the Creativity Prompt Flickr Group!!!

I would also be very happy to see your own creations, so don’t be shy and share 🙂

Creativity Prompt – Make A Fabric Covered Hardbound Journal

Friday, February 27th, 2009

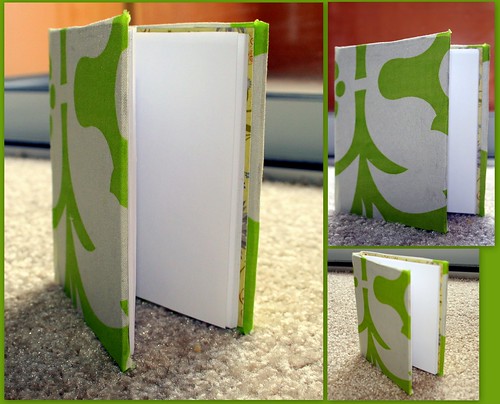
Fabric Covered Hardbound Journal

This week I want to suggest another quick and easy way for making an hardbound journal. Covering the thick chipboard with fabric adds additional appeal, the coveted and elusive “je ne sais quoi” 🙂 . Yet, it is soooooo easy to do (provided you did not cut your finger in the process).

Unfortunately, I DID cut my finger in the process, therefore my journal isn’t really as beautiful as I would like it to be (see the frayed edges in the corners)… So please ignore the imperfections and see the hidden potential in it… Considering you can see this raw potential read on for the full (video) tutorial.

Tools & Supply –

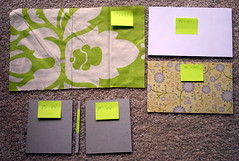
Tools & Supply

Measurements –

measurements
[Click on the picture for a better view]

  • Fabric – 12″ by 5.5″
  • Patterned cardstock & copier paper – 7 1/2″ by 4 1/2″
  • Chipboard: spine – 1/4″ by 4 5/8″ cover – 2 (3 7/8″ by 4 5/8″)

How To –


[Click twice on the video to get to You Tube and watch in high quality.
While you’re there, feel free to rate and comment 🙂 ]

Step By Step Instructions –

[I hope it is helpful for those of you who cannot watch the video]

  1. Adhere the chipboard pieces to the fabric with a glue-stick.
  2. Start at the middle with the spine. Then attach the cover pieces – one on each side of the spine. Use a brayer to insure a strong bond.
  3. Cut all 4 corners of the fabric in an angle. Leave a 1/8″ gap between the fabric and the chipboard edges.
  4. Adhere the fabric’s flaps with a glue stick. Tuck in the corners, for a nice fold.
  5. Fold the patterned paper (heavy weight) and copier paper stack in half. Crease well with the bone folder.
  6. Straighten up the copier paper stack with a sharp craft knife. To avoid falling finger tips… don’t press hard on your knife, but rather use repeated soft strokes.
  7. Lay your signature (patterned paper + copier paper stack) on a soft mat (I’m using salvaged styrofoam) and staple together. Use your bone folder to flatten the lil’ prongs.
  8. Cover the signature with strong double sided tape. Some added glue stick doesn’t hurt…
  9. Carefully adhere the signature to your chipboard cover.
  10. Voilà! Enjoy!

Enjoy!!!

If you have any question, suggestion or remark – don’t hesitate to contact me – either leave a comment here, use the contact form or start a new thread on the Creativity Prompt Flickr Group!!!

I would also be very happy to see your own creations, so don’t be shy and share 🙂

In an effort to make you share more, I want to show you the FABULOUS notebooks the talented Robin Gibson made, following this notebook tutorial. [Click on the picture to go to her Flickr photo page]:

Readers Gallery

Aren’t her notebooks fantastic?

Creativity Prompt – Try Scrapbooking On Canvas

Friday, February 20th, 2009

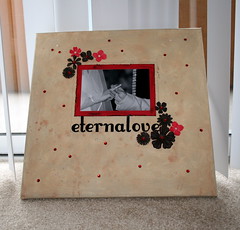
scrapbook on a canvas Thinking outside the box is one of the best creativity exercises. In scrapbooking it is manifested by getting out of the traditional 12″ by 12″ page protectors and experimenting with other mediums and sizes.

For this week’s creativity prompt I am taking scrapbooking out of the post-bound album and onto our wall, with “scrapcanvasing“, which means scrapbooking on canvas.

My experience with scrapcanvasing has been great. Getting out of the boundaries of my cardstock stash had made me pull out my art supply that had been waiting untouched, patiently, for a loooooong time. Playing on a canvas means playing with my acrylic paints, my water colors and other mixed-media art goodies – the sky is the limit…

This week’s video isn’t a tutorial – PER SE – but rather me playing around with my canvas. I truly love the results. (You can click on the picture above, for a closer look at the finished project).

So if you want to watch me playin’, stay tuned:
(and if you feel much inclined, please rate and comment on You Tube, where you can also watch the video in higher resolution)

The great music on the video is by non other than Josh Woodward – his music is available (for free) here.

Tools & Supply –

Share –

Are you feeling like creating your own scrapcanvas? Share your thoughts with me!!!

If you have any question, suggestion or remark – don’t hesitate to contact me – either leave a comment, use the contact form or start a new thread on the Creativity Prompt Flickr Group!!!

Please let me see your scrapcanvasing creations, by dropping a link at the comments section on this post 🙂

Creativity Prompt – Make A Notebook With A Simple Stapler

Friday, February 13th, 2009

Stapled NotebookBack in the days… when I was a teenager, I remember trying to make shift with the supply I had had. One of the things I remember doing was to open my small stapler and staple with it on a soft, yet firm surface, to overcome not having a staple-gun or a larger and cooler office stapler.

Now it’s the time to use my childhood’s creativity and apply the same trick for making a notebook in less than 5 minutes – no matter what size your stapler is OR what size notebook you want to make. If you are interested in watching how to make it, stay tuned for the video tutorial.

Tools –

Supply –

I embellished my front cover with 3 strips of 1¼” by 5¼” cardstock which I ran through the Cuttlebug machine with 3 different embossing folders (Spots and dots, Swiss dots and Bubbles).

How To Video –

Measurements –

  • Copy paper – 5½” by 8¼” (folded in half, and straightened with a craft knife, while folded).
  • Cardstock – 5½” by 8¾”, scored at 4¼” on each side.


[Go here to watch in high quality]

Enjoy!!!

In this video I tried You-Tube’s audio swap option. I hope it isn’t too annoying… Please tell me what you think about it and leave a comment.

If you have any question, suggestion or remark – don’t hesitate to contact me – either leave a comment, use the contact form or start a new thread on the Creativity Prompt Flickr Group!!!

You can also comment, rate and subscribe to the videos on You-Tube. If you feel like it. Please rate them, so I know how to go about the future videos.

Share the notebook you have made with us. Leave a link at the comment section or upload your photo to the Creativity Prompt Flickr group pool.

Creativity Prompt – Waterfall Mini-Album

Friday, February 6th, 2009

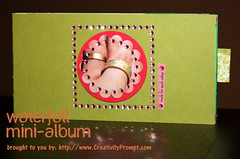
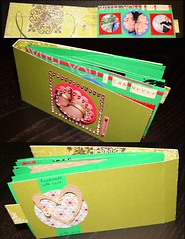
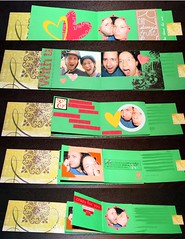
Waterfall Mini-Album For this week’s Creativity Prompt I have a fun little project for you – The Waterfall Mini Album. It’s a whimsical album that showcases your treasured memories in a playful way.

I have seen a couple of these mini-albums online but non had provided any instructions for assembling it. Therefore I have reversed engineered this album by trial and error with copy paper, until I managed to get it right. It ended up looking nothing like the ones I have seen online, but I love it and I can call it ‘mine’.

Now you can learn from my mistakes and have the full proof way of making your own waterfall mini-album…

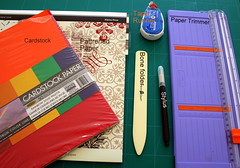
Tools & Supply –

Tools and Supply
[For a closer look, click on the photo]

Click here for more details on my basic tools and supply.

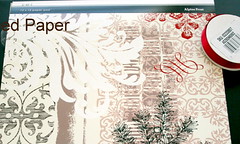
SEI Alpine Frost paper pad.

How To –

For the cutting measurements, click here.


[The great music is by: Josh Woodward from his album: Only Whispering.]

More peeks –

Album's pages Album's pages

[For a closer look, click on the photos. I have erased the private letter to my husband]

Enjoy!!!

If you have any question, suggestion or remark – don’t hesitate to contact me – either leave a comment, use the contact form or start a new thread on the Creativity Prompt Flickr Group!!!

I would also be very happy to see your own waterfall mini albums, so don’t be shy and share 🙂

Some more feedback on the videos is welcomed!!! (Don’t forget to rate & comment on YouTube. If you feel like it… 😉 )

Creativity Prompt – Make A No-Stitch Notebook

Friday, January 30th, 2009

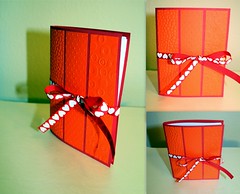
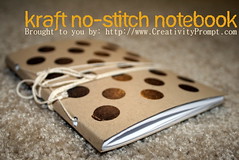
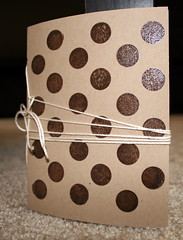
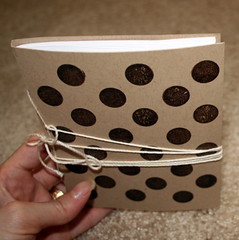
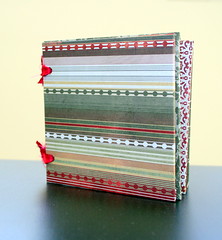
Kraft no stitch notebook After yesterday’s introduction to the new title on Creativity Prompt: “On The Catwalk” here comes a video tutorial on how to make the notebook, featured on yesterday’s post, using Papertrey Ink’s products.

This notebook is made without stitching and is super easy to make, yet it has this special “artisan” look that we all love. This is the notebook that everyone will ask: “Where did you get it from?”.

So,… Are you ready?

Tools & Supply –

How to –

Fabulous music is by: Josh Woodward.

Some additional peeks at the notebook –
[Click on the photo for a larger size]

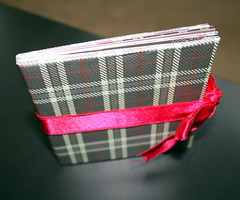
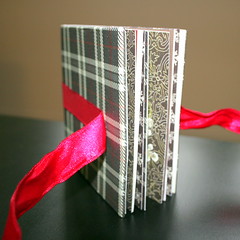
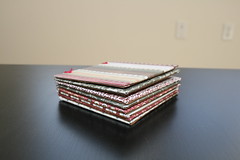
side view
view from above

Enjoy!!!

If you have any question, suggestion or remark – don’t hesitate to contact me – either leave a comment, use the contact form or start a new thread on the Creativity Prompt Flickr Group!!!

I would also be very happy to see your own creations, so don’t be shy and share 🙂

Creativity Prompt – Make A Mini-Book In 10 Minutes – Video Tutorial

Friday, January 23rd, 2009
10 minute book - closed
10 minute book - opened

My favorite projects are both quick and easy to make, which provide me with instant gratification and an appetite for more. This is why I immediately fell in love with Hagit’s mini-book, when I stumbled upon it.

I asked for Hagit’s permission to “reverse engineer” her project and she told me she’s got the idea from Moran, another talented Israeli artist. (Moran has also posted a tutorial, in Hebrew). Both of them gave me their gracious permission.

As you can see, my “reverse engineering” has brought me to a slightly different place, but my inspiration is definitely derived from Hagit and Moran – so THANK YOU!!!

In this week’s creativity prompt I am going to show you my way of creating a mini-book in about 10 minutes. (Depends on whether your tools and supply are at hand or not…)

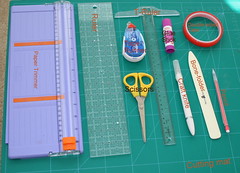
Tools & Supply –

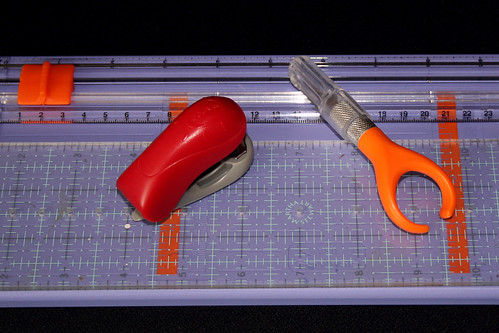
Tools
Supply

How-to –

The great music on this video is by Josh Woodward.

Enjoy!!!

If you have any question, suggestion or remark – don’t hesitate to contact me – either leave a comment, use the contact form or start a new thread on the Creativity Prompt Flickr Group!!!

What do you think about my second trial at putting together a video tutorial… I am keeping on experimenting with the webcam’s placement. Not quite there yet 🙂

Thank you so much for all your kind comments and e-mails on my first video tutorial. It really encouraged me to go ahead and make some more.

I would also be very happy to see your own mini-book creations, so don’t be shy and share 🙂

Creativity Prompt – Chunky Mini-Album – First Video Tutorial

Friday, January 16th, 2009

Chunky Mini-Album
After long deliberations with myself (I admit. I have those.) I have decided to go ahead, roll up my sleeves and make a video tutorial. I have chosen to make a project similar to a former creativity prompt – a mini album I have prepared from a recycled cardboard box, for my nephews’ and niece’s photos.

I hope you will enjoy this tutorial and that the instructions are clear enough. However, bear in mind that this is my first attempt at a video tutorial, so it’s a bit rough around the edges (and then some). Therefore I would be much appreciative for any feedback – good and bad, so I can apply it to my next videos.

Covering the cardboard (which is the same as covering chipboard) with patterned paper is a step which is repeated in many creativity prompts. So it’s good to have it “on tape” for you to see the way I am going about it. I believe that even in poor quality, a video is more explanatory than a photo.

This week’s creativity prompt is brought to you in a video form… Enjoy!


[To watch in high resolution, go here and press the link below the video]

The papers I used on my tutorial were from Basic Grey Wassail 6×6 Paper pad.

The song on my video was made and performed by my brother in law and his friend while they were still in high-school. I was amazed at their talent and I would like to know what you’re thinking as well 🙂

Enjoy!!!

Chunky Mini-Album

If you have any question, suggestion or remark – don’t hesitate to contact me – either leave a comment, use the contact form or start a new thread on the Creativity Prompt Flickr Group!!!

I would also be very happy to see your own creations, so don’t be shy and share 🙂

The 10 Best Creativity Prompts of 2008

Friday, January 9th, 2009

Creativity

Following my last post of the 10 best Journaling Prompts of 2008, comes a list of the best Creativity Prompts of last year. The list includes both tutorials and general prompts that during 2008 have spruced up the creative juices and were particularly popular among my dear readers.

so, without any fuss or delay, the “best of” award goes to:

  1. Trash into treasure
    Creativity Prompt #6 – Turn Your Trash Into Treasure
  2. Hardbound journal
    Creativity Prompt #8 – Making Your Own Hardbound Journal
  3. Guided Album
    Creativity Prompt #16 – Guided Album
  4. Accordion Spine Album
    Creativity Prompt #21 – Making An Accordion Spine Album
  5. “One-Sheet” Mini Album
    Creativity Prompt #22 – The “One-Sheet” Mini Album
  6. Cards and Envelopes Set
    Creativity Prompt #23 – Cards & Envelopes Set
  7. Complete A Scrapbook In One Weekend
    Creativity Prompt #25 – How To Complete A Scrapbook In One Weekend
  8. Card Set Holder
    Creativity Prompt #26 – Card Set Holder
  9. Decoupage
    Creativity Prompt #28 – The Art Of Decoupage
  10. Altered Board Book
    Creativity Prompt #32 – Alter A Chipboard Children’s Book

Share –

I hope this list of Creativity Prompts has inspired you.

What was your personal favorite prompt?

What type of prompts do you like to see more of in this site?

Leave a comment and share your likes, as well as dislikes. I would be really happy to hear your opinions.