/** Font types */

Author Archive

Inspiration Prompt #10

Monday, July 14th, 2008

This week I want you to derive inspiration from an incredibly talented artist, Blu.

Blu reinvents the notion of “Street Art” by his different and thoughtful use of murals and the way he incorporates them on his video art. I promise that even if you are not drawn to his style, you will get captivated and thought-provoked.

Check out Blu’s art and video art on his website.

I would really like to hear your thoughts about Blu’s art. You are more than welcome to leave a comment to this post.

Creativity Prompt #10 – Making Your Own Journaling Tags

Friday, July 11th, 2008

My scrapbooking philosophy is that words are just as important as pictures. The journaling helps in keeping a more complete memory of the moment. It creates a deeper memory of a loved one or a richer reminder of a point in time you wish to treasure for yourself and for the next generations

There are many ways to incorporate journaling in an album (or an art journal). One of the quickest and easiest ways I know is by using journaling tags. The more colorful and interesting they are, the more inclined I am to actually use them and put those feelings and memories in writing.

There are many brands of journaling tags to choose from, check out:

  1. Heidi Swapp Journaling spots

  2. 7Gypsies 97% Complete Tags

  3. Making Memories Spiral Journaling Books

  4. KI Memories Pop Culture Taglines

  5. Elle’s Studio Journaling Tags
  6. Pink Twilight’s Journaling Spots

and many more…

From time to time I also love to make my own journaling tags. It is a great way to use scraps of cardstock and patterned papers and a very good creativity prompt. Using my own hand-made goodies makes me feel inspired and more attached to the final result.

You can either make the tags as you go or make them in bulks, in a production line manner (which is the way I do it).

The possibilities for making the journaling tags are endless. Any piece of paper can do, in any shape, color and size. Rarely my journaling tags actually look like traditional tags …

This week’s creativity prompt is to make your own journaling tag (and to use them !!!).

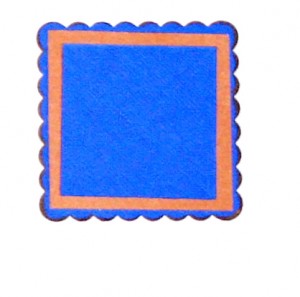
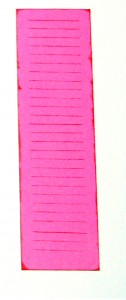
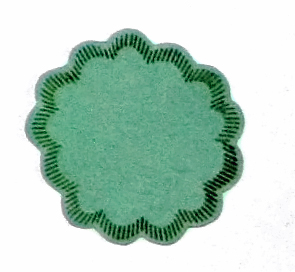
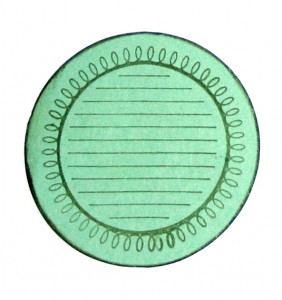
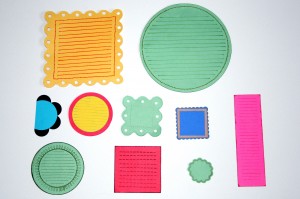
Here are examples for some journaling tags I have recently made and short instructions on how to make them yourself.

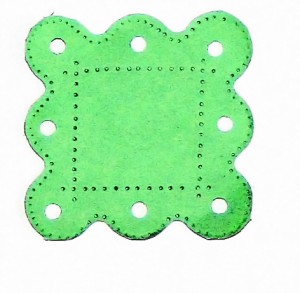
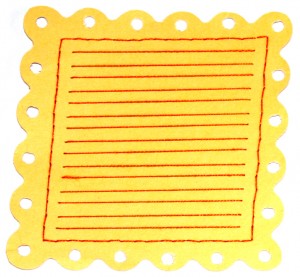
On this one I have used a Coluzzle template to scallop the edges (Thanks, Mor, for the tip on using this template). After cutting the scalloped square I punched holes in each scallop with the Crop-a-dile and pierced a frame around the inner square with a paper piercer. I am using the Coluzzle foam mat for the piercing, it really makes it easy. After piercing the frame I stitched it with an orange embroidery thread. Than, using a clear ruler, I pierced two little holes in each line and stitched them as well, in order to create the journaling lines. (A quick tip on threading a needle – put a bid of clear glue at the tip of the thread, it prevents the thread from fraying and works like magic).

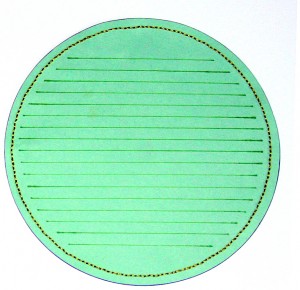
On this one I have used the same method of piercing a frame and stitching along it. For cutting the circle I used Fiskars Circle cutter. The lines were drawn using a clear ruler and a green sharpie.

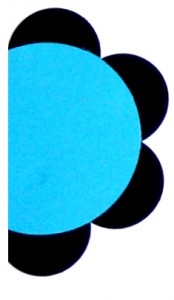
On this small tag I used a small circle punch and cut out the black circles and than adhered them to the back of the light blue circle and than cut it in half. This tag goes well when lined up against a picture or the age of the page.

This one is really easy. Using a coluzzle small circles template I cut out two circles and on the small one I stamped with Autumn Leaves clear journaling stamp using a blue chalk ink.

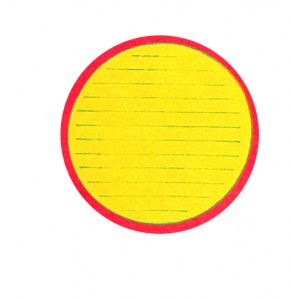
On this one I used the same technique I have used with the first yellow tag, only I did not use stitches. I also pierced the outer frame, free-hand.

This tag is reeeeeeeeally simple. I have punched out a scalloped square and adhered two smaller squares to it.

On this fun little tag I inked the edges with a red chalk ink and for the lines I used the Autumn Leaves clear journaling stamps again. Now it’s time for another tip. In order to use only the lines on the stamps and for creating a nice 1/4″ border around, I have masked the tag with post its.

On this tag I was using Technique Tuesday “Hanging by a thread” stamps only Instead of mounting the stamp straight on the acrylic block, I have mounted it in a curve to create the circle. To guard the end I was using post its again. Next I cut along the stamped lines, turning the cardstock around instead of the scissors.

On this tag I used the same technique of lining the stamp up in a curve. I was using the same stamp set as above, and also the Autumn Leaves journaling stamps. I inked the outline of the circle with a green chalk ink and cut it out using the Coluzzle template.

On this tag I was using the Technique Tuesday “Hanging by a thread” stamps again, only this time I mounted the stamp straight on the block. To mask of the outline, I was using post-its. I used red chalk ink for the journaling lines and for the edges.

I hope this post has given you some ideas and a bit of inspiration for make your own journaling tags. Please share your own journaling tag creations by commenting to this post.

Journaling Prompt #9 – Precede The Words To The Photos

Wednesday, July 9th, 2008

I always advocate the importance of journaling and the archival character of the written word. Unfortunately, I don’t always do as I preach… Too often I would leave an empty journaling spot on my layout without telling the story.

I always have a perfectly good reason for not following my own advice and leaving the pictures without their underlying stories. Either I am not inspired enough for writing or I cannot find the perfect words to describe the moment I have captured on my page. Sometimes I just haven’t got the time to sit down and write the complete story, but I don’t want to leave anything out so I write nothing. Can you believe that sometimes this kind of reasoning makes sense to me…

I am ashamed to admit that I can’t remember ever coming back to a clear journaling spot and filling in the story. In the meantime, many layouts and some complete albums are bashfully waiting with abandoned journaling spots. The stories are left untold and sometimes are even forgotten.

Having said that, I am now determined to stop this bad habbit. From now on I am going to document all the stories of all the moments that I can possibly remember and not forgetting to interweave the emotions which the stories evoke.

The best way to do so is be preceding the words to the photos. If the layouts can wait for the stories, so can the stories wait for the layouts to be created and for the photos to be taken (or printed). This way no story will be left untold (in the worst case it would be left “unscrapped”).

This week’s prompt is to make an “heritage” folder on your computer (or online).

  • First, create the main “heritage” folder.
  • Then, create a sub-folder for each person who’s important to you. Do not forget to make a folder for your own personal stories. YOU are important too.
  • Tell each story in a separate document in the relevant folder.

You can organize each folder either chronologically or thematically or in what ever way you deem right – these are your stories and you are going to make the rules of telling them.

After you have prepared the interface for your stories you can start telling them. You can either designate 15 minutes a day for writing stories OR you can write whenever you feel inspired or when you feel like reminiscing.

While documenting the stories, don’t forget to include the sad as well as the happy. The angry as well as the loving. You do not have to share all your stories, but you would like to remember them and to derive pleasure from the good ones and strength from the sad ones.

Go on. Write your stories. You are also welcome to share the process of documenting your heritage with me.

If you liked this post subscribe to my feed:

Inspiration Prompt #9 – Perspective

Monday, July 7th, 2008

On a recent “inspirational pilgrimage” on the internet I came across a fun little blog called “Little People”.

In this blog you can find pictures of tiny dolls situated in various positions on street scenes around the world. The photos are taken from different perspectives – up close and far away.

The close ups make the dolls look very realistic, but the far away photos are allowing you to grasp the right perspective of the tiny dolls against the magnitude of the street scene.

This blog is a very good example of the importance of perspective and the power perspective has on our minds. The importance of looking both up close and far away for getting the entire picture.

A more philosophical approach to this blog makes me think about us as tiny dolls, scattred around the world and being short sighted. We are keeping up with our daily routines without stopping and looking a bit farther away. This blog has made me put on my glasses and look a bit farther – what has it done for you? Do you care to share?

Creativity Prompt #9 – Get Inspired By The Color Wheel

Friday, July 4th, 2008

Getting started is many times the biggest obstacle. The first step is awkward. Staring at a blank page, overwhelmed by the scope or the complexity of the task can lead you to procrastination or to just give up. However, after you have taken the first step, the next ones are going to be natural and easy.

So how can you jump start your your creative process?

Back when I was working as a lawyer, I used to start with the outline. Starting with a familiar structure had made the first step a breeze and also helped me focus on the unique elements of the case I was working on. In the process of making a scrapbook page or any other crafty project, an easy way to get through that dreaded first step is using a template. Either use a template you have used and loved before or a template from a magazine or a book. The template can refer to either the layout or to the color palette of the project.

This week’s creativity prompt is focusing on using a color palette to jump start your work. After choosing the color palette you are already half way through and all you have left is picking up the corresponding supplies (which is FUN) and get creative. Unfortunately, choosing the “right” colors may take precious time away from your actual making time.

There are many shortcuts in coming up with a color palette. One way is by leafing through design magazines and picking up color combination that appeal to you or talk to you in some way. Another fun way of choosing colors for your projects is by using the color wheel, which is what this week’s creativity prompt is all about.

All you have to do is to find your favorite color (in my case it changes from time to time and is currently orange) on the color wheel and then pick up its analogous and complementary colors (the colors which are right next to it and the color opposite to it), and voilà– you’ve got your palette.

In the example below my anchor color is a darker shade of my favorite color (orange) and by following the above process I came up with the color palette and chose the supply accordingly.

This was my palette:

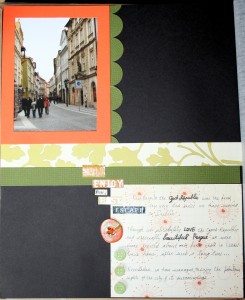
This is the layout I came up with:

Supply: Bazzil cardstock. Scenic Route patterned paper. Making Memories wordfetti. Love Elsie chipboard buttons. American Crafts Pigment Pro pen.

This is another layout I have made with the same palette. I have also used scraps from the first layout, thus killing two flies with one flick 🙂 :

Supply: Bazzil cardstock. Scenic Route and Basic Grey Patterned papers. Colorbox ink. Thread.

For some more color inspiration check out these links:

  1. For more information about the color wheel, check here, here and here.

  2. For a perpetual flow of color palettes, check here.

  3. For a visual color inspiration, check here and here.

So go ahead and make that first step by using the color wheel to choose a palette and share your creations with me by leaving a comment below.

Journaling Prompt #8 – Hold Back Time

Wednesday, July 2nd, 2008

“This is the Cave of Now, I told myself in strangely incoherent fashion. A drawing. A painting. Capture something forever. Can see it all at one time. No future, no past. Only a perpetual this-moment, only nowness.”

From “The Gift Of Asher Lev” by Chaim Potok

How many times have you said “if only I could live in that moment forever”. How many times have you wished you could hold back time. Every person has these moments. How many times have you wanted to seize the moment? A piece of time we wish to commemorate and be able to live forever.

As Chaim Potok had put it so nicely, a picture can capture a moment and keep it alive forever, but so can words. With our writing we can hold back time. We can commemorate a moment and keep it close to us, for as long as we can read it and for as long as others can read it after us. We can capture the moment, the experience, the feeling . We can capture it all in our writing.

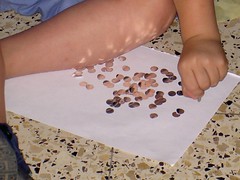
My nephew used to love to play with small stickers. You’d give him a sheet with a hundred stickers and in a matter of seconds, he had already randomly transferred all the stickers to a piece of paper. Capturing the moment that the sticker is still unstuck took a lot of patience and many trials with plenty of sticker sheets. However, without the words explaining the specialty of the moment, the picture is lacking. The words take the picture and make it a whole. Unite it into a total experience of a treasured moment.

This week’s journaling prompt is to hold back time with your words. Capture a moment with your journaling and treasure it forever. Make it a moment you can live in forever by reading and rereading it over and over again, whenever you wish to relive that moment.

I would love if you shared your treasured moments by leaving a comment to this post.

If you liked this post subscribe to my feed:

Inspiration Prompt #8

Monday, June 30th, 2008

Book Cover In this week’s inspiration prompt I invite you to get inspired by nature.

I have recently enjoyed watching a beautiful BBC production called “Planet Earth”. The footage and narration of the series just took my breath away. I was amazed and captivated by the greatness of our planet.

The beauty of nature is in its simplicity. The woods don’t buy designer clothes and don’t wear make up, but nevertheless they are colorful and fabulous. The flowers don’t read fashion magazines, but still they bloom in the most magnificent way – time and time again. The birds don’t go through vocal training, yet their twitter is harmonious and melodious. The beauty of nature is in the way it is doing its best to just be.

We can get inspired by nature’s efforts to be and to be its best all the time – even when no one is looking and when no one is listening. Even when nature is left alone it is still doing its best to be.

I would love to hear how nature inspires you. Please feel free to share your experience by commenting to this post.

Creativity Prompt #8 – Making Your Own Hardbound Journal

Friday, June 27th, 2008

A few weeks ago I mentioned the importance of treasuring ideas in an “inspiration well”. Having a place to go back to when you are feeling uninspired and blocked is important both for your creative process and your well being – it keeps you inspired, optimistic and energized.

Just taking notice of your environment and of all the wonders of the world around you and the beauty of your everyday life can help you feel more inspired and have a more relaxed life. However, writing those details down can help you stay focused and inspired also on gloomy days, when it is very difficult to be aware of all the goodness around you.

Another good reason for writing all the great ideas your mind (and your heart) yields is to perpetuate them on paper (or on your computer). When we have a fabulous idea we are consumed with it and cannot imagine we would ever forget it, but we do. No matter how fantastic and fabulous the idea is, life’s endless flow of information and duties can push away the greatest ideas.

Now, think about a journal that does not only keep your ideas but also helps you to come up with the ideas… That sounds like a great idea, doesn’t it? Well, in my case, making my own journal from scratch can do that for me.

This week’s prompt is making your own hardbound journal to inspire and to treasure ideas in it.

Supply –

  • Chipboard
  • Cutting mat + craft knife
  • Blank papers
  • Construction paper
  • Paper piercer
  • Needle + thread
  • Adhesive

Optional tools –

  • Brayer
  • Bone folder

Directions –

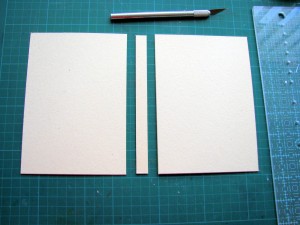
Cut two pieces of chipboard, the size of your desired cover and one narrower strip, the length of your desired cover and the width of your desired spine (about ½“ should do for the width).
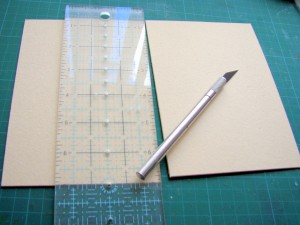
Cut the patterned paper 2” longer and wider than your cover chipboard pieces (an inch more in each side).
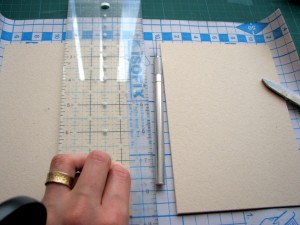
Adhere the patterned paper to each cover – use a brayer to insure the paper sticks well to the chipboard.
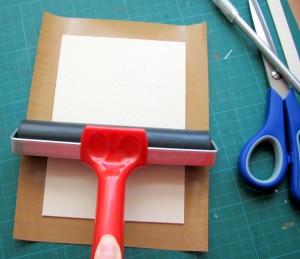
Cut the corners of the patterned paper – but not all the way to the chipboard.
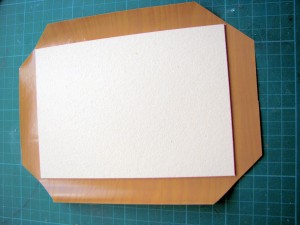
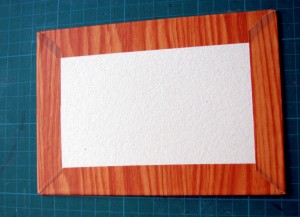
Adhere the patterned paper’s rims to the chipboard. (a bone folder can be helpful)
Cut a piece of construction paper to cover the spine, allowing an inch of a rim all over.
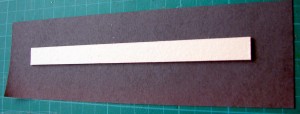
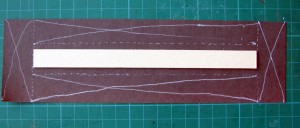
Adhere the spine to the center of the construction paper and apply glue only to the parts which are marked with an ‘x’ in the picture below. Allowing a ¼” of unglued paper near both sides of the spine.
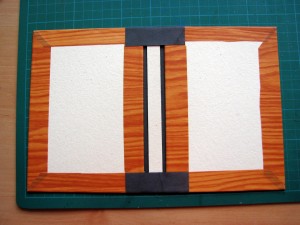
Adhere the spine to the cover pieces, as shown below.
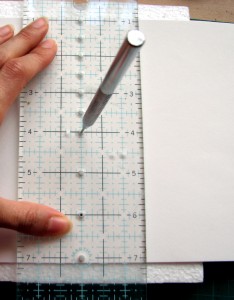
For the inserts of your journal cut the blank papers ½” shorter than the length of the spine and 2 times the width of the covers pieces, minus ½”. (That means that if your cover is 6” in length and 5” in width – you need to cut your blank papers at 5½” X 9½”).

Fold the blank papers lengthwise to find the middle mark and pierce it with 3 evenly spaced holes.
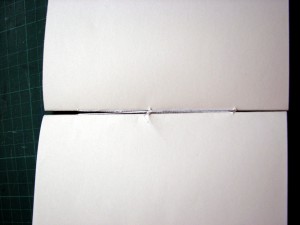
Attach all the blank papers together with a needle and a thread. If you have more than 10 inserts, it is better to make it in batches and attach each batch with the thread as well.
Cut a construction paper slightly bigger than the unfolded inserts (If we go back to the example above, it would be 5¾” X 9¾”). Adhere your inserts to the construction paper (I have used doubled-sided tape).
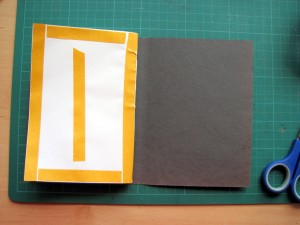
Adhere the covered inserts to the cover pieces, lining them with the outer cover. It is better to first adhere one side and than the next, by applying the glue and closing the cover on it.
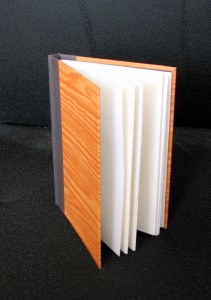
Enjoy your new journal and get inspired !!
Journaling Prompt #7 – Write a Fairy tale

Wednesday, June 25th, 2008

One of the best ways to spruce up your writing and boost your creativity is by coming up with a fairy tale. A fairy tale has no limits because it is created in an imaginative world in which you are making the rules. As the ruler you can do anything in it. The farther you go with your imagination, the better the fairy tale is.

Think about fairies and magicians and little-people and giants. Think about a completely different species, like J.R.R. Tolkien‘s hobbit.

A fairytale can be very short in scope, therefore suitable as a journaling prompt, an exercise for polishing your writing. You don’t need to write a full length novel (like Tolkien), even a one page story is enough for stretching out your imaginative boundaries.

To get inspired and jump start your own fairytale, you can visit these sites:

  1. Read from a collection of the Brother Grimm’s Tales;

  2. Try out this fun fairytale generator;

  3. Browse an assortment of fairy tales by different authors;

  4. Look through a compilation of Hans Christian Andersen’s stories and fairy tales.

Enjoy and share your fairytale by leaving a comment to this post.

If you liked this post subscribe to my feed:

Inspiration Prompt #7

Monday, June 23rd, 2008

“This bridge will only take you halfway there, to those mysterious lands you long to see. Through gypsy camps and swirling Arab fair, and moonlit woods where unicorns run free. So come and walk awhile with me and share the twisting trails and wondrous worlds Ive known. But this bridge will only take you halfway there. The last few steps you have to take alone.”

© Sheldon Alan “Shel” Silverstein

Visit Silverstein’s website
for more inspiration