/** Font types */

Author Archive

Creativity Prompt #16 – Guided Album

Friday, September 12th, 2008

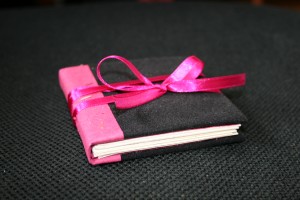
Guided Album

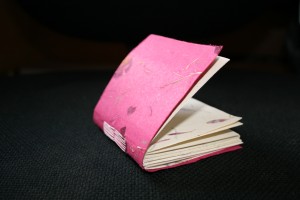
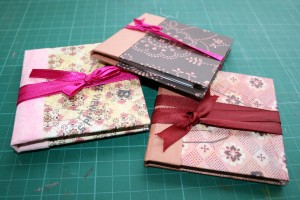
What is a guided album? let me show you but lets start with a story.

A good friend of mine has recently given birth to her third child. A baby girl named: Noa. Having two more children to take care of (and a job to come back to after the short maternity leave) means she has zero time on her hands. A guided album is the result of me thinking “what can I possibly give my friend for Noa’s birth?”

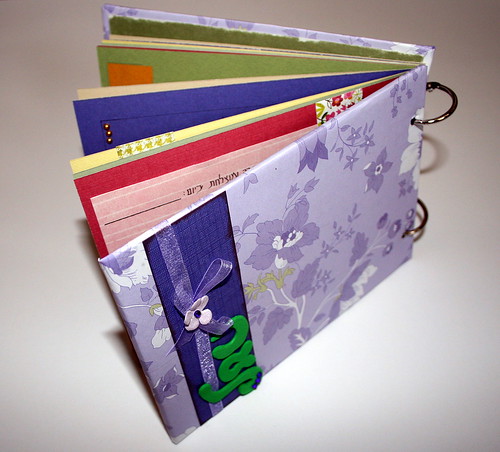
A guided album is an opportunity. It is a chance to preserve your memories and document your thoughts and feeling without going through the effort of making a traditional scrapbook.

A guided album is basically a mini album with journaling prompts written on premade journaling tags and a designated space to stick uncropped 4″ by 6″ pictures on.

A guided album can be a perfect gift for a busy mom, a bride to be or to serve as a “pregnancy pal”. (Just adjust the journaling prompts to the occasion). You can also make a guided album for yourself, as an incentive to preserve more memories, thoughts and emotions. Make it in advance, on your free time, for a busier time to come.

This week’s creativity prompt is to make a guided album.

Supply –

Tools –

Instructions –

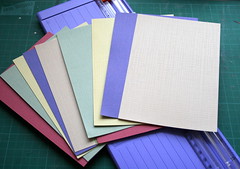
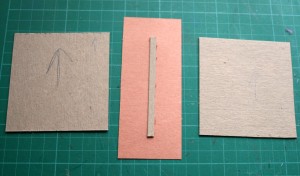
  1. Cut all the pieces of cardstock, chipboard and patterned paper to size:
    • 2 Cover pieces – cut chipboard at 5″ by 7″
    • 2 pieces of patterned paper to cover the chipboard – cut at 6″ by 8″
    • 2 pieces of cardstock, for the inside of the covers – cut at 4¾” by 6¾”
    • Inner pages – cut as many cardstock pages as you wish, at 4¾” by 6¾”
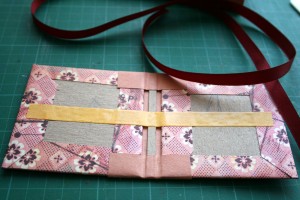
  2. Cover the chipboard pieces with the patterned paper.
    • First adhere the chipboard to the center of the patterned paper.
    • Then cut all the corners of the patterned paper, allowing a gap of 1/8″ between the chipboard edge and the base of the triangular cut.
    • Fold and adhere the remaining patterned paper’s flaps to the chipboard.
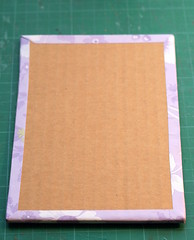
    • Adhere the two cardstock pieces to the inner side of the chipboard cover, to give it a finished look.
  3. Punch 2 holes on each cover, a ¼” from the middle edge and an 1″ from the top and bottom edges.
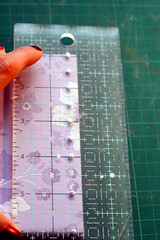
  4. Use the punched cover as a guide for marking the inner cardstock pages.
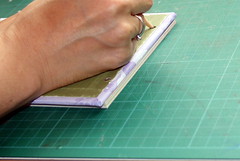
    You can then punch them all together with the Crop-A-Dile.
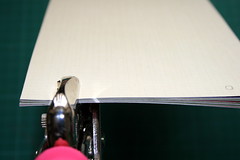
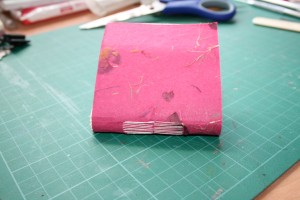
  5. Attach the binding rings and make sure they run through all the inner pages and both covers.

    The framework of the album is pretty much done…
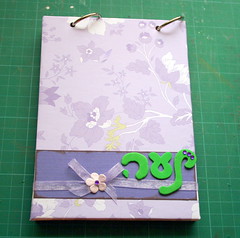
    Now we will proceed to what makes this a “guided album” …

  6. On each 2 pages spread, designate one page for a standard size picture (to eliminate the need to adjust and crop the photo) and one page for journaling.
    • Photo page – Take a standard size photo as a template and position it wherever you wish, then trace lightly with a pencil around your template. Avoid positioning the photo where the punched holes are, so you or your recipient won’t have to repeat the punches.
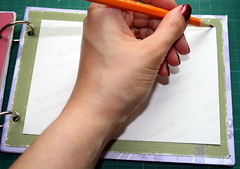
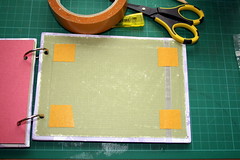
      Apply 4 strips of double sided tape to the corners of the pencil marks and leave the top cover on. This way, your recipient can just peel off the top cover and use it as photo-tabs, for a quick and easy assembling.
    • Journaling page – Write a journaling prompt and include a journaling tag (or stamped image) to write on.
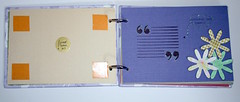
Some journaling prompts to consider –

  • Birth details: date/name of hospital/ weight/ height/ eye color/ hair color; etc…
  • Thoughts and feelings during the last week before giving birth. Worries/ hopes; etc…
  • The birth experience itself.
  • The first moments at home, with the new baby.
  • How did the siblings greet the new baby? What do they wish for the new baby?
  • A letter from dad.
  • A letter from mom.
  • First bath.
  • First smile.

You can browse the entire guided album here.

(To join the Creativity Prompt Flickr group click on the link at the right side bar.)

Share

How did you find the idea of the guided album? What would you use it for? Please share your thoughts by leaving a comment on this post.

Giveaway

Only two more days are left. To enter leave a comment here and give me some feedback.
Journaling Prompt #16 – Impossible Achievements

Wednesday, September 10th, 2008

You can do anything you set your mind into doing. I know you can.

There are many times when you (and I) are questioning our abilities and not realizing how powerful we really are. In these days stories of heroes like Dick & Rick Hoyt, a father and son also known as “Team Hoyt”, can motivate us and remind us that we can!

I was about to write a different prompt, but the Hoyt story had inspired me so much that I decided to change my original journaling prompt for today. I wanted you to be as inspired as I have been.

Tremendous achievements like this one of the Hoyt Team are keeping us in awe, but we must not forget our achievements – small ones and big ones alike. Our own achievements throughout the years can not only inspire us on bad days and respark our motivation, but can also inspire our posterity. Both objectives are important enough for us to take the time and write down our accomplishments.

This week’s journaling prompt is to make a note of our achievements.

5 Ways To Keep Track Of Your Achievements:

  1. Make a list. Jot down a simple list of all your accomplishments. List everything that comes in your mind. Do not belittle any of the things. Do not criticize them and do not consider whether anything is worthy of being listed. If you have done something that pops into your mind when you are thinking about you life’s accomplishments, than it belongs there.
  2. Use a time line. Different stages in life call for different challenges and also bring along different achievements. Make a simple thematic, as well as chronological, time-line. From childhood/through your teens/college/university/career/family and so on. Let the time line guide you through memory lane and write what where your achievements on each step. This process can provide an interesting outlook on life and on your personal development.
  3. Concentrate on 3 main achievements. Personally, I prefer to remember both small and big achievements. Many times things which are considered small now can take a turn later on and become much more appreciated. However, if writing down your entire history of achievements sounds too tiring and time consuming, than concentrating on the major ones is better than nothing. Think about 3 things that you are most proud of and write everything you can remember about them. Choosing just 3 accomplishments enables you to take your time and thoroughly document all the relevant details as well as the emotions which were involved – before/during and after the deed. Don’t forget to also mention how did that personal success contribute to you on the long run.
  4. Write a letter. Try a different take on commemorating your greatest accomplishments. You do not have to actually send those letters, but the different format might yield different set of emotions and a new perspective that you may appreciate afterward.

    • Write a letter to yourself. That method works well with recent accomplishments that you might forget in the future. Write down one major thing that you are proud of or a list of your recent accomplishments and mail it to yourself or tack it in a place you don’t frequently go to. You will be happy with the boost of confidence you will get once you reopen that letter.
    • Write a letter to your child or to your future child. In the letter include some of your main accomplishments. Describe the struggle you had experienced in achieving them and how the process itself, as well as the end result, had helped you to evolve.
    • Write a letter to the people on your journey. Write a letter to the supportive husband, friend or colleague who had helped you to achieve what you have achieved. Write how much you appreciate their help and support. Write a letter to someone who stood in your way. Write to your boss or to a former boss who did not believe in you and brag.
  5. Start a habit of awareness. One of the first posts on Creativity Prompt called for paying attention to “the little things” in life. If you haven’t done it already, adopt a new habit of awareness today. Start or finish each day with journaling about all the things you have achieved that day (or the day before). Write everything down and amaze yourself with how well you have actually done. Writing down everything from the day you were born may be overwhelming, but don’t let this staggering feeling stop you from starting a new habit from now on. After all – you deserve it.

What are your greatest accomplishments? Is it the little things in life or the huge successes that you are mostly proud of? Please share your thoughts with me and leave a comment.

Giveaway Reminder

Time is running out. Only 5 more days are left for a chance to win a free copy of “Unleashing The Creative Child Within You”. Leave a comment here with some feedback to enter.

If you liked this post subscribe to my feed:

Inspiration Prompt #16 – Authenticity

Monday, September 8th, 2008

If I am I because I am I, and you are you because you are you, then I am I and you are you. But if I am I because you are you, and you are you because I am I, then I am not I and you are not you.

–Menahem Mendel of Kotzk

Authenticity is the most important building block in leading a creative life.

Unfortunately, modern life does not give much room for authenticity. The fast pace of life, the strong wish to fit in and adjust to social conventions, the fear of criticism and ridicule – all are pushing us towards living the life we think we should live, rather than living our life authentically and allowing ourselves to roll the way we roll.

This week’s inspiration prompt is all about authenticity.

Follow these 2 easy steps to become more authentic:

  1. Let go of preconceived ideas. Fitting in and following conventions cannot lead to innovation. Great ideas are always conceived by thinking “outside of the box” and breaking all the rules. This is what “new” is all about. Forget about what other people think is right or wrong. Stop listening to what other people consider as ‘art’ or as “proper writing”. Make your own rules.
  2. Reconnect with yourself. After you have let go of popular conceptions (or misconceptions), you need to find your own voice. Think about what makes you “tick”, consider these questions:
    • What book do you revisit time and again?
    • What color or color combination appeal to your eye?
    • What song do you hear over and over again?
    • What images come to your mind when you are daydreaming?
    • Without any restrains of time and money (or gossip…), what do you see yourself doing in life?

    After you have found your own voice, nurture it and follow its advice – following your own voice and believing in it is the very definition of authenticity.

What do you think about authenticity? Do you feel like you are true to your self? Please leave a comment and share your thoughts with me.

Giveaway –

You can still win a free copy of my new e-book. Leave a comment here with some feedback on this blog to enter the giveaway.

Creativity Prompt #15 – Make Your Own Matchbox Journal

Friday, September 5th, 2008

Matchbox Journal

Making handmade journals has become a special hobby of mine. It all started with with the hardbound journal and kind of evolved with the micro version of journal cuteness. In this post I will show you how to make a matchbox journal and I promise you haven’t seen the end of “Journal Mania” yet 😉

Supply –

Instructions –

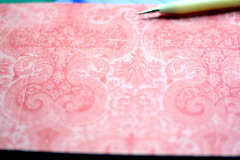
  1. Trim the cardstock to a 5 by 12 strip and score at 5, 5½, 10½, 11, then fold all the score lines. Use a bone folder to make crisp folds (you can also use the bone folder to create the score lines if you haven’t got a stylus).
  2. Cut 20 pieces of handmade paper, measured: 4¾ by 4¾.
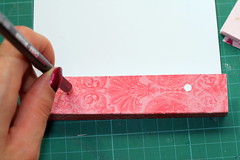
  3. Now we have some measuring to do – lazy people style … Collect all the inserts together and position on top of the small 1 flap. Make sure all the “layers” are aligned and centered and put the ruler on top. Now mark 2 points which are equally separated from each side.
    (I am sure the picture will do the “measuring method” much justice than all the mumble jumble of words)
  4. For marking the punch marks inside, just use the marks on the flap as a guide.
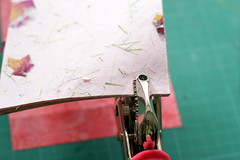
  5. Punch all the marked points with the Crop-A-Dile. As you can see, you can easily punch through all the inserts at once.
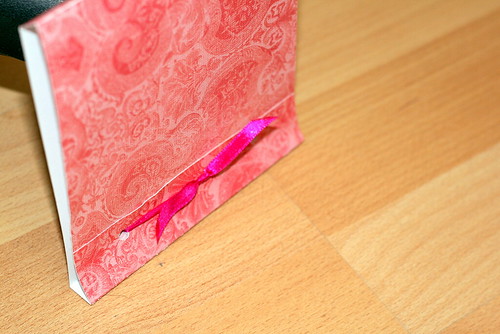
  6. Thread a ribbon from the flap, through the inserts, into the back cover and back.
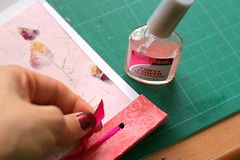
  7. The matchbooks journal is actually done, but I have an extra tip => after tying up a nice knot in the ribbon, apply nail varnish to the tips of the ribbon to prevent fraying.

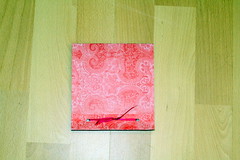
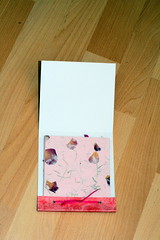
Enjoy your journal:

Front –


Inside –

What do you think about the matchbox journal? Did you find the instructions comprehensible? Please leave a comment to this post!!!

New Feature –

I have started a Creativity Prompt Flickr Group
to which you can submit your creativity-prompt inspired projects and you can also initiate a conversation on any relevant subject (including some Q&A or suggestions). You are all welcome to join.

Giveaway –

Do not miss your chance to win a free copy of my new e-book. Leave a comment with some feedback on this blog here to preserve your place at the giveaway.

Reblog this post [with Zemanta]

Journaling Prompt #15 – New Beginnings

Wednesday, September 3rd, 2008

Time to begin something new

September brings along many new beginnings. The new school year (for the students, teachers or parents among us). A new season. A fresh post-vacation start at work – whether at the office or at home. New releases of TV schedules and products as well as the beginning of the new year by the Hebrew calendar.

New beginnings are inherently flooding us with contrasting emotions. On the one hand we are filled with excitement and anticipation of the opportunity to start afresh; but on the other hand feelings of fear and apprehension are flooding us as well. The fear of change and the end of former phases in our lives.

A great way of dealing with the avalanche of ambivalent emotions is to write them down. Take your favorite pen and your favorite notepad and journal (am I the only one who has favorite pens + notepads?!?) and convey all these mixed feelings into the blank paper.

Writing everything down is not only therapeutic but can also help you to brainstorm a better beginning for yourself and your loved ones.

This week’s journaling prompt is to write about your beginnings.

  • What new beginnings are you facing at the moment?
  • What feelings does the new beginnings provoke in you?
  • What lesson would you like to teach yourself or your loved ones about dealing with beginnings from your past experience?
  • How are you going about your new beginnings? Do you have any special plans? Have you got some new resolutions for a fresh start?
  • What do you wish for yourself on your new beginning?

I will be very happy if you shared your thoughts about new beginnings with me. Please leave a comment to this post.

Do not miss your chance to win a free copy of my new e-book. Leave a comment with some feedback on this blog here to preserve your place at the giveaway.

If you liked this post subscribe to my feed:

Inspiration Prompt and a Giveaway

Monday, September 1st, 2008

I am delighted to announce the release of my first e-book: Unleashing The Creative Child Within You. This e-book is a result of my own journey to find and reconnect with my inner creative child. I invite you to join me on this journey so you too will be able to spark your inner creative child.

September the 1st is the perfect timing for starting a new learning expedition. Nothing provides such a refreshing boost like learning something new. It helps to open your mind to new methods and get inspired by the new possibilities – limited only by your own power of thought.

Without further ado I invite you to embark on a journey which will take you back to a state of creativity abundance, the same state you had had as a child.

  • Discover what have happened to your creative self.
  • Find out what inhibiting forces are intimidating your inner creative child.
  • Learn how to overtake these forces and spark your own creativity.
  • Read about the special traits that will help your creative self flourish.
  • Unleash your inner creative child by following ten simple exercises and enjoy your overflowing creativity.

Please feel free to read more about my new e-book. I am sure you will benefit from my e-book and it will help your creativity soar in ways you had never imagined were possible anymore.

For a chance to win a free copy of my e-book, leave a comment to this post with some feedback on my blog. You may comment until September 13th 20:00 (GMT) and the happy winner will be announced on September 14th.

Have a great weekend!!!

Time To Rest

Friday, August 15th, 2008

As a lawyer I was used to spend long hours at the office and rarely take any vacation. I brought myself up to a state of complete physical exhaustion and only in retrospective I understood how badly I have been treating my body and how wondrous it is that it hasn’t failed me yet and endured the torture I had inflicted on it.

During the last couple of months I have been preoccupied with the website and my first e-book and some other personal matters and again the stress levels and the physical exhaustion came back knocking on my door. Two weeks ago, my husband and I took a vacation to Iceland. We returned back home yesterday. Iceland is absolutely amazing, but the trip was physically challenging and I ended up coming back sick with a nasty cold, complete with a sore throat and a fever.

Myvatn (12)

Now it is time to remember my pledge and take some time off to heal. Therefore, I will not post any new posts until September 1st.

In the meantime you are more than welcome to enjoy the numerous free tutorials and prompts which are already posted.

I would also like to take an advantage of my time off and ask you to tell me what would you like to see more of in my website?

  1. Which tutorials are you interested in?
  2. Which journaling method or topics would you like to find here?
  3. How do you feel about the inspiration prompts so far?
  4. Would you like the website to have some new features or to cover other areas?

Please send me your much appreciated feedback and I will be back on September 1st with a new and improved site, based on your needs and wants.

Journaling Prompt #14 – Express Your Gratitude

Wednesday, August 13th, 2008


Expressing gratitude has a ton of positive effects on you.

  1. It helps you calm down.
  2. It makes you feel happier and more optimistic.
  3. It gives you a clearer view of the big picture in your life, a reminder of all the good things you’ve got but haven’t paid much attention to.
  4. Listing all the things you are grateful for can also give you an energy boost and put you in a good mood – no matter how you were feeling before.
  5. Another benefit of listing your gratitude and thinking positively is manifested by The law of attraction. According the the scholars of the “law of attraction” you attract what you think about into your life. Thus thinking positively brings positive things into your life.

There is always something to be thankful for. Always. Mostly the list of things to be thankful for is bigger than we can actually write or recollect in one sitting.

This week’s journaling prompt is to sit down, relax and start expressing your gratitude.

There are many ways to do so but in my opinion it is important to write it down, here are some ideas on how to write about your gratitude:

  1. Write down a list of things you are grateful for.
  2. Write about a person you appreciate in your life.
  3. Write a letter of gratitude to someone, expressing why and how you are grateful for him or her.
  4. Set a goal to express gratitude on a regular basis – daily/weekly/monthly… etc.
  5. Start a gratitude journal.

what are you grateful for? What is your favorite way of expressing your gratitude? Feel free to share your thanks by leaving a comment.

If you liked this post subscribe to my feed:

Inspiration Prompt #14

Monday, August 11th, 2008

There is a well known phrase saying that good things come in small packages

This saying is also true while speaking about art and creativity. Who says that a master piece must be spread over a huge canvas or carved out of an enormous piece of marble? Great art can be created on tiny canvases and the smaller the canvas is, the more willing you’d be to transform it. The blank canvas is much less intimidating when it’s measure 3.5″ x 2.5″, for a traditional ATC.

This week’s inspiration prompt is a website that offers weekly challenges, to be created on 4″X4″ Canvases. The website is called: 4X4 Friday and it is a great place to derive inspiration from and also to get a creativity boost.

Making a small piece of art can be the incentive your creativity has been waiting for. It isn’t as overwhelming as a larger scope project, but it is satisfying just as much.

Creativity Prompt #14 – Making A Teeny-Tiny Journal

Friday, August 8th, 2008

This prompt is a variation of the hard-cover journal tutorial. This time the journal is teensy-weensy and can easily be carried around in your pocket or your handbag. As an added bonus, the cuteness factor makes you want to actually use it all the time 🙂

Supply –

Instructions –

  1. Cut 3 pieces of chipboard, measured: 3×3, 3×3 & ¼ x 3 inches.
  2. Repeat the same process of making the hard-cover journal tutorial for covering up the covers and the spine and then adhering them together.

  3. The picture features a different micro-journal, but the technique is the same. I made a bunch of these cute minis and didn’t take pictures of each one separately.

  4. Adhere a strip of double sided tape along the middle of the journal’s binding, widthwise, to secure the ribbon on it. Adhere the ribbon and make sure it is long enough to be wrapped around the journal several times, when it’s closed.
  5. Cut the handmade paper to size (10 pieces measured: 2¾x5½ and one piece measured 2¾x6½).
  6. Fold each of the 10 pieces of the handmade paper in half and burnish the fold with the bone folder.
  7. Score the longer strip of handmade paper at 2¾ on each side, to allow an ½ inch spine in the middle. Burnish the folds with the bone folder.
  8. Pierce each of the 10 pieces of the handmade paper at the middle of the score line (fold) and again 1 inch to the top and to the bottom of the middle hole. All together, each piece should be pierced three times along the middle fold.
  9. Pierce the spine of the longer strip of handmade paper, as follows:

                  Â°Â°Â°Â°Â°Â°Â°Â°Â°Â°
    « 1 inch »
    middle       Â°Â°Â°Â°Â°Â°Â°Â°Â°Â°

    « 1 inch »
                  Â°Â°Â°Â°Â°Â°Â°Â°Â°Â°

    Basically what you need to end up with is a corresponding hole to each of the signatures’ holes
  10. Use the needle and thread to sew each separate signature to the spine.
  11. Attach the bound signatures to the cover of the micro journal, using double sided tape


Voilà!
Now, don’t be surprised if the journal starts multiplying …
Consider yourself duly warned 😉


Please share your own micro journal creations with me and don’t hesitate to ask for more information, either by commenting or by using the contact form.