/** Font types */

Author Archive

Journaling Prompt #29 – New Year’s Resolutions Series – Part 1

Wednesday, December 10th, 2008

Out of time
[Photo by:Orvalrochefort @ Flickr]

It is that time of year…

As directorates of corporations all over the world are busy preparing the annual reports and forecasts, we too are pondering on the year that has elapsed and the year that is coming. We too are preparing our annual reports and our forecasts, only we call it: “New Year’s Resolutions”.

In preparation for the year 2009 I have come up with a series of three journaling prompts, each one suggesting a different way to go about our new-year’s planning process:

  1. The traditional way – preparing a catalog of resolutions.
  2. The clairvoyant way – foreseeing the future.
  3. The action way – compiling a list of words to live by.

You may choose any of the above methods, all of them together or a different way altogether which works better for you.

This week’s journaling prompt is about the traditional way to embark on making your New-Year’s Resolutions.

The traditional way is the most straightforward of all methods and is best for people who know exactly what they want to achieve (i.e.: getting fitter) in the coming year or which things to avoid (i.e.: eating junk-food) etc.

Some pointers on how to compile an effective catalog of New-Year’s Resolutions:

  1. Write your resolutions on paper. Putting your goals down to paper anchors them. It gives you a sense of accountability and also gives you something tangible to go to when your resolutions will fade away as time goes by.
  2. Narrow the span of your resolutions. One of the glorious things about the holiday season is the great spirit it casts all over us. The sensation of a new beginning is exhilarating. One of the downfalls of the omnipotence feeling is the tendency of making unfeasible resolutions. Make sure that you choose goals that you can actually reach in the scope of a single year. “Becoming a Billionaire” is sweet, but start with “saving/earning at least [such and such] per annum”.
  3. Focus. This is just a different facet of how to deal with the “New Year’s Omnipotence Syndrome“. After you have narrowed down the scope of your resolutions, reduce the number of goals you wish to achieve. Our lives are hectic enough, don’t overfill your plate. Choose the 10 most prominent goals you are going to achieve in 2009.
  4. Share. The accountability factor is up again. After you have written down your list of resolutions, share them with your significant other, friends, parents, siblings, children or your internet friends – anyone who can make you accountable, and moreover, can support you through thick and thin and make sure you achieve your goals.

Share –

How do you come up with your New-Year’s Resolutions? Have you any tips to share? Leave a comment and share with me.

If you liked this post subscribe to my feed:

Inspiration Prompt #29 – Cherish The Passing Time

Monday, December 8th, 2008

Passing time

“Right now a moment of time is passing by…
we must become that moment.“
Paul Cézanne

I am trying to constantly keep the value of the everyday in my mind. To cherish my everyday, I break it down to each passing moment and get the most of it. Time passing will not return and lost moments will not be found again.

Share –

How do you cherish the passing time? Share your thoughts and leave a comment!

Have a great week!

Creativity Prompt #28 – The Art Of Decoupage

Friday, December 5th, 2008

Découpage Art

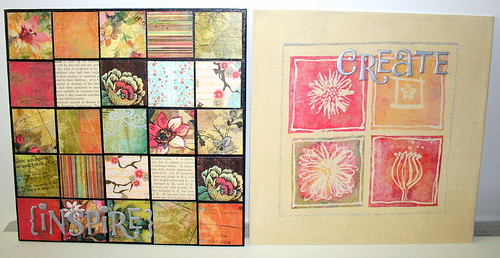
Découpage is a fantastic technique of paper piecing that helps us to create impressive art creations quickly and easily, while actual painting & drawing are unnecessary. This is also a fabulous way to use all your small paper scraps. [or holiday cards’ cut-outs…]

I have been using this technique for quite a while but only recently Meital, a childhood friend of my husband, suggested that I should make a tutorial on this technique, so here you go:

Supply –

Step by Step Instructions –

Napkins Découpage –

  1. Go through your stash [if you’re like me and you’ve got a stash…] and choose a napkin with an interesting illustration. I chose a napkin with some flower illustrations. Each napkin usually has 4 prints.
    The napkin I chose
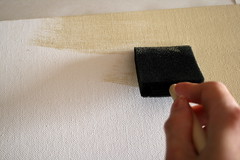
  2. Next, you need to paint your canvas. Pick a color that goes well with the illustration on your napkin. Using a foam brush, apply an even coat of the acrylic paint to the canvas. [When working with napkins and other light-weight papers it is better to use a very light color, otherwise the illustration will get “absorbed” and lost in the background.]
    Painting the canvas with an acrylic paint
  3. While the canvas is getting dried, cut the illustration from the napkin and separate its layers so you end up with the very top layer. You can discard the rest of the layers [it’s recyclable!]
    Cutting the illustration off the napkin
  4. After the canvas is completely dry arrange your cut-outs on it in a way that pleases your eye. [After applying the glue or the gel medium figuring out the placement of your cut-outs will get trickier.]
    Figuring out the placement of the illustrations
  5. Then, when you are pleased with the composition, apply the Mod-Podge glue generously with the foam brush both below and above the cut-out, as the glue works as a sealer as well as an adhesive.
    Applying the glue to the canvas and on top of the cut-out
  6. Repeat the gluing and sealing process with all your cut-outs and make sure you apply an even coat of glue and going with the brush at the same direction all over. When you are finished and the glue has completely dried you can embellish your canvas with alpha stickers and glitter glue or anything else you can think of.
    Finished canvas

Paper Scraps Découpage –

The process is basically the same, only you can use any color for the background. Therefore I am not going to be as verbose…

  1. Paint your canvas.
    Painting the canvas
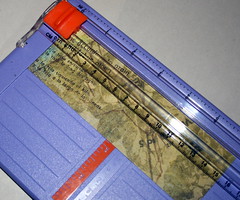
  2. Choose your scraps and cut to size. On a 10″ by 10″ canvas I used 25 pieces of patterned paper, cut at: 1 7/8″ by 1 7/8″.
    Cut the paper to size
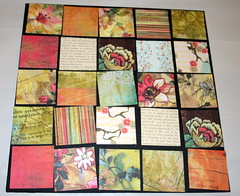
  3. Figure out the placement of all your paper cut-outs.
    Figuring out the placement of the paper scraps
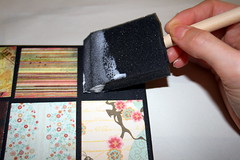
  4. Apply glue or gel medium below and on top of each piece of paper.
    Applying glue
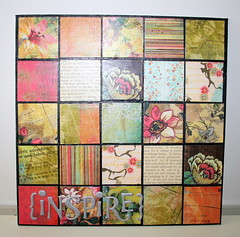
  5. Finish off your canvas with your favorite embellishments and enjoy your art!
    finished canvas

Enjoy!!!

If you have any question, suggestion or remark – don’t hesitate to contact me – either leave a comment, use the contact form or start a new thread on the Creativity Prompt Flickr Group!!!

I would also be very happy to see your artistic creations, so don’t be shy and share 🙂

Journaling Prompt #28 – Observing The Holiday Season

Wednesday, December 3rd, 2008

Have a Holly Jolly Christmas [Photo by: Lin Kristensen, @ Flickr]

Everything is changing during the holiday season. Life takes a festive coat out of its closet and wear it for at least a month or so. Everything looks differently, the food is different, there is a unique aroma in the air and a one-of-a-kind mood – a jolly holiday mood. The best description I can find for the total effect of the holidays is: Merry Everything“.

For this week’s journaling prompt I ask you to open your eyes and register all the changes the holiday season brings with it.

Don’t let those fantastic changes slip by unnoticed. Don’t rush through that fantastic season, but take heed of every little thing that is different from your everyday life.

A while back I posted a series of journaling prompts designed to hone our observation skills:

Use those observation skills for recording the impression that the holiday season leaves upon you. If you followed the observation series before and wrote down your observations, you can also contrast and compare the everyday life to the festive days of the holidays.

Share –

Leave a comment and share your observations of the holiday season with me.

If you liked this post you may want to subscribe to my feed:

Inspiration Prompt #28 – The Art Of Receiving

Monday, December 1st, 2008

For every beauty there is an eye somewhere to see it.
For every truth there is an ear somewhere to hear it.
For every love there is a heart somewhere to receive it.
by Ivan Panin

The Art Of Receiving The art of receiving is a skill I have not yet mastered.

Many times I struggle with the notion of accepting a gift – be it a material gift or a gift of a kind word – I don’t seem to think I deserve it, therefore I often cannot let myself enjoy it.

But I am working on it…

I want to open my heart and receive the love. I want to give myself permission to be worthy of the gifts I receive along the way. I want to acknowledge my merits. I want to allow people to give by becoming more competent in accepting their gifts.

I invite you to join me on this journey of mastering the art of receiving and ask you to give yourself permission to accept gifts.

Share your thoughts and experiences with me and leave a comment to this post or contact me.

Creativity Prompt #27 – How To Make A Colorful Mini-Book

Friday, November 28th, 2008

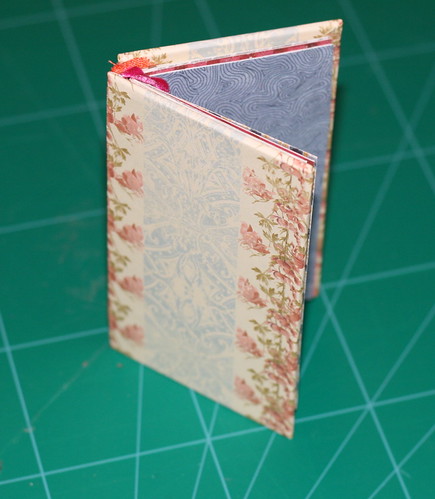
Colorful Mini-Book

For this weeks creativity prompt I have got a cute project with a unique “measurement method“. If you want to learn how to create this whimsical & colorful mini-book – read on:

Supply

  • Patterned paper
  • 2 chipboard scraps. [use the chipboard that comes with your craft supply or with your writing pads or even cut 2 pieces from a cardboard box]
  • Ribbon (optional)
  • A scrap of fabric for the spine (optional).
  • Glue stick
  • Double sided tape
  • Tape runner

Tools

  • Paper trimmer
  • Bone folder
  • Ruler
  • Craft knife + Self healing mat
  • Regular office stapler

Step By Step Instructions –

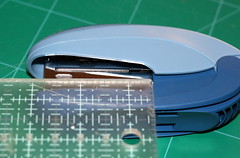
  1. To determine the size of the pages – measure the width of your stapler’s “arm”. [I did promise a unique measurement technique…]
    Unique measurement technique
  2. Next, determine the desired height of your mini-book [everything goes] and cut an even number of patterned papers at your desired height and double the width of your stapler’s “arm”.
    Cutting your patterned paper to measure - preparing the inserts
    My stapler’s “arm” width was 2¼” and I wanted the height of the mini-book to be 5″, so I cut my patterned papers at 5″ by 4½”
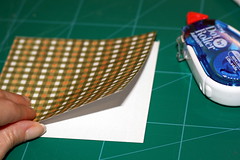
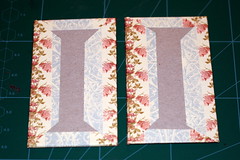
  3. Adhere every two pieces of patterned paper together – back to back – to create your inserts. [or use double sided cardstock…]
    Adhering patterned paper together - back-to-back
  4. Score each insert at the midpoint, lengthwise. [It should measure the same as your stapler’s “arm”. Mine is 2¼”.]
    Scoring the inserts
  5. Stack all your inserts together and staple them twice in the middle crease to create your signature. This is when all your measurements are going to make sense…
    Stapling the signature
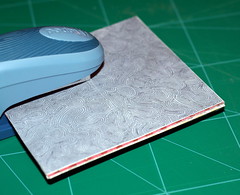
  6. Next cut your chipboard scraps ¼” taller and wider then each page of your signature. [mine are: 5¼” by 2½”.]
    Cutting the chipboard to size
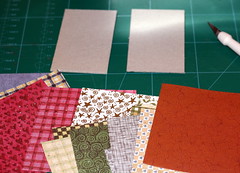
  7. Now you need to cover your chipboard pieces:

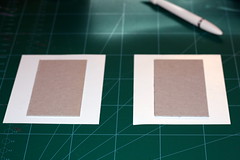
    First cut 2 pieces of patterned paper (or fabric) which are at least 1″ taller and wider than your chipboard pieces. Then, using a glue stick, adhere the chipboard pieces in the middle of the patterned paper pieces.
    Adhering the chipboard to patterned paper

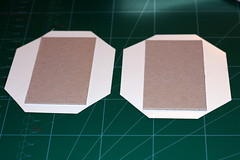
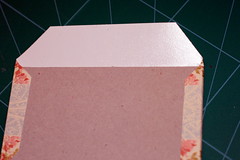
    Next, cut all the corners of your patterned paper and create a triangle whose base is about an 1/8″ away from the chipboard’s corners.
    Cutting the patterned paper's corners for the cover

    First adhere two flaps which are opposite to each other.
    Folding the opposite flaps of the cover

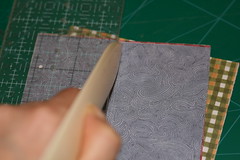
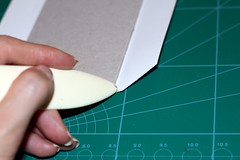
    Next, tuck the corners of the remaining flaps with the tip of your bone folder. This is going to give your cover a more professional look.
    Tucking the corners of the remaining flaps

    Adhere the remaining flaps to the chipboard, and your covers are ready.
    Finishing the cover

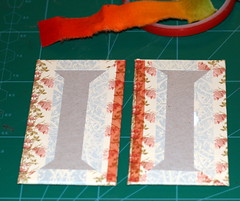
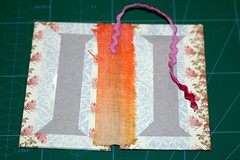
  8. Adhere a scrap of fabric [the same height as your book – mine is 2″ by 5″] to the inner side of your covers with a strong double sided tape. This is going to become the spine of your mini-book. This step is optional.
    Attaching a fabric strip to create the spine of the book
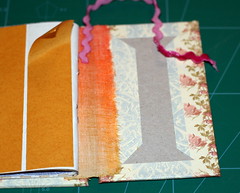
  9. Adhere the ribbon to the spine – the thinner the ribbon is, the better. This step is also optional and is going to provide your mini book a built-in bookmark.
    Attaching the ribbon to the spine as a bookmark
  10. Finally, attach the signatures to the cover with a strong double-sided tape and enjoy your colorful mini-book.
    Adhering the signatures to the cover

Enjoy!!!

If you have any question, suggestion or remark – don’t hesitate to contact me – either leave a comment, use the contact form or start a new thread on the Creativity Prompt Flickr Group!!!

I would also be very happy to see your own mini-book creations, so don’t be shy and share 🙂

Journaling Prompt #27 – Record Your Favorite Playlists

Wednesday, November 26th, 2008

music
[Photo by: Ira Mejías, on Flickr.]

Music is a powerful tool. It can change your mood. It can convey a message of love. It can walk you through memory lane. It can get you into the holiday spirit. It can make you dance or sing along. Music is powerful indeed. This is why I believe it is important to make a note of your favorite playlists.

This week’s journaling prompt is to jot down several of your favorite playlists.

You can break your journaling down by the following tags:

  1. 10 of your all time favorite songs.
  2. Your favorite childhood songs.
  3. The songs that most remind you your family.
  4. Your favorite holiday playlist.
  5. Top 10 love songs.
  6. Songs that makes you go ahhhhh… What do you listen to when you want to RELAXXXXX?
  7. Which were the most favorite songs you’ve listened to in the past week?

Share –

You can learn some more about my favorite music from my Last.FM profile and see for yourself how eclectic a playlist can be…

Now it’s your turn to share, leave a comment and share some favorite tunes with me.

Feel free to copy & paste the above “tag-list” to your own personal blog, just don’t forget to mention this post for good measure 😉

If you liked this post subscribe to my feed:

Inspiration Prompt #27 – People That Enrich Us

Monday, November 24th, 2008

People Photo by: Milivoj Sherrington (Flickr)

“There is no such thing as a ‘self-made’ man. We are made up of thousands of others. Everyone who has ever done a kind deed for us, or spoken one word of encouragement to us, has entered into the make-up of our character and of our thoughts, as well as our success.”
George M. Adams

Coming back from an homeland vacation, Adam’s words are 10 times more significant to me. I am definitely made up by the people in my life. My loving family. My understanding friends. My teachers. My nephew’s broad smile. The excited wag of the pet’s tail. The conversation around the dinner table. Sitting with a friend at a favorite cafe and losing any sense of time. A mosaic of people (and pets – it’s not an editing error) that shapes me and makes me the person I am at any given moment.

Share –

Do you believe that you are made by the people in your life? who is the most significant person in your life (or persons)? Leave a comment and share your thoughts.

Creativity Prompt #26 – Card Set Holder

Friday, November 21st, 2008

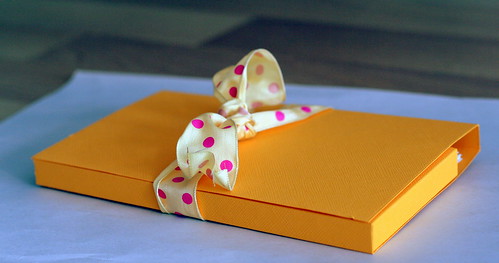
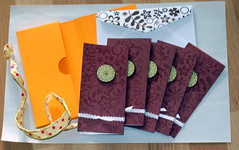
Card Set Holder

This card set holder is the perfect handmade token of appreciation to anyone you would like to give thanks to. It takes minutes to assemble and you can use inexpensive envelopes which are available at any convenient store and a couple sheets of cardstock (each sheet yields 4 cards, measured 3″ by 6″) and the holder accommodates 5 cards & 5 envelopes. The holder itself is made out of one sheet of cardstock.

So without further ado lets jump right into this week’s tutorial:

Supply –

Instructions –

  1. Download the card set holder template. Note that the template isn’t scaled but only designed to give you an idea of the measurements of all the folding and cutting that needs to be done. So don’t print out the template.
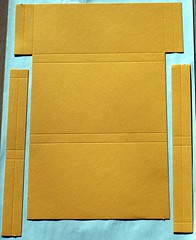
  2. Trim one sheet of cardstock to a 9″ by 12″ piece.

    • Along the 12″ side, score your cardstock at 1/2″, 1″ on each side.
    • Flip your cardstock to the 9″ side and score at: 4″, 4 1/2″, 8 1/2″, 9″.
    • Trim along the one inch score line on each side and keep only the 3″ flap at the very end.
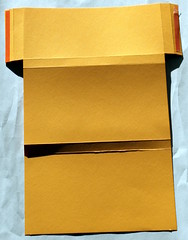
      Cutting and scoring
  3. fold all the scoring lines and burnish with a bone folder.
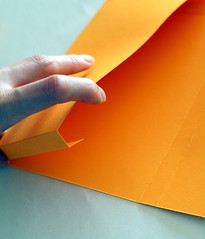
  4. Apply double sided tape to the two outer flaps.
    Applying double sided adhesive
  5. Adhere the outer flap to the inner part of the first 4″ section of your cardstock. Repeat on both sides. That would form the pocket of your card set holder.
    Creating the card set holder's pocket
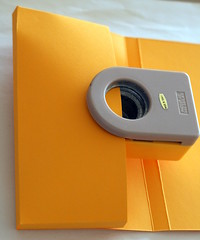
  6. Use a circle punch to punch out half a circle from the middle of the pocket. That would give your card set holder a finished look.
    Punching the pocket of the card set holder
    [You could, and perhaps should, punch out the circle before adhering the pocket. It would be much easier to punch your cardstock while it’s still flat…]
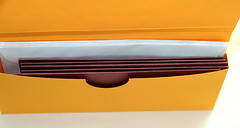
  7. Insert the envelopes and cards inside the pocket and your pretty gift is ready to be given.
    Filling up the holder with the cards and envelopes
  8. For an added interest and a finished look you can embellish your cards and envelopes to match by using the same design on both.
    Embellishing the cards and envelopes

Enjoy!!!

If you have any question, suggestion or remark – don’t hesitate to contact me – either leave a comment, use the contact form or start a new thread on the Creativity Prompt Flickr Group!!!

I would also be very happy to see your own creations, so don’t be shy and share 🙂

Journaling Prompt #26 – Give Thanks To Yourself

Wednesday, November 19th, 2008

30 Days of Gratitude- Day 8 [30 Days of Gratitude- Day 8 by aussiegall, on Flickr]

Showing your gratitude is an important habit to incorporate in our day-to-day lives, rather than once per annum. Having said that, it is also very important to have a yearly reminder to stop our daily race and be thankful for everything that we have, taking nothing in our life for granted.

However, this year I suggest to go about it a bit differently. Use this year’s reminder to give thanks to yourself. You are often forgotten in the process of expressing your gratitude, let us fix that this year.

Have no doubt, I am not underestimating any higher-power you believe in or any of your friends and family or any of your heroes, that have helped you come thus far. On the contrary, you should never stop appreciating and being grateful to them. I am a great supporter of showing your gratitude, perhaps with a handwritten letter of appreciation or any other way that suits you.

Still, showing gratitude to the ones you believe in is easy and mainstream. Giving thanks to yourself – is not.

Therefore for this week’s journaling prompt I urge you to take a few moments and jot down everything in yourself that you are thankful for.

Share –

What do you have to be thankful for? leave a comment and share your self-gratitude feelings.

If you liked this post subscribe to my feed: