/** Font types */

Author Archive

Creativity Prompt #32 – Alter A Chipboard Children’s Book

Friday, January 2nd, 2009

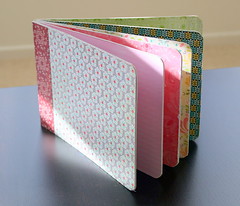
Altered Chipboard Book
On December 4th my husband and I landed in California after an 11 hours flight and were welcomed by our wonderful friends. They’d hosted us for over a week, until we found an apartment, and drove us around for all our initial errands. I am very thankful for their help and hospitality. On one of our first shopping sprees, Andrea, my good friend, has introduced me to the one dollar bin at Target, where we bought a children’s chipboard book.

The idea of altering a children’s chipboard book has sat in my mind for quite a while and as soon as I saw these one dollar books at Target, I knew I have a project at hand. I made Andrea buy one as well, so she would join me for the “craft-session” and I enjoyed her talented company a lot.

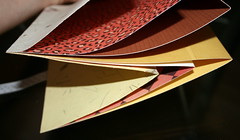
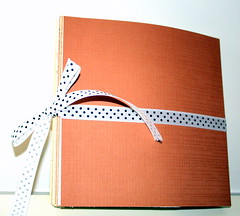
So for this week’s creativity prompt I will show you how I turned this:
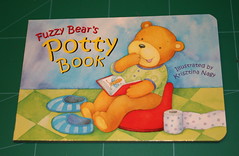
Original Book

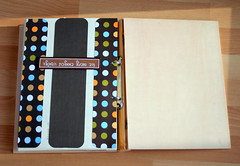
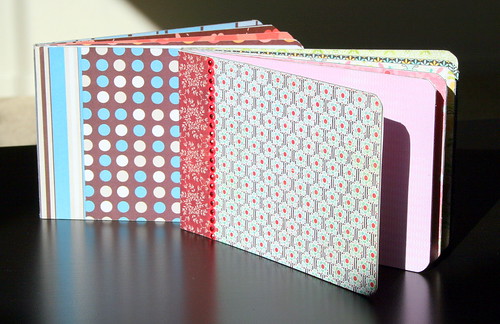
Into that:

Altered Book

Supply –

  • Chipboard book.
  • Patterned paper.
  • Glue stick.
  • Craft Knife & Cutting mat.
  • Ruler.
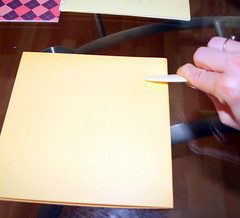
  • Bone folder or a paper trimmer with a scoring blade.

Step By Step Instructions –

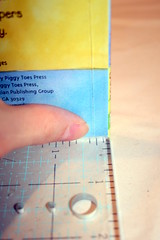
  1. First, measure the size of each page, the spine and the page fold. Write down the numbers on a scrap of paper.
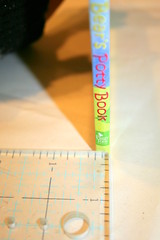
    measuring the spine
    The Spine.
    measuring
    The Page Fold.
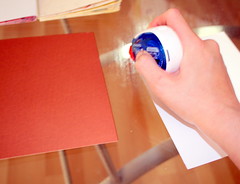
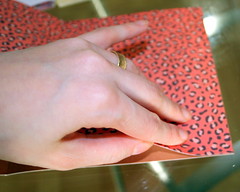
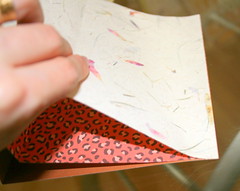
  2. Cut the patterned paper to the page’s size and adhere them on each of the book’s pages with a generous amount of glue stick. Make sure that the glue is completely dry before moving to the next page, otherwise, the pages will stick together and tear.
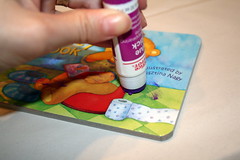
    gluing
    Laying paper on glue
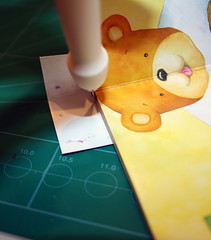
  3. After adhering each patterned paper, flip the book and cut the excess paper with a sharp craft knife. Make sure not to glue two papers to both sides of the same page before cropping the excess out!
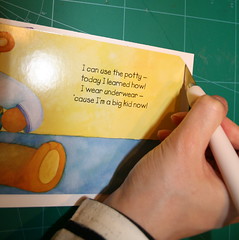
    cutting the excess paper
  4. When applying the patterned paper to the cover, stop at the first score mark on each page. (One is probably flash with the spine and the other with the page’s fold.)
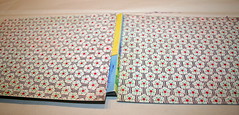
    The cover
  5. To conceal the spine start by trimming a patterned paper to the same height of the book and 2″ wider than the spine.
  6. Next, score the strip at 1″ on each side (lengthwise) – that should create the spine’s score lines.
  7. Then score the strip again on one side at the same size of the page’s fold that you have measured on step 1. Make the score line, measuring from the spine’s score line to the edge.
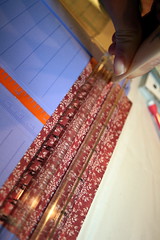
    Scoring

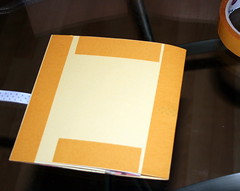
    You should end up with a strip of patterned paper which looks like that:
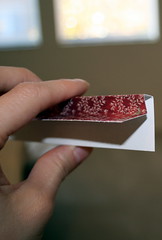
    The spine cover

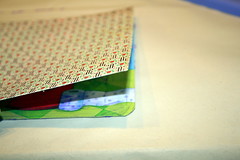
  8. Glue the patterned paper strip to the book, using a glue stick.
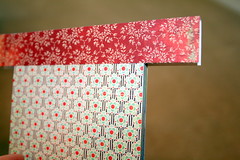
    Gluing The Spine Cover
  9. Cut the excess with a craft knife.
    Cutting the excess paper off the spine

Voilà! You are done and free to embellish the altered book as you wish.

Enjoy!!!

If you have any question, suggestion or remark – don’t hesitate to contact me – either leave a comment, use the contact form or start a new thread on the Creativity Prompt Flickr Group!!!

I would also be very happy to see your own altered books, so don’t be shy and share 🙂
Journaling Prompt #32 – A Year In Review

Wednesday, December 31st, 2008

Year end
Today, on the year end, just before you are about to embark on achieving your new year’s resolutions, it is the perfect time to review the past year. It is time to look at 2008 under a magnifying glass and take notes.

Leave criticism and self bashing out of this report! Only constructive inspection is allowed and for every fault you can find – add at least two admirable achievements you’ve had during the past year.

This week’s Journaling Prompt is to thoroughly review the year 2008 and to put your little trip down memory lane in writing.

The following questions may offer you some guidance:

  1. If you’d sum up the year 2008 in one sentence – what sentence would it be?
  2. What is your most joyous memory from 2008?
  3. What event has been most remarkable for you in 2008?
  4. Which of your 2008 goals did you meet?
  5. What resolution was the hardest to keep? Why? Which was the easiest resolution?
  6. In which ways have you developed and which were your setbacks?
  7. If you were able to change one thing in the past year, what would it be?
  8. What would you not have changed, had you given the opportunity (Despite some harsh circumstances)? Why?
  9. What decision or decisions you’ve made in 2008 were most influential?
  10. Who were the main players in your life in 2008?
  11. Which new friends have you met in 2008? Have you let a friendship get loose? Why?
  12. What book was your 2008 favorite? What song? Which movie?
  13. What new things have you tried in the past year?
  14. What traditions did you keep in 2008? Which traditions did you miss?
  15. What was the most important lesson you’ve learned in 2008?
  16. What new things have you learned about yourself in 2008?
  17. What were the greatest challenges that ran across you in 2008?
  18. What/who motivated you throughout the year?
  19. What major change has 2008 brought to you or do you feel you’re at a status-quo?
  20. If you’d sum up the year 2008 in a single word – what word would it be?

Hopefully these questions has assisted you in your year end review. You might have a clearer view of what your 2009 is about to be (your BEST ever).

Share –

For me 2008 has been blissful albeit challenging. I have lived most of 2008 in Dublin, Ireland – a country I had not been to before. I have come to love the friendliness of the Irish people and to admire the bright green slopes in the Irish country side. Fresh out of my wedding, I moved to a place far away from all my family and friends and have established the strongest relationship with my amazing husband. I have visited beautiful countries, including Iceland – a mesmerizing land. On top of that, I have left a job I was good at (being a lawyer) and started this blog and authored a great book on creativity, with both I am very proud.

2009 has a pretty big pair of shoes to fill…

How about you? How was your 2008? Share bits and pieces from your year end review by leaving a comment to this post.

If you liked this post subscribe to my feed:

Inspiration Prompt #32 – A New Year Brings A New Opportunity

Monday, December 29th, 2008
New Year - New Opportunity
[Photo by: Jesus Solana]

When I was young my big sister used to tell me that I should try to behave extra nicely on the New Year’s Eve & day as the way I behave then reflects on the way I conduct myself throughout the entire year. That’s a lot of pressure to put on a young girl’s small shoulders. The ability to ruin the entire year ahead based on a single day of misconduct…

But you know what – it isn’t true. There isn’t one day which can influence the entire year and the days of the year are never homogeneous. There are bad days and there are good days. Ups and downs.

One thing that the New Year Eve does represent for me, though, is: opportunity.

An opportunity for a change. An opportunity for taking your own life under control and taking responsibility. An opportunity to stop the vicious cycle of a self debilitating dialogue that goes like this: “If I didn’t manage to {insert something you really want in your life in a verb form}, I am never going to do it.” or “If I didn’t stop {insert a bad habit}, I’d never stop it”.

You can and you will!!!

This week’s inspiration prompt is all about the physiological window of opportunity that the new year brings along.

Grab this opportunity and take control – Be powerful!

Share –

What does the new year’s eve represent for you?
What opportunities do you see in the coming year?

Leave a comment and share your thoughts and opinions with me!

Creativity Prompt #31 – Make A Free Standing Calendar

Friday, December 26th, 2008

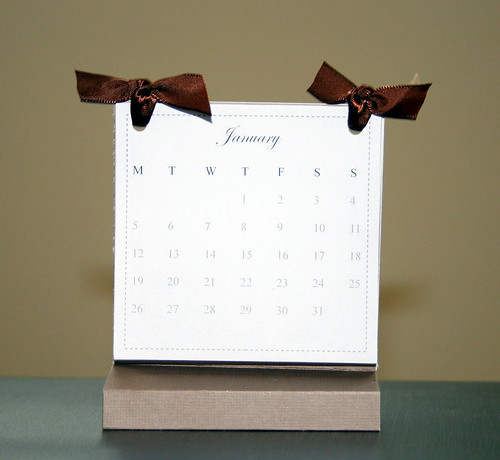
2009 Calendar

The year 2008 is coming to an end. It is time to start planing the glorious 2009 which is right at the corner. Wouldn’t it be wonderful to start the year to come with a handmade calendar, to stand beside you as a reminder of how awesome you are all year long. If you are interested – keep on reading for a step-by-step instructions and a FREE 2009 Calendar download.

Supply

  • 2009 Calendar template (download by clicking on the link above).
  • Cardstock
  • Double Sided Tape
  • Loose leaf rings/ribbon (I prefer the rings, but I didn’t have any at home, so I used Paper Trey’s ribbon instead)

Tools

  • Paper trimmer
  • Bone folder
  • Ruler + craft knife + cutting mat

Step By Step Instructions –

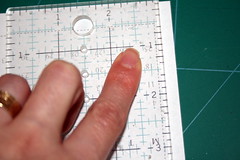
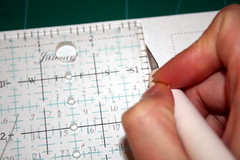
  1. Print the calendar template (either on cardstock or a regular copy-paper). Cut down the individual months’ boxes with an 1/8″ margin from the dashed frame. Use the marks on your ruler for the alignment and cut with a craft knife.
    Aligning the ruler for cutting
    Cutting
    Work on each of the printed pages individually, as they are not perfectly aligned to each other.
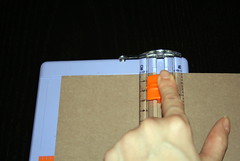
  2. Cut your cardstock at 3½” by 12″.
    Cutting the cardstock for the calendar's stand
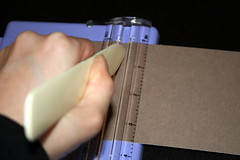
  3. Score your cardtock strip (widthwise) at: 3½”, 4½”, 5″, 7″, 7½”, 8½”. I used the paper trimmer and a bone folder for the scoring.
    Scoring the cardstock
  4. Fold all the score lines and burnish with the bone folder.
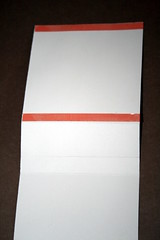
  5. Apply two strips of strong double sided tape to both ends of one of the 3½” flaps. It doesn’t matter which of them you choose to apply the tape to.
    Applying adhesive
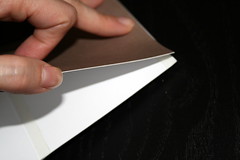
  6. Align both 3½” flaps together and adhere them. That should form the calendar’s stand.
    Adhering the calendar's stand
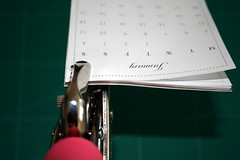
  7. Group all the months’ boxes together and align them on the top flap of the calendar’s stand. Punch 2 holes right below the top edges of the dashed frame. (I was using a crop-a-dile).
    Punching the holes through the calendar's pages and stand
  8. Attach all the layers together with the loose-leaf rings or the ribbon and you are done!!!

Enjoy!!!

If you have any question, suggestion or remark – don’t hesitate to contact me – either leave a comment, use the contact form or start a new thread on the Creativity Prompt Flickr Group!!!

I would also be very happy to see your own handmade calendars, so do share 🙂

Journaling Prompt #31 – New Year’s Resolutions Series – Part 3

Wednesday, December 24th, 2008

Pencils and moleskines
[Photo by: Paul Worthington, @Flickr]

This is the third (and last) prompt in a series of journaling prompts dealing with New Year’s resolutions.

By now we have covered the traditional way of forming new years resolutions and the clairvoyant and more inspirational way of going about it.

This week’s journaling prompt suggests a third method of laying down your new years resolutions, which is the Action Way.

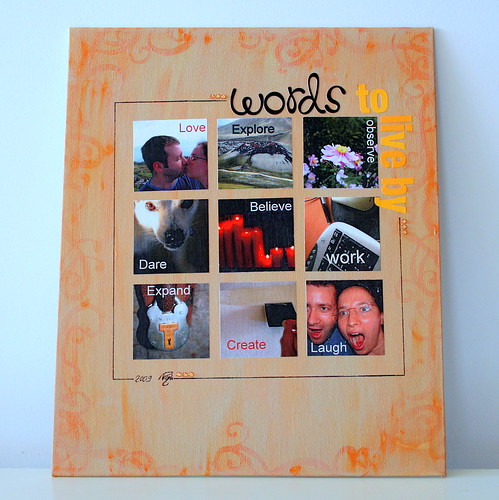
The action way is very effective for a more visual person (like myself) who needs to actually see a picture that stands behind a word in order to get to the bottom of it. This method is also fantastic for anyone who finds it difficult to follow a strictly formed resolution (like myself…) as it yields more amorphous goals, which can be interpreted and changed as life changes through time, but still provide general guidance.

The principle of the action way is to compile a list of “words to live by“, which is a short list of single action words that you would like to do more of in the coming year. The next step is to pick a corresponding picture for each action word and make a vision board – other digitally or on a hard-copy – of your action words and corresponding photos.

I have used Flickr’s mosaic tool to make a mosaic out of my corresponding photos and then downloaded it to my computer and added my action words to each picture with Picasa 3. I printed the edited image with a laser jet printer, cut out each individual image and made a vision board, using Decoupage.

This is my vision board for the year 2009:

New Year's resolutions - the action way - my vision board

Share –

How are you going about making your New Year’s Resolutions?
Which method of the last three journaling prompts did you find most effective for you?
Have you prepared your own vision board for the year 2009?
What is your most prominent resolution for 2009?

Leave a comment and share your thoughts!!!

For all of you celebrating Christmas today I wish a very MERRY CHRISTMAS!!!

If you liked this post subscribe to my feed:

Inspiration Prompt #31 – The Power Of Light

Monday, December 22nd, 2008

Hanukkah Menorah [Photo by: Allison Jennings]

Jewish people all over the world are now celebrating Hanukkah, which is also known as: “The Festival Of Lights”. There is a traditional holiday song which demonstrates the power of light, by the way even the smallest flame can take away the darkness.

I am very inspired by this notion and I would like to inspire you as well. As Francis Bacon’s had said:

In order for the light to shine so brightly, the darkness must be present.

The light is powerful, but its power can be measured only in times of complete darkness, and so do us!

For this week’s inspiration prompt I encourage you to derive inspiration from the power of light.

You certainly do not have to be Jewish in order to appreciate the power of light against darkness. Think about the glittering lights that embellish your house for Christmas or about the mesmerizing fairy lights that are wrapped around your Christmas tree. How jolly and merry they make everyone feel. This is also a token of the power of light.

Share –

Leave a message to this post and share your thoughts. What do you think about the power of light? How does the light inspire you?

Creativity Prompt #30 – Turn Your favorite Layouts Into Holiday Cards

Friday, December 19th, 2008

Christmas & Hanukkah are on their way… There are so many errands to run and so much work to do by then. It isn’t that unusual to get to the holiday cards at the very last minute. Sometime it can be discouraging.

But don’t worry, I have a little secret which helps me to make cards quickly and easily – that means I don’t have to give up on handmade cards for the holidays, even at the last minute.

My secret is very simple – turning my most used and loved scrapbooking layouts into cards. I already know the design is going to work for me so it’s a foolproof system. Who said scraplifting is for scrapbooking only?

For this week’s creativity prompt I ask you to make handmade cards regardless of how close the holidays are getting.

The Layout –
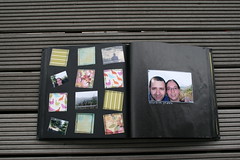
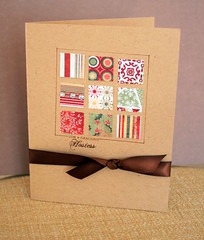
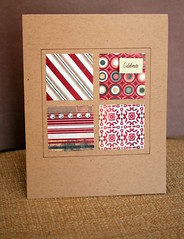
Grid Layouts

The Cards –
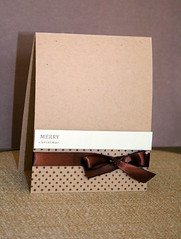
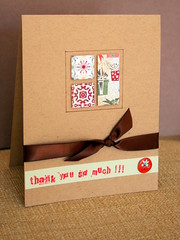
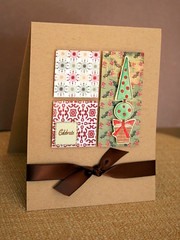
Holiday card-grid
Holiday card-grid

The Layout –
Long Border Layout

The Cards –
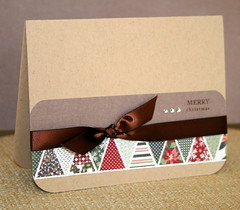
Holiday card-long border

The Layout –
Vertical+horizontal Layout

The Cards –
Holiday card-Vertical+horizontal

Enjoy!!!

If you have any question, suggestion or remark – don’t hesitate to contact me – either leave a comment, use the contact form or start a new thread on the Creativity Prompt Flickr Group!!!

I would also be very happy to see your holiday card creations, so don’t be shy and share 🙂

Do you have any fast card-making tips?

Related Posts –

  1. The Complete Guide For Easy Holiday Cards.
  2. Mini Cards & Envelopes Set.
  3. Card-Set Holder.

Journaling Prompt #30 – New Year’s Resolutions Series – Part 2

Wednesday, December 17th, 2008

Reach [Photo by: James Jordan, @Flickr]

This is the second prompt in a series of journaling prompts on forming your new year’s resolutions.

Last week I have laid down the basics of the traditional and more straightforward way of coming up with a list of goals for the year 2009.

Today I am going to suggest a new way of going about making your new year’s resolutions. As I am a “big picture” kind of a gal, who is not always sure what her next step is going to be but knows exactly where she wants to get to, I have come up with an original way of planning the year to come and I call it: “The Clairvoyant Way“.

This week’s journaling prompt is about how to embark on making your New-Year’s Resolutions, the clairvoyant way

Like its name suggests the clairvoyant way is calling you to foresee your future. Try to form a vision of where you want to see yourself in a year from now –

What accomplishments have you made? what major milestones have you had? How do you feel? Where do you live? Who do you live with? Do you look differently? and so on and so forth.

The more precise and detailed your vision is, the more effective you are going to be in achieving your new year’s goals.

Write down your vision as a short story and read it over and over again during the next year. This story is going to provide you with the inspiration and the motivation you need for actually getting there and live up to your short story.

Share –

Are you thinking of giving the clairvoyant way a try? Do you find it helpful?
If so, what is your visionary story? If not, what faults do you find in it?

Leave a comment and share your very appreciated thoughts with me.

If you liked this post subscribe to my feed:

Inspiration Prompt #30 – Who Is Different?

Monday, December 15th, 2008

Sheep

I have just moved to the Bay Area in California, USA. That makes a total of three different countries in which I have been living for the past year and so. Three different continents and in each I have had the pleasure to meet a myriad of different people of different cultures (originating from all over the world). This experience has enriched me and made me think a lot about the definition of “normal” or “Who is different?”.

Society is very comfortable with people that are ‘normal’. People that fit right into the general blend. But if you shuffle the cards a little bit (or relocate often…) you find out that as everything else in life, being normal is relative as well. What’s normal in Israel (sharing your genuine opinion when you’re asked for it, for example) might not be normal in some European countries. What’s normal in Dublin (walking everywhere) might seem odd in some places in the US.

I would like to take this notion a bit further.

If the concept of who is normal changes between different countries and continents, then why shouldn’t we open up a bit more? Why do we strive to be normal and hang out with other normal people. Why is the different child always alone at the playground? One of my new year’s resolutions this year is to go ahead and play with that child. I want to be more tolerant because who said I am not the different one???

A while ago I have shared with you all the great things I have learned from my autistic nephew. I often think that he is an example of THE “perfect human-being” and certainly not I. Are you with me on that?

For this week’s inspiration prompt I urge you to take the concept of being ‘normal’ a bit further away and rethink the notion of ‘WHO IS DIFFERENT?’

Share –

Share your thoughts with me by leaving a comment to this post.

Creativity Prompt #29 – Make A Star Album

Friday, December 12th, 2008

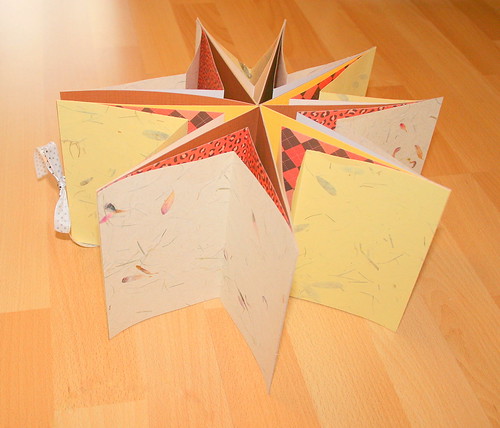
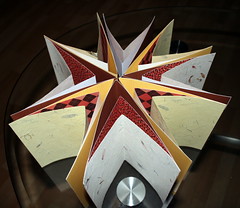
Star Album

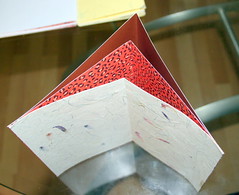
The star album has a strong “WOW” factor as it opens, but it is actually very simple to make one. The secret is in the graduating width of the partitions. For a step by step instructions on how to make this album, keep on reading:

Supply

  • 4 sheets of 12″ by 12″ cardstock.
  • 8 sheets of 12″ by 12″ patterned paper (or 16 sheets of 8½” by 11″ pp).
  • Tape runner.
  • Double sided tape.
  • 2 pieces of ribbon, 12″ each.

Tools

  • Paper trimmer.
  • Bone folder.

Step by Step Instructions –

  1. Cut the star’s partitions, as follows:
    • 8 pieces of 6″ by 12″ cardstock (just cut your cardstock in half).
    • 8 pieces of 6″ by 10″ patterned paper.
    • 8 pieces of 6″ by 8″ patterned paper.

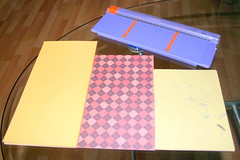
    Cutting the partitions of the album

  2. Fold each piece in half, along its long edge, and burnish well with a bone folder.
    folding the star's partitions>
You should end up with 24 pieces, all having the same height but graduating widths.
<img style=
  3. Apply adhesive to the 6″ edges of the patterned papers.
    Applying adhesive
    Then attach the partitions together –
    First, attach the 6″ by 10″ patterned paper to the 6″ by 12″ cardstock.
    Attaching paper to cardstock
    Then attach the 6″ by 8″ patterned paper to the 6″ by 10″ one.
    Attaching paper to paper
    You should end up with this shape –
    Individual star 'leg'
    Now repeat, until you’ve got 8 “legs” for building the star.
  4. After you finish adhering the star’s “legs” – assemble it on your desktop, to make sure everything works well together and to guide you through the next stages.
    Assembling the star's shape
  5. Pick 2 adjacent “legs” randomly (they are going to become the cover of your album) and apply a double sided tape strip along their midsection.
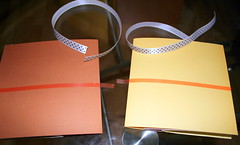
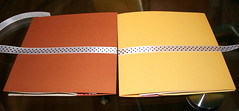
    Attaching the ribbon - step A
    Note that the adhesive’s strip is bulging out of the creased edge – this is done in order to tuck-in the edges of the ribbon for an elegant and more finished looking closure. Just wrap the access adhesive’s strip over the crease and attach the ribbon to it.
    Attaching the ribbon, step b
  6. Next, pick one of the outer “legs” and start attaching each 6″ by 6″ partition to the adjacent one.
    Applying glue to the star's partitions - part aApplying glue to the star's partitions - part b
    This is when assembling the star’s shape in advance is going to come in handy.
  7. Repeat the last stage, until you finish attaching all the star’s partitions to each other. Make sure not to attach the partitions with the ribbon to each other…

A glimpse at the star album while it’s closed:

Star album when closed

Enjoy!!!

If you have any question, suggestion or remark – don’t hesitate to contact me – either leave a comment, use the contact form or start a new thread on the Creativity Prompt Flickr Group!!!

I would also be very happy to see your own star-album creations, so don’t be shy and share 🙂