/** Font types */

Author Archive

Journaling Prompt – April Fools Edition – Play A Reporter

Wednesday, April 1st, 2009
April Fools
[Photo by: Demi Brooke]

April Fools. One of my least favorite days. It isn’t that I don’t like a good joke, but I am very gullible (and apparently too honest) and I always fall for these pranks. My husband takes full advantage of it and he pulls pranks on me all year round…

Today I have an idea for an April Fools’ piece of mischief and I want you to take part in it… (and to document it in your journals, scrapbooks, local newspaper… Where ever…)

Your April Fools Assignment is: Write a note of admiration to someone (your husband??? colleague???) and sign as “Your number one fan“. Feel free to add a special touch with a rose or a bar of chocolate. THEN put on your reporter’s glasses and document your victim’s quest to find his secret admirer…

Not only is it going to be hilarious, but you are going to perpetuate a memory of a fun tradition as well.

Share –

I’d love to hear your stories, if you take part in this practical joke. Leave a comment on this post and share.

Do you want to share other practical jokes you have pulled, or jokes that have been pulled on you? Feel free to share, you know I want to hear I am not the only one….

If you liked this post subscribe to my feed:

Inspiration Prompt – The Founding Power Of Your Thought

Monday, March 30th, 2009
Positive Thinking
[Photo by: H. Koppdelaney]

Our mind is extremely powerful. It has the ability to not only analyze our feelings but to found and form them as well. When we think positively everything we do satisfies and fills us with great pleasure and content. When we think that we are sorry little beings we live down to our expectation and measurement.

I am not the first to mention it. Oh no. This notion is as old as humanity itself. Greater and smarter people had taught it times and again, but still it is difficult to implement it on the everyday.

There are so many excuses for not taking this old advice. We do not want to sound vein. We do not want to raise “the evil eye“. We do not want to delude ourselves nor others. We should be realistic. It is much easier teaching about positive thinking than to actually let ourselves think positively when everything seem so negative and wrong. We live in a harsh world.

So many excuses to keep us away from happiness and self fulfillment. None of the excuses is tangible.

For this week’s inspiration prompt I ask you to take a minute and ponder about the founding power of our thought and then use it for empowerment and growth.

Remember:

“It isn’t what you have, or who you are,
or where you are, or what you are doing
that makes you happy or unhappy.
It is what you think about.”
Dale Carnegie

Share –

Have you ever experienced the founding power of your thought?
Share your thoughts and leave a comment on this post.

Creativity Prompt – Embellishing Raw Chipboard shapes

Friday, March 27th, 2009

Chipboard Embellishments
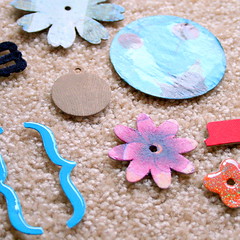
This is post is the second in the series of Embellishing Embellishments. A couple weeks ago I suggested ways of embellishing paper flowers and this week we are going to embellish raw chipboard shapes.

Chipboard is a great way to add some dimension to your project, without adding too much bulk. Chipboard is basically a bunch of layers of paper, pressed firmly together, therefore it provides a slight raise, when adhered on regular cardstock or paper.

Saying that, chipboard, in its raw state, is rather… well… ugly. Many companies provide covered chipboard shapes but the price tag can rise up and you never get EXACTLY the color, texture, finish you want on your project.

There are many companies offering raw chipboard shapes. Usually the price does play a role in telling the quality of the chipboard. For the sake of this tutorial I was using Colorbok’s chipboard shapes, they retail for 1$ but they are very thin and the layers are easily separated (especially in techniques that requires gel medium). I do recommend Maya Road’s chipboard. It has high quality yet isn’t very expensive.

The techniques I am showing on this week’s video are:

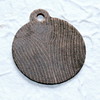
Each technique requires different tools and supply, and you may not want to experiment with all of the techniques, so I will list a separate supply and tools list for each technique below. I will also post a small picture of the chipboard, after the technique had been applied on it. You can click on each photo for a larger view.

How To –

Step By Step Instructions –

Painting with crackle paint


Painting with crackle paint Painting with crackle paint

Tools and supply –

Instructions –

  1. Apply crackle paint to chipboard with the brush that comes with it. If you want, you can dilute the paint with a drop of water. Avoid bumps and clumps, but don’t apply it too thinly.
  2. Let dry completely.
  3. For an “epoxy” look, cover in Diamond Glaze and let dry for a few hours.

Flocking


Flocking
Tools and supply –

Instructions –

  1. Apply a generous layer of glue and cover with flocking material.
  2. Pat on flocking material with your finger. (Don’t press too hard).
  3. Let dry for a minute or so.
  4. Shake off excess flock.
  5. Repeat on “bald” areas (The step you will need patience for…).

Covering in glitter


Covering in glitter
Tools and supply –

Instructions –

  1. Apply a generous layer of glue and cover with glitter.
  2. Pat on flocking material with your finger. (Don’t hesitate to apply pressure this time).
  3. Let dry for a minute or so.
  4. Shake off excess glitter.
  5. Cover in Diamond Glaze (avoid bubbles) and let dry for a few hours.
  6. Alternatively –

    Cover chipboard with colored glitter glue and let dry completely.

Covering with cardstock/patterned paper


Covering with cardstock
Tools and supply –

Instructions –

  1. Apply glue to the right side of the chipboard in a very thing layer.
  2. Adhere chipboard to cardstock or paper, while its right side is facing down.
  3. Let dry completely and then cut around with a sharp craft knife.
  4. File the excess off.

Stamping


Stamping
Tools and supply –
You can use any stamp (rubber or photopolymer/clear) and any ink, I’ll list the ones I used on the video.

Instructions –

  1. Apply a base layer of ink to the chipboard. (I really like the smoothness of the chalk ink).
  2. Ink up the stamp well and stamp on the chipboard. Apply a good amount of pressure to make sure the image will transfer evenly and completely.

Decoupage


Decoupage
Tools and supply –

Instructions –

  1. Apply gel medium to chipboard (you can put a base coat of ink before, if you want the final result to be tinted).
  2. Separate the top layer of the napkin and lay it on the chipboard – right side up.
  3. Apply a second coat of gel medium on top of napkin.
  4. Wait until it dries completely. I was impatient and it made everything more complicated than it should be, So LET IT DRY!!!
  5. Cut around the chipboard shape with micro-tip scissors. (you can poke them in any hole or cavity of the shape).
  6. Apply a thin layer of gel medium to the edges of the shape. It will straighten all stray pieces of napkin as well as prevent the chipboard from separating.

Photo Transfer


Photo transfer Photo transfer

Tools and supply –

Instructions –

  1. Start by choosing your photos and printing them on transparency with an inkjet printer. I am using Canon MP620 Wireless All-in-One Photo Printer.
  2. Apply a base coat of ink to the chipboard.
  3. Apply gel medium to the chipboard and lay the printed transparency over it, inked side down.
  4. Apply pressure to the transparency with a brayer and rub the image off with a bone folder.
  5. Gently peel off the transparency and make sure the top layer of the chipboard isn’t stuck to the transparency. If it is stuck, peel it gently with the tip of your craft knife’s blade and adhere it back on with some more gel medium.
  6. Apply another coat of gel medium on top – but make sure it is completely dry first.

Share –

If you have any question, suggestion or remark – don’t hesitate to contact me – either leave a comment here, use the contact form or start a new thread on the Creativity Prompt Flickr Group!!!

Can you think of other ways to embellish chipboard? Which technique is your favorite? Which technique have you used before? Share your thoughts by leaving a comment on this post.

I would also be very happy to see your own creations, so don’t be shy and share a link 🙂

Journaling Prompt – Write Down Your Inside Jokes

Wednesday, March 25th, 2009
In-Joke
[Photo by: Helga Weber]

Wikipedia defines an “In-joke” as a joke whose humor is clear only to those people who are “inside” a social group or occupation; an esoteric joke.

Everyone has a bunch of inside jokes. Ones shared with family. Ones shared with friends. Ones shared with the significant other. Ones shared with colleagues, and so on and so forth. Usually a long list of internal jokes.

There are several “bonuses” in inside jokes, which are usually overlooked:

  1. Inside jokes are usually making you genuinely happy, whenever you hear them.
  2. Inside jokes make you feel connected to a certain group or a single person you share the joke with.
  3. Last, but not least, inside jokes has the ability to bring you back in time and evoke memories of when and how the joke was “born”.

Therefore I suggest in this week’s journaling prompt to start putting those in-jokes in writing.

Write down a list of inside jokes and the group of people or the person you share the jokes with.

I guarantee that every time you will look at the list, you are going to – at the very least – smile, if not laugh uncontrollably, and also bring up scenes of pleasure in your mind.

You will bring up the time the joke was created, perhaps late at night, after a couple drinks and a good movie. You will bring up scenes of you snorting juice when a friend mentioned this joke. It will bring up faces of people you care about. It will bring up times when you were happy and laughing and in a good mood.

The list has a pretty good chance to elevate your mood, each and every time you go over it.

Obviously there is no point in sharing an internal joke of mine… but I do urge you to list yours for keepsake.

Share –

Have you listed some of your inside jokes?
Who do you share most in-jokes with?

I’d love to hear from you, so leave a comment on this post 🙂

If you liked this post subscribe to my feed:

Inspiration Prompt – Live With Courage, Zeal and Love

Monday, March 23rd, 2009
Happiness
[Photo by: Maciej Lewandowski]

Happiness wanders off sometimes. You go to sleep happy and jolly and wake up to a gloomier day. Or you can drive happily to the office, whistling along with your favorite song, then take a phone call that deflates you of any positive thought you’ve had.

Happiness? Gone.

Day? Ruined and dragged.

What can you do about it? You can smile and stay mindfully optimistic. But sometimes it isn’t enough or just isn’t working.

In those days you dig deeper into your core meaning of life and find what are the things you care most about and you focus on them and keep on going at 120 mph. Concentrate only on what’s important and forget about everything which is not.

Be zealous and courageous about everything you love and care about and apathetic about the rest, as the Scottish writer had articulately phrased:

“I had looked for happiness in fast living, but it was not there. I tried to find it in money, but it was not there, either. But when I placed myself in tune with what I believe to be fundamental truths of life, when I began to develop my limited ability, to rid my mind of all kinds of tangled thoughts, and fill it with zeal and courage and love, when I gave myself a chance by treating myself decently and sensibly I began to feel the stimulating, warm glow of happiness, and life for me began to flow like a stream between smooth banks.”

By Andrew Young

Share –

Are you filling your life with courage, zeal and love?

What makes you tick?

What makes you happy?

Share your thoughts and leave a comment to this post. I am looking forward to hear from you!

Cretivity Prompt – Felt Mini Album

Friday, March 20th, 2009

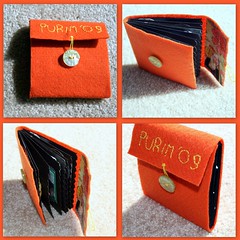
Felt Mini Album One of the hardest things in living far away from your family is being absent from family gatherings during the holidays. Purim is one of those occasions. The kids are wearing their costumes and the general atmosphere is one of joy and festivity. This Purim I wasn’t able to join my family, but I wanted to create a mini album that I can carry around so at least I will be near the photographed memories…
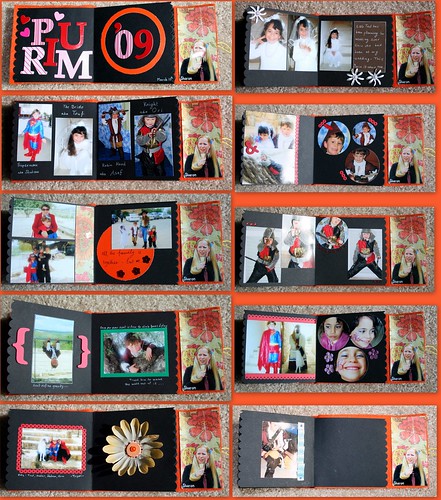
To capture the holiday spirit, I designed a mini album which is covered in felt and has some embroidery details on its cover, as well as a decorative edge to all the signatures inside. This mini album is in fact a dressed up version of the 10 minute mini book tutorial. I guess my minis want to dress up for Purim – who am I to stop them?

The felt cover protects the album, but also provides softness that makes you want to caress it… A feeling which goes hand in hand with the cute pictures of my nephews and niece: Superman, the Bride, Robin Hood and the Knight In Shining Armor…

If you want to make one for yourself or as a gift to a loved one, keep reading…

Tools & Supply –

How To –

Step by Step Instructions –

  1. Cut your cardstock at 9″ by 4″. (If you want to give up the scalloped edge, or to simply round up the corners, you can cut your cardstock at 8″ by 4″ and score at 4″ instead).
  2. Score your cardstock at 4½” and fold in half. Use a bone folder for a crisper crease.
  3. Align the edges of each closed signature with the tick marks of the border punch. Make sure the ends are placed at the same tick mark on both sides. Punch firmly and repeat all across the edge. If you are more cautious about your [EXPENSIVE] punch, or if your signatures are made of heavy-weight cardstock, you can punch each edge individually, as long as your alignment is precise. It will just take longer.
  4. Attach the signatures together with glue stick. Again, take special care at aligning the scallops together. Use a brayer to insure a strong hold.
  5. Let the signatures dry while they are spread wide open to make sure they won’t get stuck together.
  6. Measure and cut a stripe of felt. Use the signatures for measuring. Just pencil in a tick mark a little bit above the height of the signatures and cut along with sharp scissors. (~4¼” by 11½”).
  7. Figure out the placement of your flap using the signatures. Note that the spine adds some dimension. After finding the right placement, pencil in your title and embroider over it using a backstitch.
  8. After finishing your title design, use the remaining embroidery floss to create a loop in the middle of the flap. Thread your embroidery floss horizontally and allow a loop to form, then secure its ends. Don’t worry about the backside of the flap, as it’ll be covered later.
  9. Use the signatures to find the placement of the flap on the felt cover when closed. Allow some room for adding dimensional elements to the album’s pages. Sew a button in correlation to the loop you have just added to the flap.
  10. Measure and cut a piece of patterned paper and glue on the flap to conceal the embroidery’s backside. Use a brayer to insure a strong hold. (~4″ by 2″.)
  11. Attach the signatures to the felt with glue stick, let dry and start playing with the inside pages 🙂

Here is a glimpse to all the inside pages of my mini album:
[Click on the photo for a closer view]

The Inside Pages Of The Mini Album

Share –

If you have any question, suggestion or remark – don’t hesitate to contact me – either leave a comment here, use the contact form or start a new thread on the Creativity Prompt Flickr Group!!!

I would also be very happy to see your own creations, so don’t be shy and share 🙂

Journaling Prompt – Taking Flight

Wednesday, March 18th, 2009

Taking Flight - Safe Haven There are times in life when we feel the need to take flight. We wish we could grow wings and fly away to our a safe haven.

There are numerous reasons to take flight. A difficult phase in life. An impossible struggle. A hurtful situation – either physically (i.e. facing a bully…) or psychologically. An unsuccessful business move or a general feeling of discomfort with the present situation.

Safe havens can be perceived in two different ways:

  1. An actual place you go to, when you want to get detached. A book. The park. The beach. A mountain trail. Etc.
  2. A fantastic place where you’d rather be, if only you could teleport yourself there…

For this week’s journaling prompt you can take the notion of taking flight either way.

  • Where do you go to when you feel the need to hide?
  • From which situations would you like to take flight?
  • Have you ever wanted to disappear? When? What happened?
  • If you were able to grow wings and fly, where would you go to?

When I feel overwhelmed I either start painting or read a book I feel connected to. I wish I could teleport myself to a place where only pure goodness exists (I’m not sure they’ll let me in…) Being next to my nephew is close enough…

Share –

Where (and when) would you take flight to? Leave a comment and share your thoughts.

If you liked this post subscribe to my feed:

Inspiration Prompt – The Measure Of A Man

Monday, March 16th, 2009

The measure of a man The measure of a man is something illusive, yet we always try to capture it.
We mostly measure ourselves. With severity. We also measure the people we care about, our family and friends. We tend to measure the people we work with – our colleagues and our rivals. Sometimes we measure the person standing before us in the line or crossing the road…

There are so many things that are easy to measure with strict measurement criterions, like length, density, capacity. We pull out the tape measure or the scale or the particle accelerator (the latter would be pulled out by my father at his lab…) and come up with a simple and mostly accurate answer.

That isn’t the case when trying to measure a character.

So what is the measure of a man?

Here is an inspiring quote by Kahlil Gibran explaining how a man should NOT be measured:

To measure you by your smallest deed
is to reckon the ocean by the frailty of its foam.
To judge you by your failures
is to cast blame upon the seasons
for their inconsistencies.

Share –

What is the measure of a man? Leave a comment.

Creativity Prompt – Embellishing Paper Flowers

Friday, March 13th, 2009

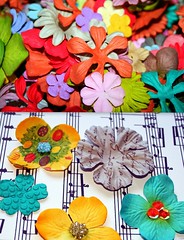
Embellishing flowers Embellishing embellishments? Have I gone crazy? No. Not really. I was just thinking how can I stretch my supply a little bit and get a personalized look and this is what I came up with.

Many crafters have heaps of plain paper flowers laying around, but only you will have the altered version of these flowers… Think about all the possibilities… Exciting, isn’t it? Some companies offer pre-embellished flowers, but embellishing them yourself isn’t only cheaper, but also more fun and creative.

In today’s video I suggest and show just a few options: sewing, adding bling, embossing, flocking, stamping and decoupaging – but the possibilities are really endless.

You can use the embellished flowers on cards, layouts as well as on wall art and other mixed-media projects.

How-To

[I apologize in advance for the quality of the editing. I am slowly learning to work with iMovie…]

[If you head over to YouTube, please rate, comment & subscribe]

On this video –

  • Stamping – Use pigment ink and press hard on the stamp, to get into all the folds and crevices.
  • Adding BLING – Apply some strong liquid adhesive that dries clear (like diamond glaze) and sprinkle beads, glitter or gemstones onto it. Allow it to dry and add a little bit of adhesive on top, to make sure it’ll stick.
  • Flocking – Similarly to adding bling, just apply some Diamond Glaze and pour in the flock. Tap on it gently with your finger to make sure the flock is applied evenly.
  • Decoupage – Choose a scrap of napkin or tissue paper that fits your flower. Use only the top layer of the napkin. Apply gel medium or Mod-Podge generously on the flower and adhere the napkin to it. Apply a second coat of gel medium on the covered flower. Allow it to dry and cut the excess with scissors.
  • Embroidery – Add some appeal to the flower with an embroidery floss. There are many options. On the video, I applied sequins to the flower, using a “French Knot“.
  • Embossing – Put the flower into an embossing folder and move it through a Cuttlebug machine (or another die-cutting & embossing machine). Make sure you pick an embossing design that fits in scale to the flower’s size.

More options –

  • Inking – change the color of the flowers with an ink pad or an even coat of acrylic paint.
  • Crackle Paint – Apply a thick layer of crackle paint on the flower and allow to dry.
  • Photo transfer – The idea is similar to decoupaging, but instead of napkins you use a photo, printed on transparency with an inkjet printer. Note that this technique isn’t as smooth as decoupaging and the printed design won’t be transferred as crisply. (Use a gel medium for this technique).

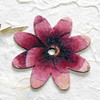
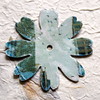
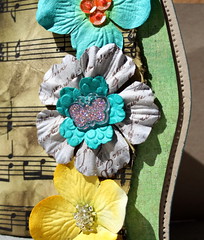
Take a closer look at the embellished flowers (click on the photo):

Embellished Flowers

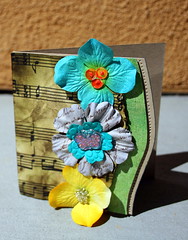
Here’s a card I have made with the flowers:

Card

[This card is based off CPS106.]

Share –

If you have any question, suggestion or remark – don’t hesitate to contact me – either leave a comment here, use the contact form or start a new thread on the Creativity Prompt Flickr Group!!!

I would also be very happy to see your own creations, so don’t be shy and share 🙂

Do you have more ideas for embellishing paper flowers? Please share!

Journaling Prompt – Take A Trip Down Memory Lane

Wednesday, March 11th, 2009

Lately we’ve been dealing with memories here on creativity Prompt. Wikipedia defines a Memory as “an organism’s mental ability to store, retain and recall information”.

Last week we captured a memory that has never been. What we basically did was to store information in our minds, regardless of it’s authenticity… It certainly isn’t what people traditionally refer to as a memory, but it falls into the scope of the definition.

This week we are going to deal with another component of the definition, which is the “recalling” part. More specifically, we are about to write down our “first memories of…”

So if you feel like participating in this week’s journaling prompt, answer the following questions with the first memory that comes to your mind –

  1. What is your first memory? Crawling in the house and grabbing my uncle’s white shirt with my dirty fingers… My uncle is a very good person that cannot harm a fly, but his loud voice can sure frighten a crawling child 🙂
  2. What was the first TV program you remember watching? The Littl’ Bits
  3. What is the first song you remember hearing? A lullaby.
  4. What is the first meal you remember having? (I don’t think it’s possible to actually remember having milk or formula…) I remember eating my grandmother’s boiled chicken with sweet cabbage and mash potatoes. I also remember my father’s sour cream with bananas and strawberries.
  5. What is the first book you remember reading? Dana is sleeping. Dana is waking up… (In Hebrew: “Dana Nama. Dana Kama”.)
  6. What is the first painting you remember drawing? A house with a flower and a girl that rise above the house and a huge sun with a happy face.
  7. What is the earliest family vacation you remember? Visiting the alligators’ farm at Hamat Gader.
  8. What is the first toy you remember having? My doll Nikki (it was a male doll and I wouldn’t leave it alone for a second).
  9. Who was the first teacher you remember? (including kindergarten) Clara, the kindergarten teacher’s assistant.
  10. What was the first pet you remember having? A cat. We never had pets long enough to name them… Both my parents love animals, but not at their house.

Share –

share your first memories by leaving a comment on this post. You can answer directly in the comment section or include a link to the specific post on your personal blog.

If you liked this post subscribe to my feed: