/** Font types */

Author Archive

Creativity Prompt – How To make A Double Accordion Brag Book

Friday, June 26th, 2009

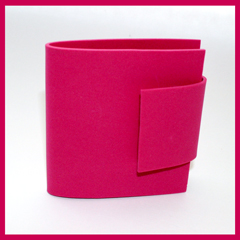
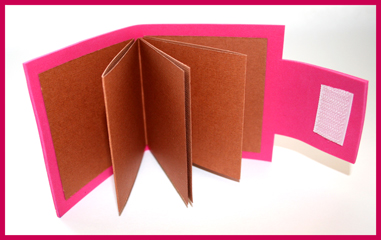
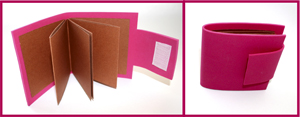
How To make An Accordion Brag BookFor this week I have a 5-minute-project for you. An adorable little brag book with a fun foam cover that makes it extra “snugglable”.

It is cute. It is easy. It is super, light-speed, quick and it is made with very inexpensive materials. The perfect project.

Put a 2″ by 3″ photo with a 1″ by 3″ piece of patterned paper or journaling strip on each page for the quickest scrapbook ever.

Tools & Supply

How To

Step by Step Instructions

  1. Cut fun foam to 3½” by 9½”.
  2. Cut 2 cardstock strips of 3″ by 12″ each.
  3. Score each strip at 3″, 6″ & 9″. You can just align your score lines with the 3″ mark on your paper trimmer.
  4. Fold your score lines – once up and once down – to create an accordion fold.
  5. Adhere the folded cardstock strips to the fun foam with a double sided adhesive. Optional – Before attaching each cardstock strip, you can add a strip of ribbon to it – just align the middle of the ribbon with the center point of the back of the cardstock and adhere to the fun foam. Tie the ends of the ribbon in a bow to make sure your accordion fold stays put.
  6. Find the center of the fun-foam cover’s flap with the grid ruler and mark 1″ on each side. Cut along these marks all the way to the bottom of the flap and snip off the ends.
  7. Adhere the velcro or magnetic snaps to the flap. To make sure the aligning is perfect, adhere both parts of the velcro while they’re attached together and then peel off the backing and close the flap. To allow some room for bulky embellishments, make sure you don’t close the flap too snag.

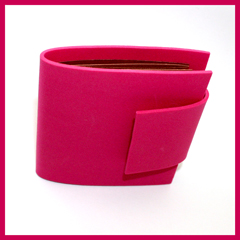
Accordion Brag Book Accordion Brag Book Accordion Brag Book

Share

If you have any question, suggestion or remark – don’t hesitate to contact me – either leave a comment here, use the contact form or start a new thread on the Creativity Prompt Flickr Group!!!

I would also be very happy to see your own creations, so don’t be shy and share ๐Ÿ™‚

Reminder

Only a few more days left for the early bird’s admission to “Capture Your Dream“. Don’t miss the special offer of only $14.95 for 30 downloadable lessons!!! (LESS THAN 50 CENTS PER LESSON)

Workshop - Capture your Dream

Inspiring Journaling Prompt – Write With an Up-Side-Down Point of View

Wednesday, June 24th, 2009

I would like to share an inspiring video I’ve stumbled upon on You Tube. The video conveys the story of a kid who insisted on adopting an uplifting point of view despite what “the experts” and his “social environment” said. An excellent and inspiring story:

Are you as inspired as I was after watching it? I am sure you are!

Now, inspired by this wonderful video, grab your journal and portray an up-side-down point of view. The kind of view that sees a smiling face instead of a sad one. The kind of view that sees the little things and tries to ponder about how things miraculously work. The kind of view the boy had that made him so special – and so controversial.

Try to communicate the same point of view from behind the camera – Try new angles, new lighting, new settings, zooming in a bit more – try to view the world differently.

Share your thoughts, journaling and photos by leaving a comment on this post.

Reminder

Only one more week left for the early bird’s admission to “Capture Your Dream“. Don’t miss on the special offer of only $14.95 for 30 downloadable lessons!!! (LESS THAN 50 CENTS PER LESSON)

Workshop - Capture your Dream

Creativity Prompt – Going Back To Scrapbooking Basics

Friday, June 19th, 2009

Going Back To Scrapbooking Basics: photos and cardstockEvery once in a while when I feel the muse is playing hide-and-seek I like to take a step backward, get rid of all the fluff and go back to the basics. The same applies to scrapbooking.

The industry is flooded with beautiful products and tools. Wonderful papers, inks, stamps, embellishments, die-cuts and so on and so forth. Design team members are making layouts that can be presented in art galleries. Little by little, the wonderful hobby of putting together a scrapbook to tell our stories is becoming a tedious chore with a lot of pressure involved.

I am sorry to say that I have heard many creative people deciding to give up scrapbooking altogether. Some did it knowingly and some just don’t get to it anymore because of all the work and pressure involved… Isn’t it a shame?

Pressure and high expectations are known foes of our inner creative child. They practically eliminate our creativity and drive our muse away.

Therefore for this week’s creativity prompt, I prod you to go back to scrapbooking basics. Make a layout with only your photos and cardstock and nothing else. Preferably without using any fancy tools as well.

This is how I did it –

Tools & Supply

Tips

  • Use the grid on your cutting mat and ruler to align and cut elements to size without measuring. Just align the edge with the marks on the grid for a fool-proof straight-cutting and even positioning.
  • You can also use the grid ruler to draw perfect frames around any element. Align the edge of your element with the grid and trace with a marker.
  • Emboss your journaling surface (either a tag or the background cardstock itself) to create subtle journaling guidelines.
  • Vary the tip size of the markers you use to add instant graphic interest to your journaling design.
  • DON’T FORGET THE STORY.
  • Most importantly – don’t fiddle with your layout. Know when to call it done and move forward to the next story. HINT – Perfection is NOT the criteria…

Share

How are you going back to scrapbooking basics? When was the last time you only pulled out your photos and cardstock?

Leave a comment on this post and share!

Workshop - Capture your Dream

Journaling Prompt – Concentrate On Relationships When Documenting Your Wedding Day

Wednesday, June 17th, 2009

Relationships On My Wedding Day June is a very popular “wedding month”, so I am sure I am not the only one celebrating my anniversary this month.

Documenting the wedding is traditionally all about love. Sometimes it’s about the venue, the guests, the unity, the traditions… It is rarely about the relationships.

When I say RELATIONSHIP I mean INTERACTION or RECIPROCITY between the newlyweds to each other and their connection with the rest of the guests.

These relationships are extremely unique. It seems like the couple is elevated off earth on a cloud of togetherness, glancing upon the guests, but not communicating with them on the same level of awareness.

The bride and groom are dancing, small-talking, laughing at jokes and paying respect to their guests – but they are still not quite connected.

My best guess is that the connection between the newlyweds, the new bond between them, is so strong and overpowering that it casts a shadow on all other interactions.

This connection, this peak of togetherness is so wonderful, I think we all ought to take the time and document it.

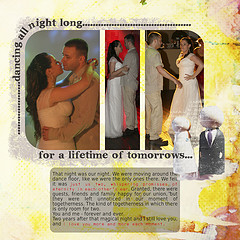
On the picture above the journaling reads:

That night was our night. We were moving around the dance floor, like we were the only ones there. We felt it was just us two, whispering promises of eternity in each other’s ear. Granted, there were guest, friends and family happy for our union, but they were left unnoticed in our moment of togetherness. The kind of togetherness in which there is only room for two.
You and me forever and ever.
Two years after that magical night and I still love you, and I love you more and more each moment…

[Supply- font Karabine; digital kit by Two Peas In A Bucket; Old Victorian Wallpaper brush by Kisso-Myrusso.]

Share

Share the special relationship and interaction you had on your wedding day.

Not married? How about describing how will your wedding day be like (I had been planning my wedding day since I was 6 years old – that’s the kind of “girlie-girl” I was).

Workshop - Capture your Dream

New Workshop: Capture Your Dream || REGISTRATION CLOSED

Tuesday, June 16th, 2009

Workshop - Capture your Dream

Capture your dream is a self paced workshop designed to help you identify your dream, capture it in a beautiful handmade mini-album and pave your way to make your dream come true.

In this workshop you will complete a mixed-media mini-album, which you will create from scratch with things you have lying around in your house or things you can find in your local craft or office supply store.

Each project is propped up by a pdf file with clear step-by-step instructions, packed with valuable tips and techniques and backed with supporting photos.

As always the inspiration and journaling prompts are going to make you think and ponder. You will get fantastic insights not only to your deepest dream but also to the means of making it happen.

Boosted with inspiration prompts, stimulating journaling and motivated by meaningful creative projects, you will capture your dream and follow it toward realization.

“Capture Your Dream” will show you…

  • How to make your own fabric covered and embroidered mini-album.
  • How to use different mediums for your album’s pages (i.e. felt, transparency, cardstock and more.)
  • Different ways to include your journaling on your scrapbook pages.
  • Different ways to add layers, texture and interest to your layouts.
  • How to inject meaning into your projects with tactile and visual similes.
  • How to get chronological perspective through journaling.
  • How to communicate and work side-by-side with your dream.
  • and many more…

I am offering personal guidance and support to each participant on each step of the way, everything to make you feel like I am sitting right by your side.

Do you want to capture your dream in a significant and expressive way? Join now and get one step closer to making your dream come true!

  • The workshop is self paced. You will receive the first segment (Introduction & Supply List) immediately after registering.
  • The duration of the workshop is 6 weeks (5 lessons per week). That’s 30 lessons delivered right to your inbox!!!
  • Format of the lessons – Downloadable pdf. files – including templates, instructions, supporting photos and supply list with live links to the products.
  • Price – USD 50.00

Hurry up and register now to secure a place in the workshop. Unfortunately, I need to limit the number of participants in order to provide the individual attention each participant deserves.

P.S.: You are going to LOVE this workshop… OR your money back!

I am so confident you are going to love this workshop that I am offering you a full money back guarantee. If for any reason you are not fully satisfied with the workshop, just send me an e-mail and I will refund 100% of your purchase. No questions asked.

Frequently Asked Questions

Q: The workshop is pretty intensive what if I’m too busy for 5 lessons per week? OR I’m going on vacation soon and would miss some of the lessons.

A: No problem. The format of the lessons allows you to take them at your own pace, whenever it is convenient to you. You can take one lesson every day or take several lessons during the weekend or in an afternoon. I will still be available for you to answer questions and offer support.

Q: Will there be a special forum for the workshop’s members? I’d like to connect with other members.

A: Absolutely. The workshop is going to have a private forum for its members and you are welcome to participate in it, ask questions, communicate with other members, share thoughts and even include links to your workshop related work. I will be active on this forum too ๐Ÿ™‚

Q: Will I have to buy special tools and supplies for the workshop?

A: As scrapbookers you probably have most of the tools and supply needed for the workshop. About 10 days before the workshop starts I will send each participant a complete tools and supply list.

Q: What if I don’t like the workshop?

A: I cannot imagine this happening ๐Ÿ˜‰ Now seriously, in case you are not happy with the workshop for any reason, drop me an e-mail by the end of the workshop and I will refund 100% of the purchase price.

Testimonials

  • “Sad not to be getting any more of your e-mails. I am still working on my mini album and will let you know when I post on my blog. Just wanted to let you know that I learned a lot of new techniques from your course. I don’t like to sew, so I adapted those parts and did with paper instead. Also, I feel like I now have an organized plan for my dream which is one of the most difficult parts to do. Sometimes you just don’t know how to actually begin to do something. Putting it down on paper helped me a lot.”
  • “It was wonderful and I recommend it to EVERYONE! You are fantastic รขโ‚ฌยฆ always quick with a kind word รขโ‚ฌยฆ and help! Thanks so much!”
  • “Today I was looking through my childhood memories when my 12 year old daughter joined me. It was so nice to share these memories and my dreams with her. A wonderful side effect of the workshop!”
Inspiration Prompt – Love Is Like A Precious Plant

Monday, June 15th, 2009

Inspiration Prompt - Love Is Like A Precious Plant The “wedding season” has arrived… Nadav and I also got married in June – two years ago, and the love between us is still growing and thriving.

Romance is an inspiring and motivating force. Love is even more wonderful as it surrounds our lives in so many ways. Granted, we love our significant other; but we also love our family, we love our friends, we love watching the sunrise at dawn.

As with our sweethearts so with the rest of our “objects of love”, a relationship based upon love needs constant cultivating and grooming. It does not sustain itself, but it gives back so much in return. The reward is worth all the hard work. It is absolutely PRICELESS.

For this week’s inspiration prompt, be inspired by love. Love and be loved…

John Lennon had said it beautifully:

Love is like a precious plant. You can’t just accept it and leave it in the cupboard or just think it’s going to get on by itself. You’ve got to keep on watering it. You’ve got to really look after it and nurture it.

Share

Share your thoughts and insights about love and loving relationships by leaving a comment on this post.

If you liked this post you may want to subscribe to my feed:

Creativity Prompt – Upcycle a Yogurt Container into a Surprise Mini Album

Friday, June 12th, 2009

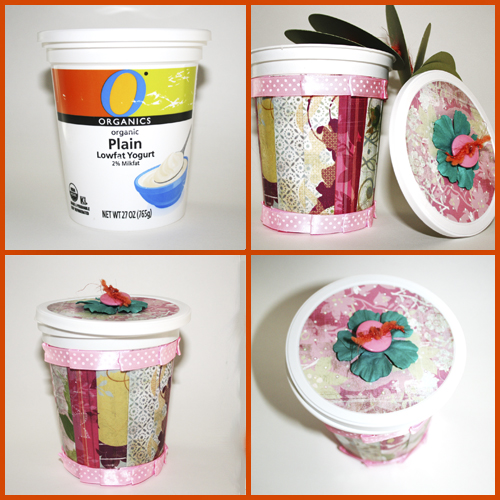
Upcycle a Yogurt Container into a Surprise Mini AlbumBeing environmentally friendly is important to me. It is actually very selfish of me, as I want my posterity to enjoy mother earth as long as possible. Therefore on one of my very first creativity prompts I have shown you how to turn your trash into treasure.
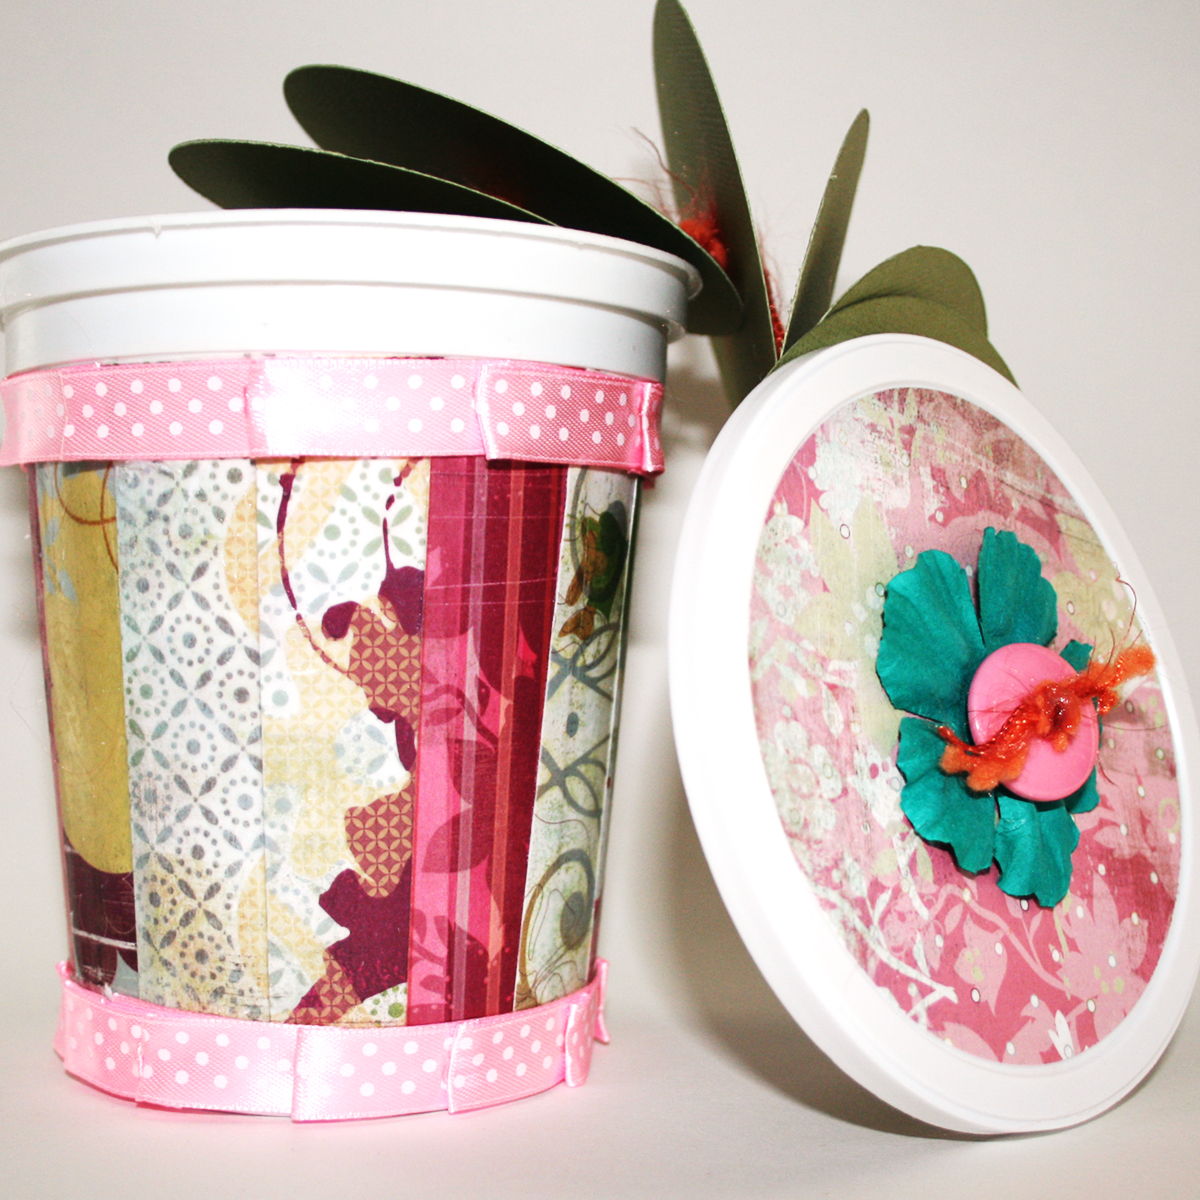
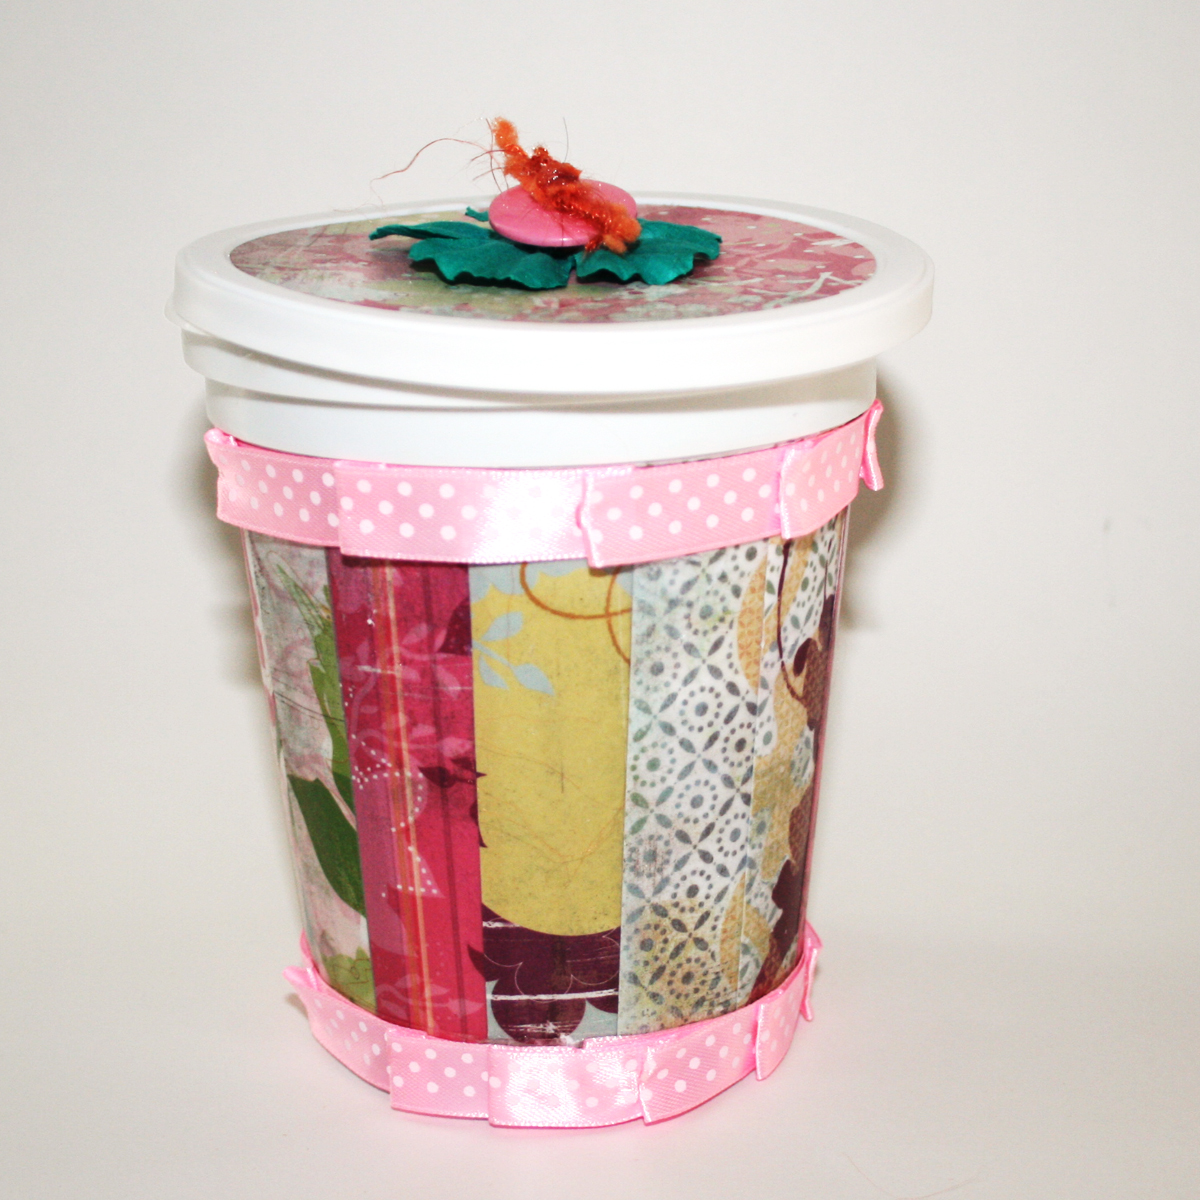
This week I am revisiting this idea and I am going to show you how you can upcycle an empty yogurt container, just before it hits the recycle bin, and make a beautiful surprise mini album with it. If you are not a big fan of mini albums in boxes, you can stop half way through and make a lovely pencil (or brushes…) holder from it.

So if you are interested in turning your trash into treasure too, keep on reading.

Tools & Supply

How To


[The fabulous music is by Josh Woodward from his album: “Not Quite Connected”]

Step By Step Instructions

  1. Measure the lid’s diameter with a ruler.
  2. Cut a circle from your patterned paper in the same diameter.
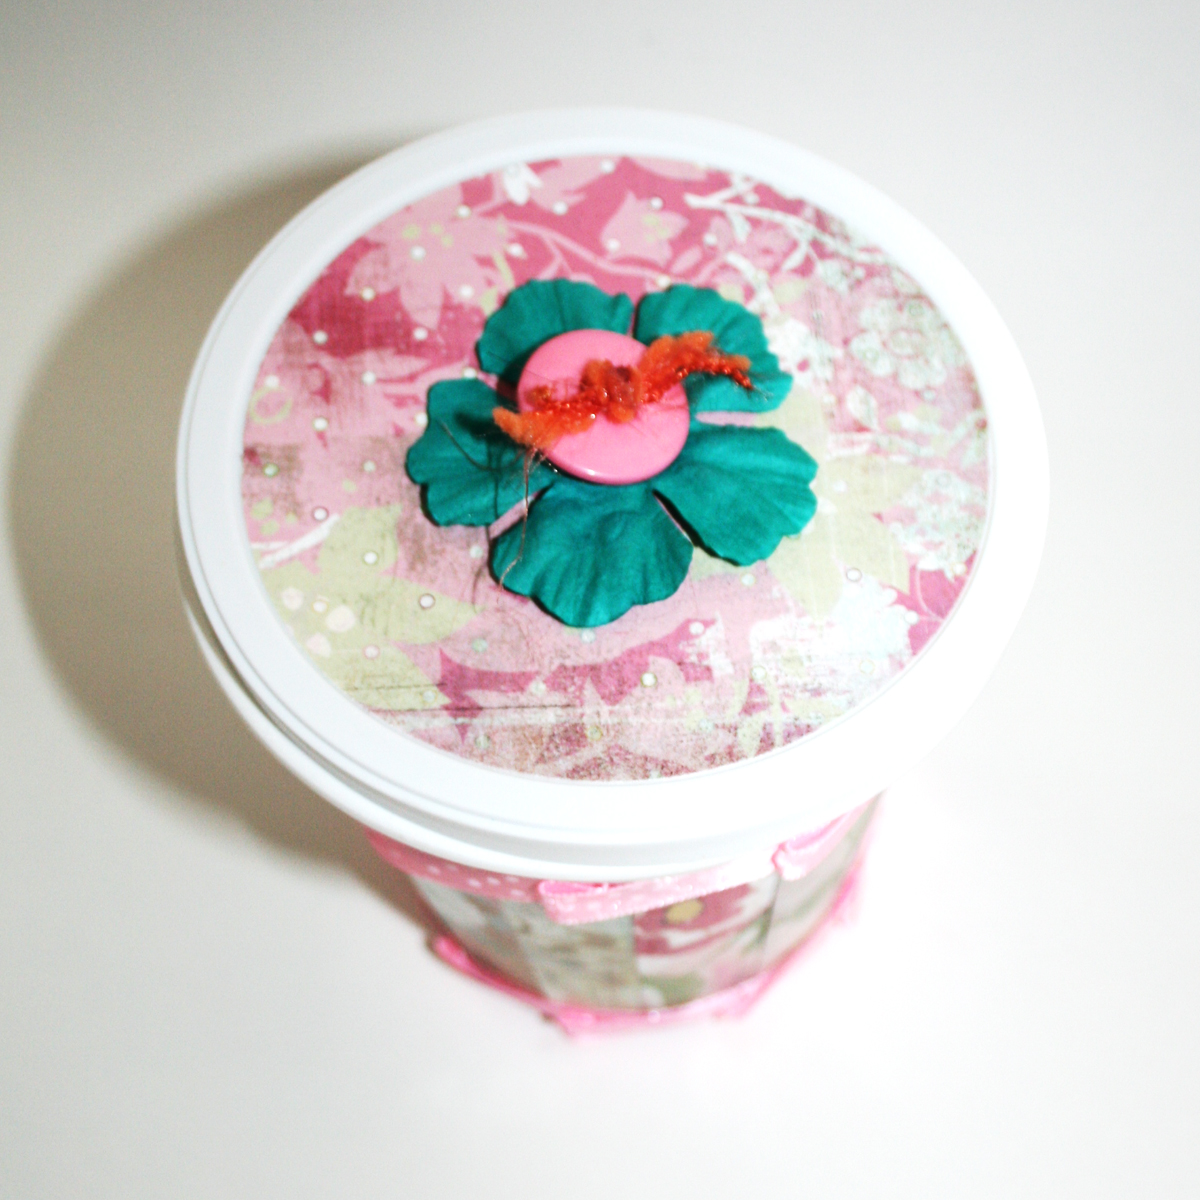
  3. Adhere the patterned paper circle to the lid with Mod-Podge and seal with another generous layer of Mod-Podge on top. Let dry completely.
  4. Cut a bunch of patterned papers to the same height as your container and a 1″ width. [mine are 4″ by 1″]
  5. Adhere the strips to the container – one by one – using Mod Podge. To eliminate air bubbles, rub each stripe with your finger. It’s messy, but important to secure your paper strips to the plastic container.
  6. Seal your strips of paper with another generous layer of Mod Podge and put aside until it dries completely.
  7. Measure the diameter of the bottom of your container to figure out the smallest size of a circle that can fit into your container.
  8. Cut as many cardstock circles as the number of pages you wish to have in your mini-album. The circles vary in size whilst the smallest has the same diameter as the container’s bottom and the largest has the same size as the container’s lid.
  9. To find the center of the cardstock circles, cut some more circles from scrap paper, at the same size as your cardstock ones. Fold each scrap paper circle once vertically and once horizontally and mark the point of conjunction. This point is exactly at the center.
  10. Use the scrap circles as a template and punch a hole at the center of each cardstock circle.
  11. Cut a long strip of strong decorative string and fold in half.
  12. Make a knot at the fold (with the two long string edges coming out of it).
  13. Weave both edges of the string through the circles. Secure each circle with a knot and add another knot between each circle, at about 1″, as a spacer.
  14. Punch a hole at the center of the lid and apply Diamond Glaze (or any other strong liquid adhesive) to the inside of the lid.
  15. Thread the ends of the string through the hole and make sure the top cardstock circle gets stuck well to the inside of the lid.
  16. To finish off the lid, thread the ends of the string through the paper flower and the button and secure in a knot. Dab some diamond Glaze on the knot to make sure it stays put.
  17. Cut a piece of ribbon that circumscribes the top of your container. Apply a strong tape adhesive to the back of the ribbon and adhere to the top edge of your container. Repeat on the bottom of your container. This will finish off the edges.
  18. For a more cohesive look, add a second strip of ribbon (about 1½ times the circumference of your container) and then adhere to the edges with glue dots, while pleating the ribbon at each 1″. Secure each pleat with a glue dot.

Variation – You can skip steps 1-3 & 7-16 and make a quick and easy pencil holder instead…

Upcycled Yogurt ContainerUpcycled Yogurt ContainerUpcycled Yogurt Container

How Ideas Become Creativity Prompts…

A page torn from my bedside journal:

From an idea to a Creativity Prompt

Share

If you have any question, suggestion or remark – don’t hesitate to contact me – either leave a comment here, use the contact form or start a new thread on the Creativity Prompt Flickr Group!!!

I would also be very happy to see your own creations, so don’t be shy and share ๐Ÿ™‚

If you liked this post you may want to subscribe to my feed:

Journaling Prompt – Chicken Soup For The Soul OR Healing Food

Wednesday, June 10th, 2009

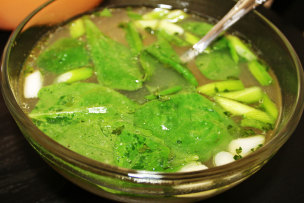
Chicken Soup For The Soul OR Healing FoodSoon after I finally got rid of my allergies and sunburns I came down with a nasty flu. Extreme times call for extreme measures so I called my parents and retrieved my mom’s chicken soup recipe. The miraculous flu medicine of all times.

After bringing 8 cups of water with 1 onion, 1 butternut squash and 2 chicken thighs and shins to a boil, the recipe calls for 2 hours of simmering over low heat.

During those 2 hours the entire house was filled with scents which magically brought me back to Thursdays on my parents’ house, while my mom was getting ready for the sabbath and getting all the cooking done.

I was already starting to feel better, there and then, while waiting for the chicken and vegetables to leave their healing essence in the water.

After the soup was ready, following my mom’s instructions, I added fresh minced ginger and garlic and a handful of fresh spinach leaves and some chopped spring onions with a sprinkle of parsley leaves.

The soup was very fragrant. Flavored by all the fresh ingredients with just a dash of salt and pepper.

One spoonful and my head was less pounding, my nose less stuffed, my throat less dry and my bones less aching. Finally I felt good enough to take a long nap, without getting up every minute to wipe my nose… One spoonful was better than all the 1000mg capsules of vitamin C I was taking ever since my nose started to feel funny on Friday.

This is the story of my healing food. What is yours?

For this week’s journaling prompt document your healing food – the dish that instantaneously makes you feel better.

  • What food comforts you? What dish can heal your ailment?
  • What is the recipe?
  • Who did you get the recipe from? Is it a part of your family’s tradition?
  • What is the magical healing power of the dish?
  • When do you eat it?
  • Does the process of making this food heal as well?
  • Does it bring back any healing memories?
  • How does it smell? What does it taste like?

Share

I shared my healing food with you, share yours by leaving a comment on this post.

I would LOVE to hear about your comfort food.

If you liked this post you may want to subscribe to my feed:

Inspiration Prompt – Work Hard And Plant A Seed In The World

Monday, June 8th, 2009

Plant A Seed In The World The harder you work to achieve something, the deeper is the imprint your achievement is going to leave.
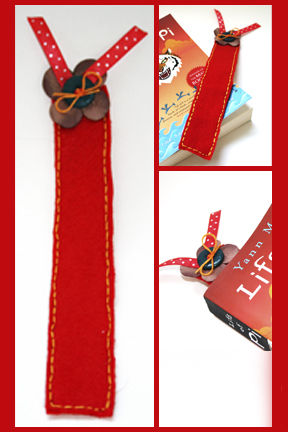
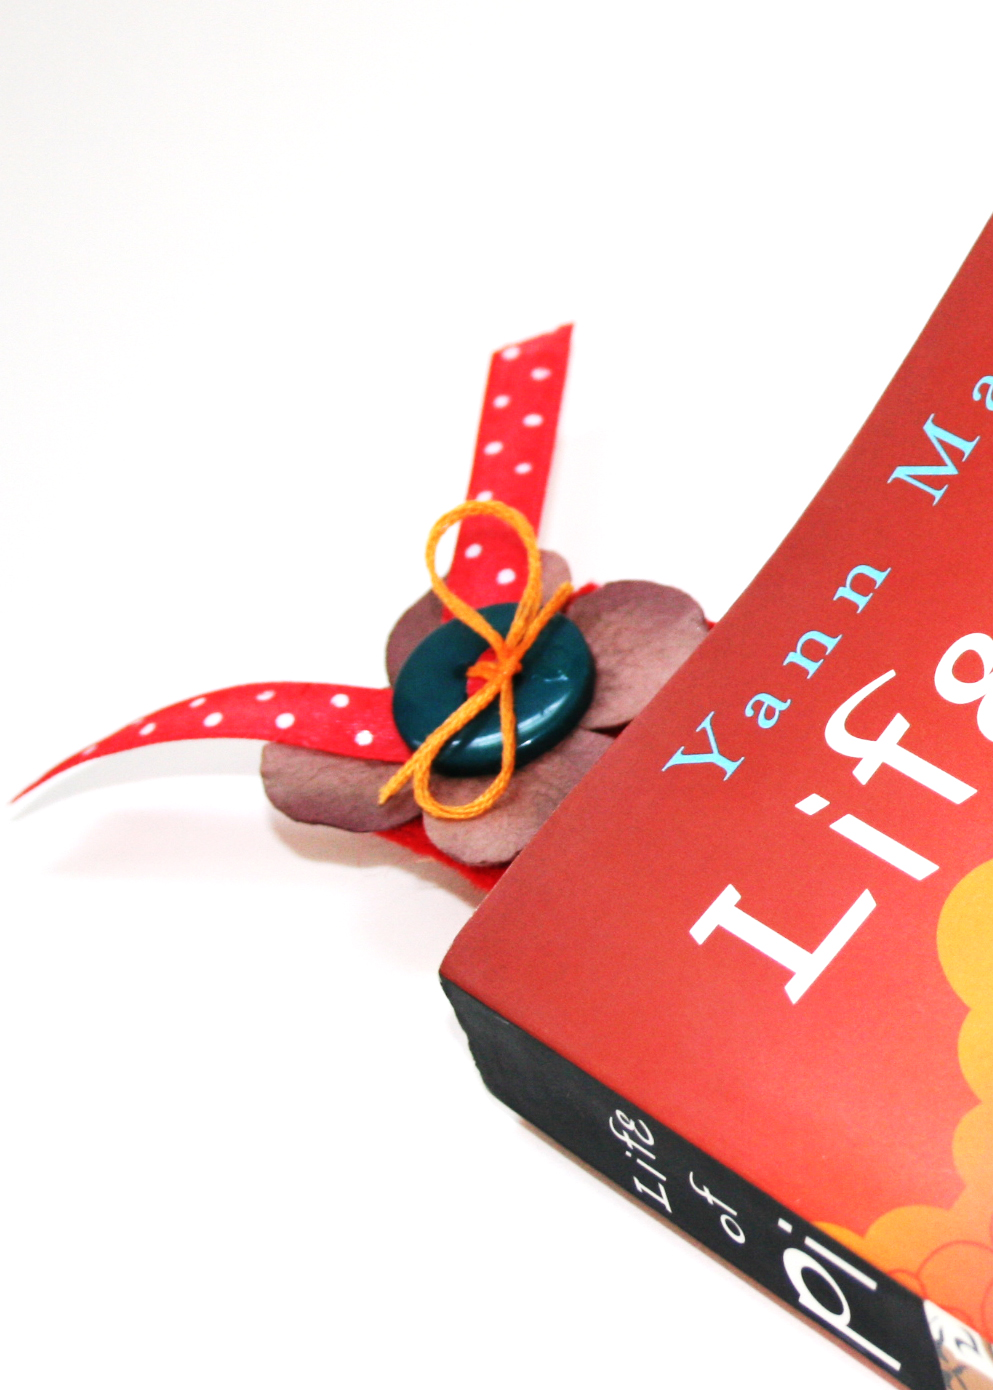
If something comes easily to you, the slightest piece of criticism or a snappy remark can shatter your confidence and destroy your sense of accomplishment. Deep inside you may think that if you didn’t make a real effort, maybe your deed isn’t so great after all.

However, after you worked hard to accomplished something – no one will be able to take that accomplishment away from you. No one will be able to belittle your success and make you doubt your merit.

The seed you have planted has rooted and you KNOW you have achieved something GREAT.

Have a fabulous day!

Share

Leave a comment and share your thoughts on owning your great accomplishments.

If you liked this post you may want to subscribe to my feed:

Creativity Prompt – How To Make a Felt Bookmark

Friday, June 5th, 2009

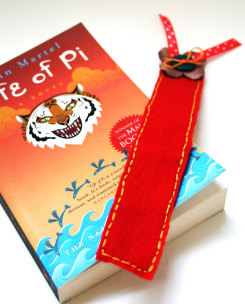
How To Make a Felt Bookmark
I am equally [i.e. very] passionate about two things: making stuff and reading… Therefore, it is only natural that sooner or later I came up with a way to combine both by making bookmarks – so cute I sometimes stare at them for a while before I start reading (another oddity you’ve learned about me).

A few years back, when I had no time for arts and crafts – working looooong hours at the office – I purchased a laminating machine, making bookmarks for my self and for my parents and for my sisters and… Well, you got the picture. Sadly the laminating machine passed away after we had moved to Ireland. It never made it to California. Technically speaking it didn’t even make it to Ireland…

Well, when laminating is out of the question, lets pull out our felt stash and make the cutest bookmark e-v-e-r! Are you with me on that?

Tools & Supply

How To


[Music by the talented Josh Woodward from his album: “The Simple Life”]

Step by Step Instructions

  1. Cut two pieces of felt to your desired bookmark’s size (mine were 9¼” by 1½”).
  2. Trace one of your felt strips on a piece of plain cardstock.
  3. Align the edge of your traced rectangular with the ¼” mark of your ruler and draw a line – both lengthwise and widthwise, then cut the smaller rectangle with sharp scissors.
  4. Make s felt “sandwich”, by placing the cardstock strip between the 2 felt strips. temporarily adhere the cardstock to the felt with a [permanent] tape runner.
  5. Take your ruler and place it about an 1/8th of an inch from the edge of your felt sandwich and mark at each ¼” as a sewing guide for later on. Keep on marking all around the rectangle’s edges – you can also make smaller marks, depending on your desired stitch’s size.
  6. To allow your ribbon to easily go through the button’s holes, cut both ends to a pointy edge, then thread it through 2 of the button’s holes. Cut the excess ribbon off and protect the edges from fraying by applying a tiny dab of Diamond Glaze.
  7. We are using the button as a tool to finish off the sewing, as we cannot conceal the knot anywhere else. Therefore thread the embroidery floss through the button and into the flower and then through the felt sandwich. Leave a long tale for your knot at the end.
  8. Keep on stitching the edges of the felt sandwich with a backstitch.
  9. Secure your sewing by threading the embroidery floss back through the flower and the button and tying it in a knot with the tail you’ve left before. A dab of diamond glaze will keep the knot secured.

Felt bookmarkFelt bookmarkFelt bookmark

Share

If you have any question, suggestion or remark – don’t hesitate to contact me – either leave a comment here, use the contact form or start a new thread on the Creativity Prompt Flickr Group!!!

I would also be very happy to see your own creations, so don’t be shy and share ๐Ÿ™‚

If you liked this post you may want to subscribe to my feed: