/** Font types */

Author Archive

Inspiration Prompt – You Never Fail You Are Just Delayed

Monday, October 19th, 2009

I have recently watched an eye opening video on You Tube that I want to share with you.

This video shows how many of the greatest minds, most talented artists and most imaginative inventors had been deemed as failing at something at a certain point in time.

Every beginning is dotted with misguided steps and awkward hand strokes, those dots are accumulating over time until they render a perfect line.

Watch on You Tube

Don’t be distracted by the dots. In the end you will make a perfect line!

Have a great day!

Tomorrow I am celebrating my BIRTHDAY and I would like to send you some warm wishes πŸ™‚

Share

Were you ever disappointed at not getting something right at the very first time, only to discover you are headed towards greater success? Share your thoughts by leaving a comment on this post.
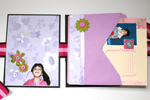
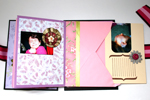
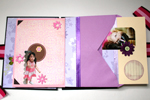
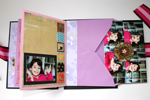
Creativity Prompt – How To: Envelopes Mini Album

Friday, October 16th, 2009

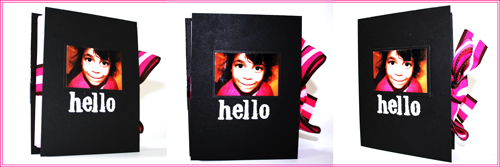
Envelopes Mini Album

This week’s project is also quick and easy to put together. You decide how much time you want to spend embellishing each page later on…

All you need is a bunch of envelopes, 2 pieces of chipboard and a long piece of ribbon. Pretty straightforward.

You can take your time and decorate each page individually, or just adhere a photo on the back of each envelope and insert your journaling in each corresponding envelope. The sky is the limit for you.

Tools & Supply

How To


Watch on You Tube
[Music by Kevin MacLeod with permission]

Step By Step Instructions

  1. Cut 2 pieces of chipboard – ½” taller and wider than your envelopes.
  2. Stick a strong double sided tape at the center of each chipboard piece. You can use the markings of your cutting mat for easy alignment.
  3. Adhere your ribbon to both pieces of chipboard, while leaving a ½” gap between them.
  4. Adhere each envelope to the next at the base with plain packaging/wrapping tape. Make sure you keep the orientation of the envelopes.
  5. Cut the excess tape off the sides of the envelopes stack.
  6. Adhere the envelopes stack to the chipboard with some more strong double sided tape.
  7. Cut the envelope inserts out of cardstock. Make them ½” shorter and narrower than your envelopes.
  8. Insert a piece of cardstock into each envelope.
  9. Embellish and… Voilà!

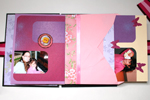
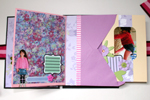
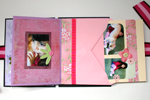
Envelopes Mini AlbumEnvelopes Mini AlbumEnvelopes Mini Album


Share

If you have any question, suggestion or remark – don’t hesitate to contact me – either leave a comment here, use the contact form or start a new thread on the Creativity Prompt Flickr Group!!!

I would also be very happy to see your own creations, so don’t be shy and share πŸ™‚

Journaling Prompt – Let The Pictures Tell The Story And Your Words Set The Tone

Wednesday, October 14th, 2009

Let The Pictures Tell The Story

This series of photos I took a year ago conveys an entire story. The story of my niece trying to have it her way and disappointed at failing to do so. I was visiting home and wanted some alone time with my sister (her mother) and she wanted to keep her mom at seeing distance…

Any words will take a way from the story which the photos depict succinctly.

For this week’s journaling prompt try to accompany powerful photos with a series of powerful words that set the tone. No more. No less.

  • Don’t use whole sentences but rather single words.
  • Use adjectives.
  • Try to add a powerful verb.
  • Concentrate on the mood and setting of the story.

I would support the series of pictures above with the following words:

  • Negotiating.
  • Disappointed.
  • Hopeful.
  • Winning…

Share

Have you tried this journaling technique before? Do you feel less pressure when writing a bullet-point list? Share your thoughts by living a comment on this point.

To set off this technique share a list of words that describes your day today. I am looking forward to hear about your day!

Inspiration Prompt – Keri Smith’s 100 Ideas

Monday, October 12th, 2009

For this week’s inspiration prompt I want to share a different kind of inspiration – creative inspiration.

Sometimes no matter how hard we try we feel uninspired, blocked and cannot seem to come up with any new ideas or make anything that pleases us.

Our creativity needs refueling as much as our body needs food, as much as our car needs gasoline and as much as our cellphone needs battery…

Keri Smith, an amazing artist and author has compiled a list of 100 ideas that can help you rekindle an extinguished inspiration. 100 sparks of creativity, any of which can relight your fire.

Take a look. Try some of her brilliant ideas. Try each and every one of her ideas, an idea a day.

Fuel your creativity!

Share

Have you tried any of these ideas? How do you fuel up your creativity? share by leaving a comment on this post.

Creativity Prompt – Make A SIMPLE Fabric Covered Mini Album

Friday, October 9th, 2009

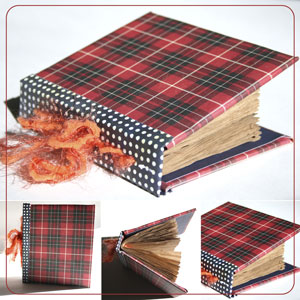
A SIMPLE Fabric Covered Mini AlbumFor this week’s project you don’t even need cardstock. It’s as simple and easy as it gets…

All you need is a batch of 4″ by 6″ photos, a 5″ by 6″ piece of chipboard and a fabric scrap.

Is that all? Yes. That. Is. All.

In my album I gathered pictures from 5 different apartments my husband has lived at (in 5 different continents). There is one common denominator in each photo – my husband is completely absorbed in his computer. I named the mini album: “Nadav’s Playground”…

If you have a few photos that tell a story and you wish to compile them in this cute album you can carry around or gift to a dear one, than read on.

Tools & Supply

How To


Watch on You Tube [Music is by Josh Woodward with permission]

Step By Step Instructions

  1. Cut 2 pieces of chipboard at 2½” by 6″ each.
  2. Fold each photo in half lengthwise (into 2″ by 6″).
  3. Adhere half of each photo to the next with glue stick – back to back – to create a photo booklet. Go over it with a brayer to eliminate air bubbles or glue bumps.
  4. Lay your chipboard pieces over the left side of the fabric scrap. Leave a gap between the 2 chipboard pieces. The gap should be as thick as the booklet’s spine.
  5. Adhere the chipboard to the fabric with glue stick as laid before.
  6. Trim off the excess fabric. Leave a 2″ edge all around the chipboard pieces.
  7. Cut the corners of the fabric, but leave a small gap for a neat fold later.
  8. Adhere the fabric flaps to the chipboard with glue stick. Use a brayer to ensure the adhesion.
  9. Adhere the booklet to the cover with glue stick.
  10. Embellish! (Although the American Crafts letter stickers are self adhered, I added a dab of strong liquid glue to make sure they stay put. TIP – I ran out of some of the letters so I switched on my creative half. The ‘N’ is actually a trimmed ‘M’ and one of the ‘A’s is an ‘at’ sign – which goes well with the computers theme.)

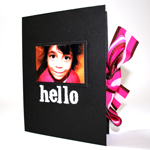
A SIMPLE Fabric Covered Mini AlbumA SIMPLE Fabric Covered Mini Album

I want to share with you one of my favorite pictures from this mini album. It was taken here at our apartment in California. Note the pasta on his lap and the computer on the dinner table…

My husband's passion for anything computer-wise

Isn’t that a memory to cherish?

Share

If you have any question, suggestion or remark – don’t hesitate to contact me – either leave a comment here, use the contact form or start a new thread on the Creativity Prompt Flickr Group!!!

I would also be very happy to see your own creations, so don’t be shy and share πŸ™‚

Journaling Prompt – Record Your Fall Traditions

Wednesday, October 7th, 2009

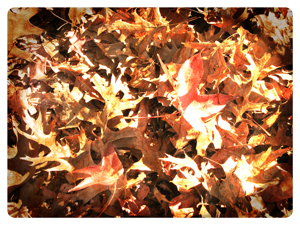
Fall TraditionsRight now in some places the first signs of fall are budding. Some places are already in the midst of fall. In other places it isn’t fall at all. Some places have no fall…

Here at the Bay Area in California the mornings are chillier. The foliage has just started to lose its bright green sheen. When you stroll along the sidewalk you may even spot a fallen leaf or two. You may barely notice but the season is changing.

S l o w l y.

To seize the season this week’s journaling prompt is calling you to record your special fall traditions (or which ever season you experience now).

Is it “bathing” in colorful leaves?
Is it going to the pumpkin patch?
Is it sipping a venti pumpkin spice latte?
Is it cooking your first batch of soup?

What is it that you do when you wake up in the morning and notice the fall has arrived?

Share

Share your special fall traditions. (Share your recipes as well, if you mark the fall by cooking a special dish)
Is it fall where (and when…) you read this post?

Share by leaving a comment on this post. I am excited to hear about your traditions.

Inspiration Prompt – Hello Diversity, You Are Very Welcome!

Monday, October 5th, 2009
School of fish - Diversity
[Photo by: Jon Hanson]

Granted, sticking with the familiar is convenient and even comforting but it is the diversity that makes the world as special as it is.

How boring would it be if we all looked the same, wore the same clothes and lived in look-alike houses.

How horrible would it be if we all carried the same set of skills and came up with the same ideas?

How would the world evolve if we all conformed and banned disparity?

Aristotle had said long ago:

Ò€œIt is the mark of an educated mind to be able to entertain a thought without accepting it.Ò€

Welcoming diversity is all about that.

Welcoming diversity is about listening. Even when you don’t agree. Even if you do not understand. Even if you do not see the need. Even when you don’t believe in what is being said.

Welcoming diversity is about letting go. Letting go of prejudice. Letting go of pride. Letting go of the need to carve the world the way you believe it should be like.

Welcoming diversity is about accepting ideas without accepting an idea. It is about making place while keeping yours.

Share

How are you welcoming diversity? Share your thoughts by leaving a comment on this post.
Creativity Prompt – Make A Hardbound Journal From Packaging Material

Friday, October 2nd, 2009

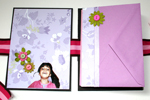
Hardbound Journal From Packaging Material
I love recycling and every time I manage to turn trash into treasure, I am happy. Maybe too happy, but that’s for the professionals to judge πŸ™‚

If you are as jubilant about recycling as I am and would like to make a fat journal out of cardboard and packaging paper used for padding – then keep on scrolling.

I’ve got a video tutorial just for you.

Tools & Supply

How To


[Music by Josh Woodward, with permission]

Watch on You Tube.

Step-By-Step Instructions

  1. Cut cardboard at: 5½” by 4½” | 5½” by 4½” | 5½” by 1″.
  2. Cut 2 pieces of patterned paper for the cover, at: 8″ by 6″.
  3. Adhere the cover pieces to the center of the patterned paper with glue stick.
  4. Cut the corners of the patterned paper and leave a gap from the cardboard corners – a gap as long as the cardboard is thick (between ½” to ¼” depending on the cardboard).
  5. Fold the remaining patterned paper flaps over and adhere to the cardboard with glue stick.
  6. To cover the spine, cut a 6″ by 6″ piece of patterned paper diagonally. Cut it 2″-1½” away from the corner on each side.
  7. Fold and adhere the top patterned paper flaps to the cardboard spine with glue stick.
  8. Apply strong double sided adhesive to both edges of the patterned paper and attach the cover pieces to it. Allow an 1/8″ gap between the spine and each of the cover pieces.
  9. For the inside cover, cut your patterned paper at: 5¼” by 4¼” | 5¼” by 4¼” | 5¼” by 1″.
  10. Adhere the patterned paper to the inside cover with glue stick. Optional – To secure the adhesion go over the cover with a brayer a few times in different directions.
  11. Punch 2 holes in the spine using a Crop-a-Dile.
  12. Cut the insert pages (from the packaging paper, or any other plain paper you have) at 8″ by 5″.
  13. Fold the insert pages in half.
  14. Optional – Use a T-Square ruler to straighten up the inserts (or leave them looking rustic).
  15. Position your folded pages where they should lay inside the journal and mark the placement of the holes, then punch the inserts accordingly.
  16. Thread your string through the inserts, from the inside – out.
  17. Thread the ends of the string through the spine and secure in a knot or a double bow.
  18. Write your secrets and deepest wishes in the pages of your new handmade journal.

Share

If you have any question, suggestion or remark – don’t hesitate to contact me – either leave a comment here, use the contact form or start a new thread on the Creativity Prompt Flickr Group!!!

I would also be very happy to see your own creations, so don’t be shy and share πŸ™‚

Journaling Prompt – With A Snap Of A Finger…

Wednesday, September 30th, 2009

With A Snap Of A Finger...Making the bed at 6:30 am. Heaps of laundry to wash, dry and fold. A dinner than won’t make itself after a hard day at work. Children toys scattered all over the place. A carpet that needs vacuuming. Floor that needs moping. Bathroom that need cleaning. Annual report that will certainly not compile itself and the list is loooong.

Where is perky Mary Poppins when we need her. With a snap of a finger, the sheets will make themselves. The dinner will be ready. The house will get clean and tidy and all our work will be done and ready on our desks.

Isn’t that a wish worth wishing? (Without a doubt – a rhetorical question)

For this week’s journaling prompt entertain yourself with the idea that you can get things done with a snap of your fingers.

What will you wish your fingers to take care of? List 10 chores you would gladly hand over, with a snap of a finger.

This can make a great layout or a mini album, entitled: “With a Snap of a Finger…” It will be a great idea to entertain yourself by, but also a document of your daily grind.

Share

What would you hand over to your fingers? What are your most tedious chores? share by leaving a comment on this post.
Inspiration Prompt – The Day Of Atonement

Monday, September 28th, 2009
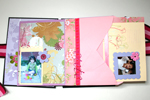
Atonement
[Photo by: Gregory Markchester]

Today is the Jewish people Day of Atonement. According to the Jewish religion, on this day each person is tried before god in the majestic court. The book is opened and all one’s rights are measured against one’s sins – determining whether one lives or dies.

The Jewish religion perceives god as a benevolent god. God forgives all sins made against him but god shall not forgive any sin made against another human being. Therefore the people must sincerely ask for forgiveness from anyone who might have been hurt by their deeds.

Although the Day of atonement is marked as a day of fasting, it is not a day of mourning but a festive holiday. A holiday in which people take time away from their material needs and ponder about their way in life – where are they going to and how are they getting there?

For the sake of this week’s inspiration prompt I want to leave all religious connotations aside and discuss the meaning of taking an annual Day of Atonement.

Taking 24 hours in which we won’t be running towards something. 24 hours in which we think about our endeavor, about the way we treat other people and the way we treat ourselves. 24 hours in which we observe our past ways and plan our future ones, and if necessary change routes.

Sometimes life’s pace is extremely fast and without taking the time to really think about life’s meaning and about what is really important in life, we may lose our way and perhaps lose ourselves in the race.

I believe the self examination done on the Day of Atonement can be meaningful and beneficial to both believers and atheists – everyone examines their ways at their own level.

Share

What do you think about the idea of a Day of Atonement (in a non-religious – but maybe spiritual – way)?

I am very interested to hear from my non Jewish readers whether your religion/tradition has a similar notion.

Please share your thoughts and insights by leaving a comment on this post.