/** Font types */

Author Archive

Super Quick Holidays Cards + Free Template (Update)

Saturday, November 21st, 2009

Super Quick Christmas Cards

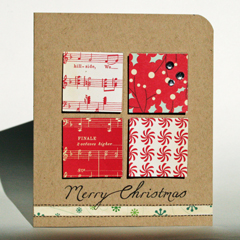
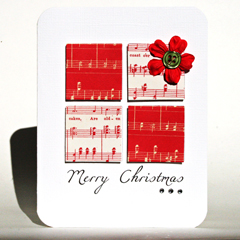
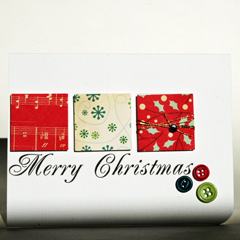
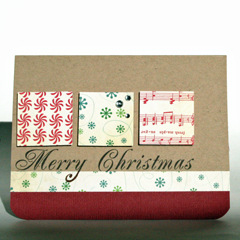
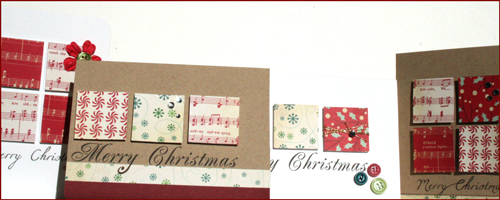
Yesterday I posted a video tutorial and a free template on making super quick handmade cards for Christmas.

A reader has reminded me that some people may want to make handmade cards for other holidays, or for non-religious holidays, which is so true. I celebrate Hanukkah, for instance. Though I do send Christmas cards for my close Christian friends.

So I decided to make 2 more templates – one for Hanukkah and one for general holidays greetings for all of you to enjoy:

Enjoy!

I’d love to see the cards you’ve created, so please share.

Make Your Own Planner Workshop
Check out the new “Make Your Own Planner” workshop and you may solve this year’s holiday gift shopping problem. An affordable workshop that keeps on giving…

Creativiy Prompt – Super Quick Christmas Cards + Free Template

Friday, November 20th, 2009

Super Quick Christmas Cards

Sending handmade cards is a wonderful and well appreciated gesture, but with a recipients list as long as eternity, who has the time to make them?

What if most of the work was already done? The basic design has been laid down. The greeting has been “stamped” and all you had to do is cut, score, punch and paste? That would really give the push you need to accomplish your goal of sending handmade cards to all your acquaintances.

Search no more. I have sorted out your Christmas cards dilemma for this year.

Below you can find a printable template (PDF file format) that does most of the work for you. If you are interested, keep on reading.

Tools & Supply

How To


[Watch on You Tube]

Step-By-Step Instructions

  1. Print the template on a cardstock of your choice (8½” by 11″). Make sure your printer’s setting is on “No scaling”.
  2. Cut your cardstock at 5½” and score each half at 4¼”.
  3. Cut 1¼” by 1¼” squares from the patterned paper of your choice. Use a punch to make this step super quick.
  4. Adhere your patterned paper squares to the squares on the template, using dimensional foam adhesive.
  5. Either stop here, right a personal greeting inside and send the card OR embellish some more.

Quick Christmas CardsQuick Christmas Cards

Quick Christmas CardsQuick Christmas Cards

Share

If you have any question, suggestion or remark – don’t hesitate to contact me – either leave a comment here, use the contact form or start a new thread on the Creativity Prompt Flickr Group!!!

I would also be very happy to see your own creations, so don’t be shy and share 🙂

Make Your Own Planner Workshop
Check out the new “Make Your Own Planner” workshop and you may solve this year’s holiday gift shopping problem. An affordable workshop that keeps on giving…

Journaling Prompt – Give Thanks To A Complete Stranger

Wednesday, November 18th, 2009
A Complete Stranger
[Photo by: Derrick Tyson]

A week before American Thanksgiving lets try to remember together the kind strangers in our lives and give them thanks.

Think about all the faceless people around you. People you have seen once, never before and probably never again.

Think about the person who stood before you inline and after one glance at your stressed expression, or nagging child, gave you his place in the queue.

Think about the person who made you smile while you were upset, without even knowing.

It doesn’t have to be a recent encounter, either. It can be a person you had stumbled upon long ago but you can still remember his random act of kindness or the lesson you have learned from him while your lives had briefly brushed against each other’s.

Now, open your journal and write.

Document your chance meeting and what you have gotten out of it. Write down how the stranger has enriched you, even if just momentarily and express your sincere gratitude.

Start a gratitude journal and register these random acts of kindness regularly. Don’t constrain your thanks giving to your near environment, remember the strangers in your life too.

After all, every one we come across makes a dent in our life, leaves an impression and these accumulated marks are part of what makes us ourselves.

Share

Which stranger would you like to thank and why, participate in the discussion by leaving a comment on this post.

Make Your Own Planner Workshop
Check out the new “Make Your Own Planner” workshop and you may solve this year’s holiday gift shopping problem. An affordable workshop that keeps on giving…

Inspiration Prompt – Speak As Your Next Word Will Be Your Last

Monday, November 16th, 2009
Words
[Photo by: Andrew Storms]

Charles de Lint had suggested an interesting notion:

“Here’s a weird thought: What if everyone only has so many words inside of them? Then sooner or later you’d run out of words, wouldn’t you? And you’d never know when it was going to happen because everybody would have a different allotment, it would be different for everyone – the way hair colour varies, or fingerprints. I could be in the middle of a story, and then run out of words, and it’d never be finished.”

Play with this idea, what if your next word will by your last?

What if you only manage to insult but not to ask for forgiveness?
What if you only manage to receive but not to give thanks?
What if you only manage to think of an idea but not to share out loud?
What if you only manage to remember but not to tell?

“These are thought provoking questions but I will never overextend my word-quota”, you may think.

Well, think again.

Let me share a story with you.

A story about an independent woman who had survived major hardships in her life but kept moving forward. Had started a new family after her fiance perished in the holocaust. Had built a successful business. Had always made sure her hair is flawless, her lipstick is meticulously applied and her suit is perfectly ironed. Always a suit, even on a trip to the supermarket or when picking up her granddaughter from kindergarten.

This woman had a million stories to tell. Every day, at lunch time, after picking up her granddaughter and making sure she clears up her plate, she would open the big sofa bed in the guest room and tell her stories. Such wonderful stories. Books she had read. Adventures she had gone through and her granddaughter would listen with glistening eyes, asking: “please, grandma, tell me one more story”, and she did.

The years had passed and the granddaughter grew up. She didn’t need a babysitter anymore and forgot all the stories that had been told before and abandoned the stories that has not yet been told.

One day, in the spring time, the woman came by to visit her granddaughter and brought her some sweets. The granddaughter enjoyed the break and the sweets but quickly said her goodbyes, as she was busy studying for her finals.

An hour later the woman came back. Sweets in her pocket and the granddaughter thanked her and said goodbye again.

An hour later and she came back again. Sweets in her pocket again and the granddaughter started to worry and to understand.

Not long afterward Alzheimer disease was diagnosed.

Soon after that all the stories has been forgotten and lost forever.

The hasty granddaughter, if you haven’t realized by now – is me!

The word quota may be over extended and if it happens, it will take you by surprise.

So make sure you tell all the stories (and write them down). Articulate your idea in words and don’t shy away. Verbalize your gratitude. Speak with a positive note and always start with the compliment before moving on to a constructive criticism. Speak as your next word will be your last.

Share

Please share your thoughts about the idea of a finite word quota and leave a comment on this post. I love to hear your mental voice and to keep the discussion going whenever it’s possible.
Make Your Own Planner Workshop
Check out the new “Make Your Own Planner” workshop and you may solve this year’s holiday gift shopping problem. An affordable workshop that keeps on giving…

Creativity Prompt – Make a Hybrid Board Book

Friday, November 13th, 2009

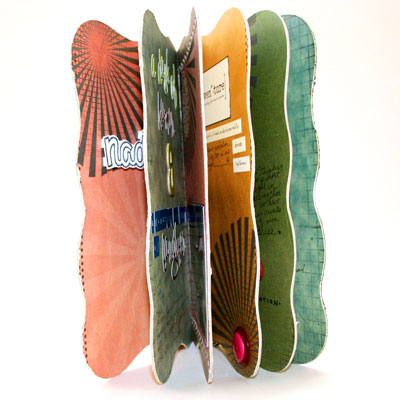
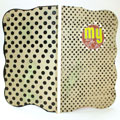
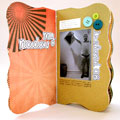
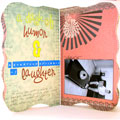
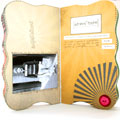
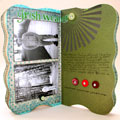
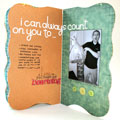
Hybrid Board BookThis time I revisit an oldie, but a goodie – the altered board book.
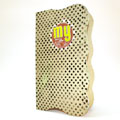
This week there is a twist – I am going hybrid.

That means that part of the book is designed digitally and part of it – traditionally. Together it’s a great mix of new & old.

Using digital elements, such as patterned papers, word art and other digital embellishments helps in keeping a theme and a color scheme for the book. If you want to make this book as a gift, in multiples, then starting on your computer also allows you to include all your journaling on the pages and then printing them either once or a million times, with no extra effort.

Cool, huh?

Tools & Supply

How To


[Watch on You Tube]

Step-by-Step Instructions

  1. Start this project on the computer. Open your photo editing software and either crop or resize the digital patterned papers to the same width and height of your board book.

    Don’t forget to count the spine while making the pages for the cover, leave a gap the same width as your spine between them.

  2. Print your pages on cardstock. Plain paper won’t be opaque over the altered pages of the board book.

    Use the borderless printing setting, otherwise the printer will scale down your images to allow a white border around them and it’ll distort your measurement.

  3. Start working on the cover – trim off the excess paper and score your spine’s fold lines to get crisp creases. You may also go over the folds again with the bone folder, for an even crisper look.
  4. Adhere the cover by applying a generous layer of glue stick on the board book cover and burnish with a brayer. Let dry.
  5. In the meantime, start cutting the pages and your photos and any other digital element you have printed (word art, embellishments, journaling tags, etc.)
  6. Once the glue has dried, turn your page around and cut off the excess with a very sharp craft knife. If you get uneven edges, you can file them down with sand paper.
  7. Repeat the same process with the rest of the pages: adhere, go over it with a brayer, let dry and trim off the excess.

    Make sure you trim off the edges of a page before adhering the printed cardstock to the other side.

  8. Some ideas for embellishing your mini altered book:

    • Adhere your titles with foam pop-dots to give some extra dimension.
    • Stick to one type of embellishment (buttons in my case) to maintain cohesion.
    • Use different sizes of pen tips to create interesting handmade word art.
    • Outline your pictures, letter stickers and other elements with your journaling pen to anchor them to the page and add dimension.
    • Using 3D embellishments can make dents in your photos, so make sure both pages have the same “elevation” so the elements won’t touch the pictures themselves.
    • Have fun!!!

Hybrid Board BookHybrid Board BookHybrid Board BookHybrid Board Book
Hybrid Board BookHybrid Board BookHybrid Board Book

Share

If you have any question, suggestion or remark – don’t hesitate to contact me – either leave a comment here, use the contact form or start a new thread on the Creativity Prompt Flickr Group!!!

I would also be very happy to see your own creations, so don’t be shy and share 🙂

Make Your Own Planner Workshop
Check out the new “Make Your Own Planner” workshop and you may solve this year’s holiday gift shopping problem. An affordable workshop that keeps on giving…

Sweet Announcement – I Am On Shimelle Digitals Design Team

Thursday, November 12th, 2009

Shimelle Digitals - CupcakesI have no idea how I was able to contain myself until now, but I’ve made it somehow and now I can finally tell: I have joined Shimelle Laine‘s Design Team.
I will be doing both digital and hybrid projects, using Shimelle Digitals kits.

I love Shimelle. I have been a loyal follower ever since I took my first workshop with her: “Home Sweet Home” which was so awesome it almost immediately followed by another one: “My Freedom”.

I am thrilled to work with Shimelle’s fabulous kits alongside the extremely talented Baker’s Dozen, my teammates:

  1. Allison
  2. Anso
  3. Avital [Hey, it’s me…]
  4. Dolly
  5. Elisa
  6. Helen
  7. Karen c.
  8. Karen m.
  9. Kate
  10. Nadine
  11. Rani
  12. Sheri
  13. Yvonne

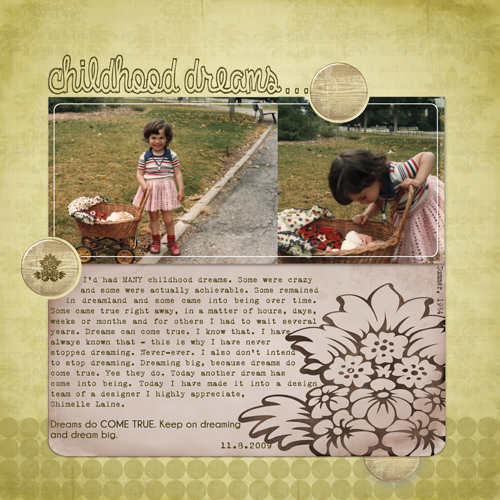
This is my first layout for Shimelle Digitals:

Childhood Dream Layout

In this layout I used only the Long and Winding Road Kit and Free Long and Winding Road Add On. Fonts: Clementine Script, VT Portable Remington and Berlin Sans FB; all available at Dafont.com.

Take a look at my teammates layouts (click on the links above) to see how they came up with 12 completely different and totally amazing layouts, all using the same kit!

I guess the possibilities are truly endless…

Keep your eyes open, I will be posting tutorials for some great hybrid projects using Shimelle Digitals kits.

Make Your Own Planner Workshop
Check out the new “Make Your Own Planner” workshop and you may solve this year’s holiday gift shopping problem. An affordable workshop that keeps on giving…

Journaling Prompt – Narrate An Inspiring Picture

Wednesday, November 11th, 2009
Narrate An Inspiring Picture
[Photo by: Flemming Christiansen]

Beauty holds great powers. One of its super-powers is to break through blocks, including the writer’s block.

When you look at an inspiring picture, the beauty in it so vast, so powerful, words start to come up by themselves.

At first you can only identify a few single words, scattered in the wind of thought, but the longer you look at the picture, the more you can keep up with the flying words and identify more and more of the words and string them together into beautiful sentences, portraying everything you see and feel while looking at it.

For this week’s Journaling prompt I urge you to look at some amazingly inspiring pictures and follow the word flood.

You will be amazed with the results this technique yields.

Don’t stop at other people’s photos. Take a look at the latest pictures you’ve taken or at your favorite ones and start writing.

Narrate the beauty and transfer it into words.

You can write an entire scene – what you can see in the picture, what is the sequence of events that has brought such beauty and what will happen next…

Then…

Let me read it (please, please, please!)

Share

Please share your narrated beauty! I’m looking forward to read about your beauty in the comment section of this post.

Make Your Own Planner Workshop
Check out the new “Make Your Own Planner” workshop and you may solve this year’s holiday gift shopping problem. An affordable workshop that keeps on giving…

Inspiration Prompt – Believe In Your Rainbows

Tuesday, November 10th, 2009
Believe In Your Rainbows
[Photo by: Gordana Adamovic-Mladenovic]

I have not lived long enough to become old and wise but I have noticed that whenever I truly believe in something, and do whatever I can to capture my dream, it comes true.

Sometimes it happens right away. Most times it takes a while to get there. But if you keep believing, there comes a time that IT happens and everything falls right into place.

When you lose hope you usually extinguish the ember, but as long as you believe you are keeping it burning until the fire is up.

It takes patience, belief, hard work and persistence. I didn’t say it just miraculously happens…
However, it does happen if you give it a chance.

I have stumbled upon this quote by Gerald G. Jampolsky, MD:

As a child I was told and believed that there was a treasure buried beneath every rainbow.
I believed it so much that I have been unsuccessfully chasing rainbows most of my life.
I wonder why no one ever told me that the rainbow and the treasure were both within me.

I love it!

Chasing rainbows is the underlying idea behind believing in your dreams and knowing that it is already within you to succeed, is the rudimentary understanding that will get you to the treasure.

Share

Are you a believer? Share your thoughts by leaving a comment. I always love to read your comments and replay almost each and every one!

Make Your Own Planner Workshop
Check out the new “Make Your Own Planner” workshop and you may solve this year’s holiday gift shopping problem. An affordable workshop that keeps on giving…

Healthy Kitchen Prompt – Veggie Lasagna For Two

Monday, November 9th, 2009

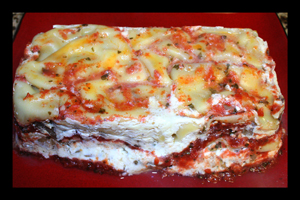
Veggie Lasagna For Two
I have recently shared with you the lifestyle change my husband and I have implemented. One of the main building blocks of our new regime is healthy eating.

As we see it, healthy eating isn’t giving up good food and succumbing to rice crackers. In our mind healthy eating is plentiful, rich in flavor and scrumptious in general.

We consider ourselves foodies and wish to keep the title – diet or no diet.

Many of you contacted me after sharing my story and have shown interest in our new journey. Therefore I thought to introduce a new feature here on Creativity Prompt, called: The Healthy Kitchen Prompt in which I will share recipes I invented that keep the flavor but ditch the extra calories away.

Please let me know what you think about this new feature, incorporating creativity in the kitchen…

Lasagna For Two

(small loaf pan, big enough for one lasagna sheet)
300 Calories per serving

Lasagna has been a struggle for us. We love it but cannot employ portion control with all the cheese that is traditionally added to it. Another issue is the size, the traditional lasagna pan yields enough servings for a very boring lunch/dinner menu all week long…

Finding the right balance of: taste, calories and size has made me very happy.

Ingredients

  • 2 no-cook lasagna sheets
  • 1/4 C low-fat cottage cheese
  • 1/4 C half-skim ricotta cheese
  • 1/4 C Freshly grated Parmesan cheese
  • 1 small can of diced tomatoes
  • 1 C fresh basil leaves
  • 4-5 cloves of garlic
  • Italian seasoning or dry oregano
  • Salt and Pepper
  • Olive Oil Spray
  • 1 jumbo egg
  • 1/2 large onion – peeled and cubed
  • 1/2 C sliced mushrooms
  • 1/2 Eggplant – peeled and cubed

How To

  1. Spray a frying pan with a light coat of oil, saute the onions on medium heat.
  2. When the onions become translucent, add the mushrooms and eggplant and add 1/4 C of water (TIP: adding water will help you get the “fried” vegetables flavor without the extra oil).
  3. Pre-heat your oven to 350F/180C.
  4. In a small blender put the canned tomatoes, garlic, fresh basil, salt, pepper and oregano and blend together to a smooth consistency.
  5. In a separate bowl mix together the cottage and ricotta cheese, an egg, salt and pepper, until they are all combined together.
  6. When the vegetables soften, but not cooked all the way through, take them off the stove and mix together with the cheese mixture.
  7. Spray your loaf pan lightly – make sure the edges are all covered – and pour in 1 Tbs of the tomatoes mixture and spread on the bottom of the pan.
  8. Lay a lasagna sheet on top.
  9. Pour in 1/2 of the cheese and veggies mixture and spread evenly.
  10. Pour 1/2 of the tomatoes mixture and spread evenly.
  11. Sprinkle 2/3 of the Parmesan cheese on top.
  12. Lay another lasagna sheet and repeat with 1 cheese layer, 1 tomatoes layer and the rest of the Parmesan.
  13. Cover with foil and put in the pre-heated oven for 45 minutes.
  14. When the timer goes off, keep the oven working and take the pan out. Take off the foil cover and put the pan back in the oven for 15 more minutes.

Wait 10-20 minutes before serving.

Bon appétit!

Make Your Own Planner 2012
Check out Creativity Prompt’s new and unique self paced workshop: “Make Your Own Planner”.
This workshop will show you how to make a beautiful handmade planner for the year 2012. Not only are you going to get the entire meticulously designed planner kit for instant download, but you will also get a high resolution video tutorial as well as step-by-step instructions to guide you on each step of the way. Either treat yourself with a fresh and creative start for the coming new year, or get it to create wonderful gifts for your family and friends.
Join now

Creativity Prompt – Reuse A Bottle Lid To Create Your Own Patterned Paper

Friday, November 6th, 2009

Reuse A Bottle Lid To Create Your Own Patterned Paper

Every time I manage to find a new use to something that would otherwise find itself in the recycling bin, I am happy, even skittish… (I will deny if you tell).

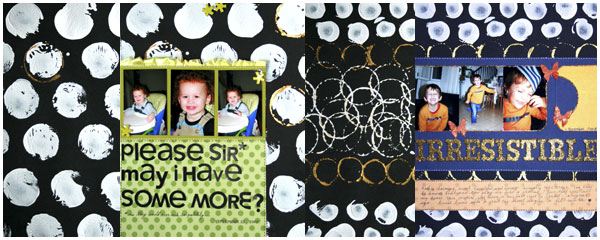
In this week’s creativity prompt I am reusing bottle lids to create artistic patterned papers.

The polka-dot-circular-spotty look is extremely popular right now and almost ALL the patterned paper manufacturers have a few in their latest collections. Before you reach your hand to the wallet and buy some new papers why not stopping at the recycling bin and make your own ones?

If you are interested in some ideas, then keep on reading.

Tools & Supply

How To

Watch on You Tube.
[I have had lots of comments requesting me to speak on my videos. I hate talking because my funny accent shines through. This time I took a deep breath and created a voice over – with my voice (I have to write it to believe it). Tell me the truth, don’t you want the fabulous music back?]

Step By Step Instructions

  1. Dip the lid in a pool of acrylic paint and stamp over the cardstock. To get a good impression of the lid make sure its entire surface is covered with paint. You may also use a brush to apply the paint more evenly to the lid. Apply some pressure on the lid, but beware of the paint’s slipperiness. I was going for the artistic look so I didn’t mind the imperfect stamping.
  2. You may use the opposite side of the lid to create a circular outline. Use it as a frame, or as an outline to the solid circle you stamped with the other side of the lid.
  3. Experiment –

    • Create different patterns.
    • Use different sizes of lids.
    • Use other mediums (instead of acrylic paint):

      • Ink pads.
      • Embossing ink + embossing powder.
      • Glue + glitter/ flock/ foil.
    • Use different objects to stamp with:

      • Toilette paper rolls.
      • Paper swirls.
      • Cardstock/ corrugated cardstock.
      • Old credit or gift cards.
      • Vegetables (if they went bad…)

Share

If you have any question, suggestion or remark – don’t hesitate to contact me – either leave a comment here, use the contact form or start a new thread on the Creativity Prompt Flickr Group!!!

I would also be very happy to see your own creations, so don’t be shy and share 🙂

Make Your Own Planner Workshop
Check out the new “Make Your Own Planner” workshop and you may solve this year’s holiday gift shopping problem. An affordable workshop that keeps on giving…