/** Font types */

Author Archive

The 10 Best Journaling Prompts in 2009

Wednesday, December 30th, 2009

In light of the coming new year, I backtracked a little bit and gathered the most popular posts on creativity Prompt in 2009.

Without further ado, here are the posts which attracted most of your attention and sparked a wonderful conversation – either on the blog or privately, via e-mails.

  1. Write About Your Beauty.
  2. Record Your Personal Change Of Seasons.
  3. Paint a Self Portrait With Your Words.
  4. How Can You Treat Yourself Better?
  5. Concentrate Your Thanks Giving On One Person Or One Thing.
  6. How Do You Tackle Everyday Chores?
  7. List Your Current Favorites.
  8. Hone Your Writing Skills With Colors.
  9. Chicken Soup For The Soul OR Healing Food.
  10. Concentrate On Relationships When Documenting Your Wedding Day.

Share

What Journaling Prompt did you like the best? What had made this prompt sparkle?

What story would you like to tell today and what would you like to journal about tomorrow?

Make Your Own Planner Workshop
This year you can really make your dream come true!

“Capture Your Dream” workshop is a self-paced, six weeks long workshop, that will walk you through a journey of capturing your biggest dream and making it come true.

In the process of making your dream happen – with lots of inspiration and guided self-exploration, you will also create a mixed media mini album from scratch and learn many tips and techniques – including some photography pointers that will add character to your photos and will help you take better pictures of your projects.

The workshop includes 30 printable PDF lessons with step-by-step pictures and instructions as well as several printable templates you may use in other projects too.

I am confident you will enjoy it and find it helpful so I also offer full money back guarantee while the workshop lasts.

The 10 Best Inspiration Prompts in 2009

Monday, December 28th, 2009

In light of the coming new year, I backtracked a little bit and gathered the most popular posts on creativity Prompt in 2009.

Without further ado, here are posts which attracted most of your attention and sparked a wonderful conversation – either on the blog or privately, via e-mails.

  1. The Value Of Optimism.
  2. Dare!
  3. You Are Great.
  4. Life Happens.
  5. Make The Most Out Of Your Present.
  6. Hello Diversity, You Are Very Welcome!
  7. You Never Fail You Are Just Delayed.
  8. Speak As Your Next Word Will Be Your Last.
  9. Remember & Never Forget.
  10. Today Is The Day.

This is the time to announce that there will not be any more inspiration prompts on Creativity Prompt. In 2010 and onwards I would like to concentrate on more scrapbooking, card-making and craft projects as well as on story telling.

Share

What Inspiration Prompt did you like the best? Why? What nerve has it tingled?

Make Your Own Planner Workshop
This year you can really make your dream come true!

“Capture Your Dream” workshop is a self-paced, six weeks long workshop, that will walk you through a journey of capturing your biggest dream and making it come true.

In the process of making your dream happen – with lots of inspiration and guided self-exploration, you will also create a mixed media mini album from scratch and learn many tips and techniques – including some photography pointers that will add character to your photos and will help you take better pictures of your projects.

The workshop includes 30 printable PDF lessons with step-by-step pictures and instructions as well as several printable templates you may use in other projects too.

I am confident you will enjoy it and find it helpful so I also offer full money back guarantee while the workshop lasts.

One Circle Widens and Another Narrows Down

Sunday, December 27th, 2009

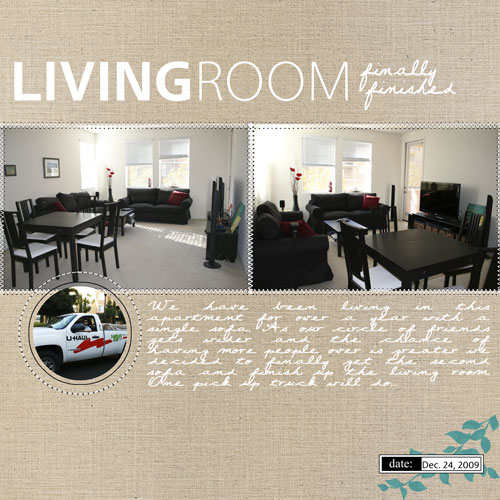
Living Room - Finally Finished
[Fonts: Vegur, Popsies; Digital Kits: Karla Dudley’s Capture + Record, Digi Essentials & Blakely]

I have been very fortunate in the last couple of weeks to meet a group of fantastic people to hang out and have loads of fun with.

One of the most difficult aspects of a relocation is starting afresh socially. You are displaced from the close group of friends you’ve been nurturing since childhood and get into a place where a tight circle of friends had already been formed. Pair with it natural shyness and a funny accent and suddenly your “play dates” are getting sparse.

Little by little we are widening our circle of friends here and our social calendar is getting full again. To “celebrate” the occasion we’ve decided to narrow down another circle – our apartment’s interior design.

When we got here we had to buy all the furniture at once and lost a lot of money by converting Euros to US Dollars. So we decided to lightly furnish the apartment with all the necessities and add on furnitures as the need arises…

Therefore on December 24th we rented a pick up truck, drove to IKEA in Palo-Alto and purchased the second sofa and some decorations. Thus, with a slight backache, our living room is finally finished 🙂

Share

Have you narrowed down a circle in life as another one widened? Leave a comment and engage in the discussion.

Make A Simple Notebook With Ribbon Binding – Creativity Prompt

Friday, December 25th, 2009

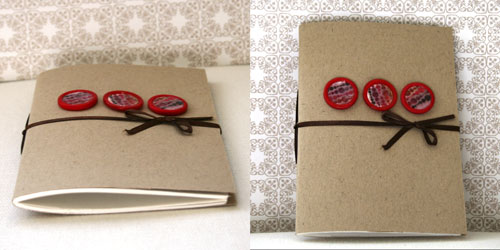
Notebook With Ribbon Binding

This project is also an easy one you can whip up in under 10 minutes. I love those type of projects and I can never have enough notebooks to sketch, doodle and write in. Can you?

I used the ribbon for the binding, as an alternative to the linen thread or embroidery floss I normally use for binding and as an added bonus, the ends of the ribbon also provide a nifty closure for the notebook.

If you are interested in making this sweet and simple notebook, then keep on reading for the supply, video how to and step-by-step instructions. Enjoy!

Tools & Supply

How To

[Watch on YouTube. While you’re there, please comment, rate & subscribe]

Step-by-Step Instructions

  1. Cut your papers 8″ wide and 5½” tall. Fold in half to 5½” by 4″.
  2. Straighten the edges of the paper stack with a grid ruler, aligned with the edge of the paper and a craft knife.
  3. Cut your cardstock 8½” wide and 5½” tall and wrap around the paper stack to adjust the spine.
  4. Lay the paper stack over the cardstock cover and mark the piercing holes: one at the center and one to each side – 1″ apart.
  5. Pierce the papers and cardstock following the marks you created before.
  6. Thread the ribbon through the needle so both ends would meet and start the binding stitching from the inside out, through one of the outer holes.
  7. Then go in through the opposite hole.
  8. Tie the ends together in a double knot and thread the needle out through the center hole and in again through the same hole.
  9. Thread the needle through the loop the tied ends create and then underneath the first stitch.
  10. Thread the needle out through the center hole again.
  11. Cut the ribbon off the needle and use the ends to close the notebook.
  12. To embellish the notebook I adhered 3 buttons with a dab of Diamond Glaze to the center of the notebook’s cover and adhered three punched out circles of patterned paper to the button. I then secured the patterned paper with another layer of Diamond Glaze.

Share

If you have any question, suggestion or remark – don’t hesitate to contact me – either leave a comment here, use the contact form or start a new thread on the Creativity Prompt Flickr Group!!!

I would also be very happy to see your own creations, so don’t be shy and share 🙂

Make Your Own Planner Workshop
“Capture Your Dream” workshop is relaunching as a self-paced workshop. Isn’t this the perfect time for you to capture your dream and make it happen?

Holiday Greetings

Thursday, December 24th, 2009

To all my dear readers who celebrate Christmas today I wish a very merry Christmas. May your home be filled with joy and your day be merry and bright!

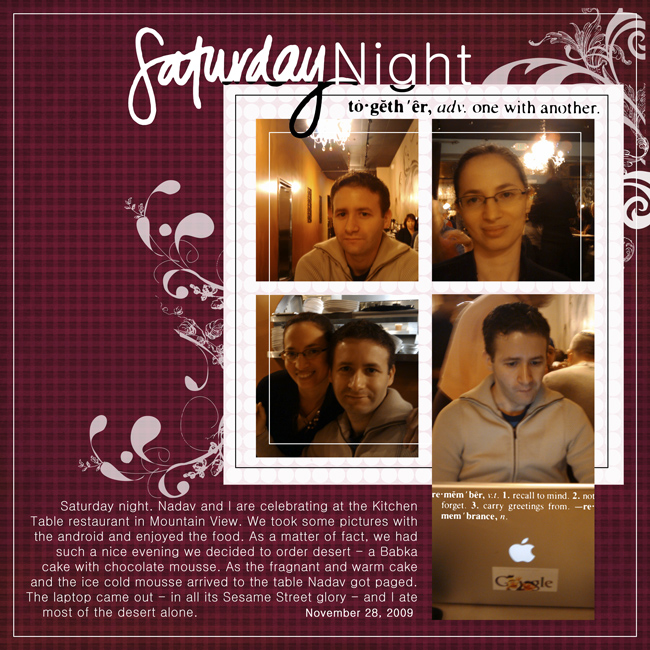
Let me share a layout I made with Shimelle Laine’s new digital kits, she has some fabulous new Christmas kits available at Two Peas In A Bucket:

At the Kitchen Table

[Font: Gulim; Shimelle kits: Penned Words: Dates; Wrap It Up Christmas Papers; Other kits: House of 3 – Heidi Swapp definitions + Rhonna Botanical Swirls]

Journaling Prompt – New Year’s Resolutions Series – Step 4: Choose

Wednesday, December 23rd, 2009
New Year’s Resolutions Series – Step 4: Pick
[Photo by: Dudley Carr]

This is the last step in making effective new years resolutions. Last but certainly not least.

One of the main problems in following through with the list of resolutions is going after too many resolutions and starting off the year with an unrealistic expectation that will nip any sense of accomplishment in the bud.

Dream far. Wish for the stars, but do not spread your attention too thin. Even a simple resolution such as relaxing more is time consuming and by pairing it with a million more resolutions you destine yourself to fail.

Step 1

Reminisce.

Step 2

Contemplate.

Step 3

List.

Step 4

Go over the list you compiled last week and choose. between one to five resolutions to stick to in 2010. Make it a realistic list. Make sure all the resolutions are feasible and can be done in a course of a year.

For a more comprehensive, fail-proof system to capture a dream and follow through to realization, check out the relaunched “Capture Your Dream” workshop.

Share

What is your resolutions for 2010? Share by leaving a comment on this post.

How To Make A Gift Card (pun intended) – Creativity Prompt

Friday, December 18th, 2009

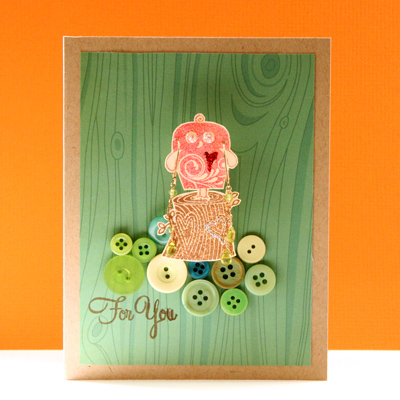
Gift Card

The Hero Arts blog has sparked this idea in my head when they came up with a gift card challenge. I’m always up for a challenge and instead of thinking about a fun way to incorporate money or a store gift card in the card, I thought why not incorporating the gift itself and the idea for this card emerged.

Another fun idea is to stamp and cut a tree image and to wrap a necklace around it, like a twinkling ornament chain.

Tools & Supply

How To


[Watch on You Tube – while there, please rate, comment & subscribe]

Step-by-Step Instructions

  1. Stamp the images over a smooth light cardstock.
  2. Cut around the images with precision scissors, while rotating the cardstock and leaving the scissors at the same position.
  3. Adhere the background piece of the patterned paper centered on the card base with permanent tape adhesive.
  4. Temporarily lay the tree image on the background paper and arrange green buttons around it to simulate a grassy hill. When you are pleased with the buttons’ arrangement – adhere them with glue dots.
  5. Adhere the tree image in its place on top of the buttons with a thick foam adhesive. Either use a ½” thick piece of foam adhesive or layer a few thinner foam adhesive pieces together.
  6. Pierce holes in the owl “ears” and put on the earing. Then adhere the owl on top of the tree with another piece of thick foam adhesive. The thickness of the foam gives room to the earing’s stubs.
  7. Add some more interest and texture with a few touches of glitter glue here and there.
  8. Stamp your greeting with brown ink. Attach the stamp to the left side of the acrylic block, so the buttons won’t stand in your way.
  9. Give the gift card to someone you love and get a smile in return.

Share

If you have any question, suggestion or remark – don’t hesitate to contact me – either leave a comment here, use the contact form or start a new thread on the Creativity Prompt Flickr Group!!!

I would also be very happy to see your own creations, so don’t be shy and share 🙂

Make Your Own Planner Workshop
Jump start your creativity for 2010 and Make Your Own Planner with an affordable workshop that keeps on giving with an unlimited personal use license…

Make Your Own Planner Workshop
“Capture Your Dream” workshop is relaunching as a self-paced workshop. Isn’t this the perfect time for you to capture your dream and make it happen?

New Year’s Resolutions Series – Step 3: List – Journaling Prompt

Wednesday, December 16th, 2009
New Year’s Resolutions – List
[Photo by: Ayala Moriel]

Step 1

Reminisce.

Step 2

Contemplate.

Step 3

After you have taken a trip down memory lane and analyzed your past successes and achievements, now is the time to create a mindful List.

This is not the time to put boundaries on your thoughts. You need to shut off the inner critic or inner realistic in you and list every dream you come up with. Be it a feasible dream or something which is completely out of reach (such as catching the moon in a jar).

Write a list of 10 resolutions for next year, 100 resolutions or 1,000. It doesn’t matter because in this stage all you do is purge your thoughts into the paper in a form of a list.

Step 4

Choose.

Share

What is the first resolution on your list (I don’t mean the most important one, just the one that came up first). Share by leaving a comment on this post.

Make Your Own Planner Workshop
Last chance to join “Make Your Own Planner” workshop. Just a few more days… An affordable workshop that keeps on giving…


Make Your Own Planner Workshop
“Capture Your Dream” workshop is relaunching as a self-paced workshop. Isn’t this the perfect time for you to capture your dream and make it happen?

Stitched Cards -a-thon…

Monday, December 14th, 2009

I am always looking for new ways to expand my creativity and try out different things, which is why I have recently purchased a simple sewing machine.

I never intended to use the sewing machine to make or amend clothes, nor did I intend to sew hand made dolls, home decor or bags (though I definitely do not rule out any of these).

My first intention for this sewing machine was to stitch papers with it.

I love the sewn look. It makes everything look better, well designed and finished.

So there is no surprise in me spending a whole weekend just fiddling with my new sewing machine, trying out different things and making about a gazillion cards, these are their stories…:

Handmade sewn cardsCast of Characters – American Crafts cardstock in “Earth Tones”; Cardboard; American Crafts white glitter button; Red embroidery floss; Patterned paper by Cosmo Crickt – “Jolly by Golly”; Handmade Mulberry paper; Papertrey Ink stamp “Messages”; Palette hybrid ink in “Dark Chocolate” .
Techniques – This one is pretty straightforward. I just ripped off a piece of cardboard and exposed the corrugated layer, then sewed it to the card over a couple of other patterned paper pieces, also sewn to the card base. Later I attached the button with a glue dot and stamped the greeting.

Handmade sewn cardsCast of Characters – Wausau heavy-weight cardstock; Patterned paper by Basic Grey from last year’s “Wassail” collection; Fiskars “Apron Lace” border punch.
Techniques – First I sewed the patterned paper strips to the card base and then cut the gift images from the paper with precision scissors and adhered them with pop-dots.

Handmade sewn cardsCast of Characters – Wausau heavy-weight cardstock; Ali Edwards stamp “Simply You” by Technique Tuesday; Palette Hybrid ink in “Poppy Red”; Red embroidery floss; Yellow button; Thin corrugated cardboard; Cuttlebug heart shaped die; Rangers yellow Stickles.
Techniques – I used the negative of the die-cut corrugated cardboard and teared it around the shape, then sewed around it. After that I sewed around the shape with no thread and hand-stitched it with embroidery floss, using the holes the machine poked in the card base. I added a button with a glue dot and added a sewn frame that holds an inner lining paper which conceals the hand-sewn stitches inside. For a touch of glitter, I went over the sewn frame with yellow glitter glue.

Handmade sewn cardsCast of Characters – Wausau heavy-weight cardstock; Mulberry paper heart die cuts; Papertrey Ink vintage button in “Poppy Red”; Palette Hybrid ink in “Poppy Red”; Ali Edwards stamp “Simply You” by Technique Tuesday; Yellow embroidery floss; We Are Memory Keepers “Corner Chomper”.
Techniques – This is probably the simplest card, but the one I love the most… All I did was to temporarily adhere the heart die-cuts to the card base and go over them with a couple different stitches Then I attached the button with a glue dot, stamped the greeting (I cut the clear stamp because I didn’t want to use the first part of the greeting) and voilà…

Handmade sewn cardsCast of Characters – Wausau heavy-weight cardstock; American Crafts cardstock in “Earth Tones”; Rangers yellow Stickles; Papertrey Ink vintage button in “Poppy Red”; Palette Hybrid ink in “Dark Chocolate”; Papertrey Ink stamp “Messages”; Red embroidery floss; Small square punch; We Are Memory Keepers “Corner Chomper”; Patterned paper by Basic Grey from last year’s “Wassail” collection; Handmade paper; vintage textbook paper.
Techniques –In this card I made a collage of different paper strips, sewn both horizontally and vertically with different types of stitches as well as hand-sewn with red embroidery floss. Then I adhered the paper collage with pop dots on another piece of cardstock, also sewn to the card base. After that I added the finishing touches – a button adhered with a glue dot, glitter frames and distressing the text paper with a baby wipe dabbed in the “Dark Chocolate” ink.
The greeting banner: I stamped the greeting on cardstock and cut it into a small rectangle. Then I fed the end of the rectangle through the edge of the square punch and created the slotted end. The I curled it with the blade of my scissors, pleated it in one end, distressed it with the baby wipe stained with the ink and adhered it by applying glue-dots only to its ends.

Handmade sewn cardsCast of Characters – Bazzill textured cardstock in “Butterfly” ; Papertrey Ink stamp “Messages”; Palette Hybrid ink in “Dark Chocolate”; Orange grosgrain ribbon; Striped patterned Paper by chatterbox; Rhinestones; Patterned paper by Basic Grey from last year’s “Wassail” collection.
Techniques – Simple. Simple. Simple. I temporarily adhered the paper strips to a piece of cardstock and sewed them to it. The stitch is very dense, so it was easy to tear up the cardstock excess. After finishing the sewing part I tied a ribbon around the cardstock, then I attached it to the patterned paper with some pop-dots. I added the rhinestones and the stamped greeting and that’s it. Simple…

Handmade sewn cardsCast of Characters – Wausau heavy-weight cardstock; We Are Memory Keepers “Corner Chomper”; Brown paper – recycled from a package filler; Striped patterned paper by Black River Designs (awesome papers, great quality, by the way…); Green patterned paper by Chatterbox; Papertrey Ink stamp “Messages”; Palette Hybrid ink in “Dark Chocolate”.
Techniques – I started by sewing the green paper to the card base with a zig-zag stitch. The I adhered the striped piece of patterned paper and attached the handmade flower with a few glue-dots.
The handmade flower: I punched 10 pieces of brown paper with a scallop circle punch by EK Success. Then I sewed all the pieces together in the center and crumpled all the layers, one after the other – starting with the top layer – until I achieved the look I was looking for.

Share

Do you own a sewing machine? Have you used a sewing machine for paper crafts? Share by leaving a comment on this post.

Make Your Own Planner Workshop
Check out “Make Your Own Planner” workshop for a fun, quick and affordable holiday gift – either for you or for a loved one.


Make Your Own Planner Workshop
“Capture Your Dream” workshop is relaunching as a self-paced workshop. Isn’t this the perfect time for you to capture your dream and make it happen?

Creativity Prompt – Whip Up Quick Handmade Holiday Gifts – 10 Gifts In Under 10 Minutes

Friday, December 11th, 2009
Quick Handmade Holiday Gifts
[Photo by: Ginny]

The holidays are practically here and with all the preparations involved you may feel a little bit behind. As the holidays get closer, the lines at the stores get longer and the stress level – higher.

Let me help you by compiling a list of 10 handmade gifts that can be whipped up in less than 10 minutes. That is even quicker than driving to the store or than browsing online stores.

Each image is linked to the full video + step by step tutorial:

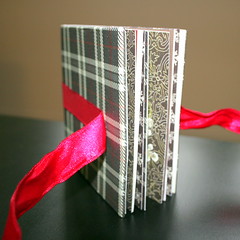
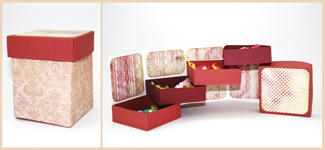
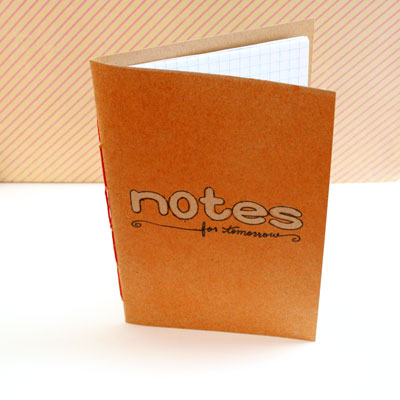
10 minute book - openedA Cute Box Of DrawersSimple Stitched Notebook
A SIMPLE Fabric Covered Mini AlbumStapled NotebookGate Fold Mini-AlbumHow To make An Accordion Brag Book
THE QUICKEST Mini AlbumHow To Make An Art JournalKraft No-Stitch NotebookWhat are you making this year?

…and one more gift idea –

Make Your Own Planner Workshop
Do you have last minute gift giving challenges? Check out the new “Make Your Own Planner” workshop and you may solve them…