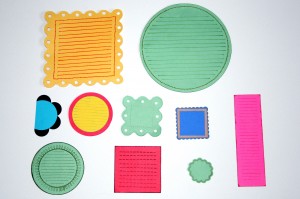
My scrapbooking philosophy is that words are just as important as pictures. The journaling helps in keeping a more complete memory of the moment. It creates a deeper memory of a loved one or a richer reminder of a point in time you wish to treasure for yourself and for the next generations
There are many ways to incorporate journaling in an album (or an art journal). One of the quickest and easiest ways I know is by using journaling tags. The more colorful and interesting they are, the more inclined I am to actually use them and put those feelings and memories in writing.
There are many brands of journaling tags to choose from, check out:
and many more…
From time to time I also love to make my own journaling tags. It is a great way to use scraps of cardstock and patterned papers and a very good creativity prompt. Using my own hand-made goodies makes me feel inspired and more attached to the final result.
You can either make the tags as you go or make them in bulks, in a production line manner (which is the way I do it).
The possibilities for making the journaling tags are endless. Any piece of paper can do, in any shape, color and size. Rarely my journaling tags actually look like traditional tags …
This week’s creativity prompt is to make your own journaling tag (and to use them !!!).
Here are examples for some journaling tags I have recently made and short instructions on how to make them yourself.
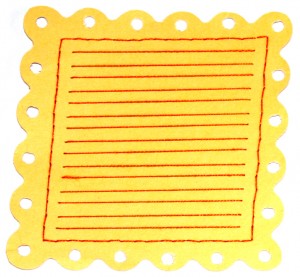
On this one I have used a Coluzzle template to scallop the edges (Thanks, Mor, for the tip on using this template). After cutting the scalloped square I punched holes in each scallop with the Crop-a-dile and pierced a frame around the inner square with a paper piercer. I am using the Coluzzle foam mat for the piercing, it really makes it easy. After piercing the frame I stitched it with an orange embroidery thread. Than, using a clear ruler, I pierced two little holes in each line and stitched them as well, in order to create the journaling lines. (A quick tip on threading a needle – put a bid of clear glue at the tip of the thread, it prevents the thread from fraying and works like magic).
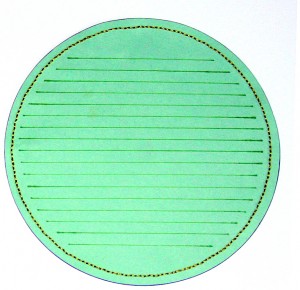 On this one I have used the same method of piercing a frame and stitching along it. For cutting the circle I used Fiskars Circle cutter. The lines were drawn using a clear ruler and a green sharpie.

On this small tag I used a small circle punch and cut out the black circles and than adhered them to the back of the light blue circle and than cut it in half. This tag goes well when lined up against a picture or the age of the page.
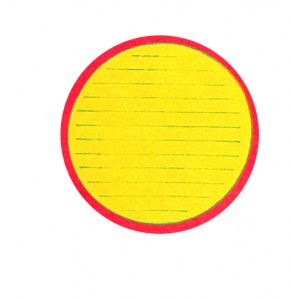
This one is really easy. Using a coluzzle small circles template I cut out two circles and on the small one I stamped with Autumn Leaves clear journaling stamp using a blue chalk ink.
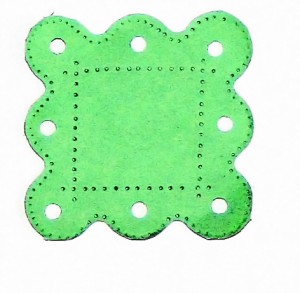
On this one I used the same technique I have used with the first yellow tag, only I did not use stitches. I also pierced the outer frame, free-hand.
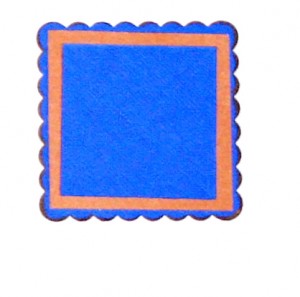
This tag is reeeeeeeeally simple. I have punched out a scalloped square and adhered two smaller squares to it.
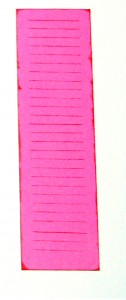
On this fun little tag I inked the edges with a red chalk ink and for the lines I used the Autumn Leaves clear journaling stamps again. Now it’s time for another tip. In order to use only the lines on the stamps and for creating a nice 1/4″ border around, I have masked the tag with post its.
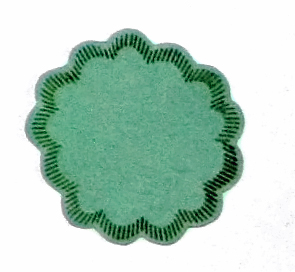
On this tag I was using Technique Tuesday “Hanging by a thread” stamps only Instead of mounting the stamp straight on the acrylic block, I have mounted it in a curve to create the circle. To guard the end I was using post its again. Next I cut along the stamped lines, turning the cardstock around instead of the scissors.
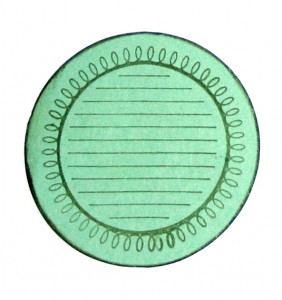
On this tag I used the same technique of lining the stamp up in a curve. I was using the same stamp set as above, and also the Autumn Leaves journaling stamps. I inked the outline of the circle with a green chalk ink and cut it out using the Coluzzle template.
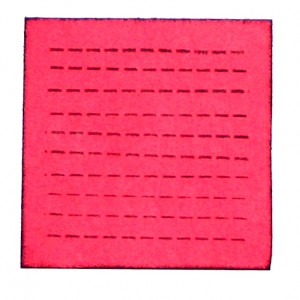
On this tag I was using the Technique Tuesday “Hanging by a thread” stamps again, only this time I mounted the stamp straight on the block. To mask of the outline, I was using post-its. I used red chalk ink for the journaling lines and for the edges.
I hope this post has given you some ideas and a bit of inspiration for make your own journaling tags. Please share your own journaling tag creations by commenting to this post.
Tags: creativity prompt


I don’t scrapbook, but I’ve recently bought one and probably will start after I get some pictures printed out.
I think I might enjoy it and I love your tips. Thank you. Arlene or Clarian’s Hawk on Hero Arts.
http://arlenesbits.blogspot.com
Thanks for the great ideas, I love the tags with the piercing and stitching. Might have a go at this tonight
[…] – bookmarked by 5 members originally found by Kya10 on 2008-08-23 Creativity Prompt #10 – Making Your Own Journaling Tags http://www.creativityprompt.com/creativity-prompt-10-making-your-own-journaling-tags/ – bookmarked […]
[…] tags – kan man göra själv, eller ladda ner, printa och klippa ut eller använda för Digitala LOs. Man kan använda clear […]
I’ve joined a journalling tag swap for the first time and this has given me great ideas for making tags. Thank you 🙂
You are very welcome! Thanks for letting me know.