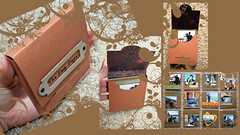
 It has been a while since I last designed a free template for you guys. Now it’s time to hone my
 limited Photoshop and reverse engineering skills and provide you with another free template. This time a template for a mini album case.
This case is perfect for a 3″ by 3″ album, for those important pictures you want to always carry with you in your bag…
I created an album, made out of 3″ by 3″ laminated cards, featuring the early days with Nadav – long before we even thought about getting married 🙂
If you feel like making a similar mini-album, or you have some other ideas for this cute little case, then stay tuned and keep on reading.
Tools & Supply
- Mini Album Case Template [Click to download for free]
- Case Lining Template [Click to download for free]
- 8½” by 11″ sheet of cardstock
- 8½” by 11″ sheet of Patterned paper [You can cut a regular 12″ by 12″ to size…]
- Craft knife
- Cutting mat & ruler
- Stylus
- Scissors
- Strong double-sided tape
- Tape runner
- 1 sheet of 12″ by 12″ cardstock (For 16 3″ by 3″ cards).
- Laminating machine [can be replaced at times of need by an hot iron – but make sure to test run it first]
- Hot laminating pockets
Optional – For the Mini album
How To
[You can watch the video in HD on YouTube. While you’re there please rate & comment 🙂 ]
Step by Step Instructions
- Download the templates by clicking on the link at the supply list above and print the case template on cardstock and the lining template on a patterned paper. Make sure the printer’s settings are set to a letter size (8½” by 11″) and to borderless printing. Print on the back side (the smooth side of a textured cardstock and the wrong side of your patterned paper), so the lines won’t show on your finished project.
- Cut along all the solid lines with a craft knife and a ruler. Be careful not to cut any of the dashed lines. Finish off the curved parts with scissors, it’ll make a smoother cut along the curve.
- Score all the dashed lines with a stylus and a ruler.
- Fold all your score lines (You can use a bone folder for that).
- Cut along the solid lines of the lining template. You can use either scissors or a craft knife, whatever
is closeryou feel more comfortable with. - Score along the dashed lines on the lining template and fold your score lines.
- Adhere your lining to the case template – make sure you are concealing the printer’s lines, which means your positioning is correct. Don’t be shy with your adhesive and apply a generous layer, especially on the edges and the score lines.
- Apply a strong adhesive tape to the small flaps and on the long flaps, on the right side of the template.
- Assemble the case and voila, it’s too easy 🙂
Few pointers regarding the mini album –
- Cut your cardstock to 3″ by 3″ squares (1 sheet of cardstock makes 16 squares).
- Adhere your photos and journal on the back.
- Laminate all your squares and cut the excess laminating material off.
- Usually this type of albums gets handled often, not to mention it’s tossing and turning in your bag all the time. The laminating helps to keep the album more durable.
- Use only flat elements on your cards so the lamination goes smoothly.
Different Views on the Project
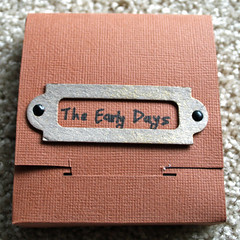
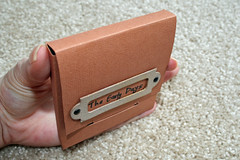
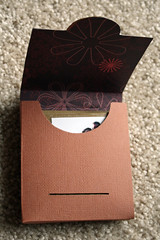
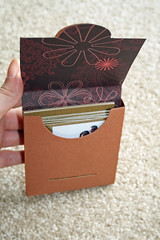
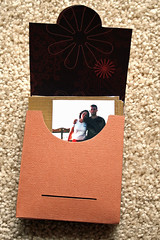
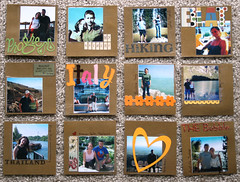
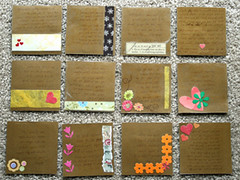
[You can find all the photos on Flickr]
Share
If you have any question, suggestion or remark – don’t hesitate to contact me – either leave a comment here, use the contact form or start a new thread on the Creativity Prompt Flickr Group!!!
I would also be very happy to see your own creations, so don’t be shy and share 🙂
Giveaway reminder
You still have a chance to enter the drawing on Creativity Prompt for a $50 GIFT CERTIFICATE to Scrapbook.com. For more details on the giveaway click here.
Update
The contest is closed!
Tags: creativity, creativity prompt, mini-album, template, Tutorial, Video Tutorial


I can’t wait to look at this more closely tonight–it looks like a fantastic project. Thanks so much for the templates!
You’re very welcome. It would be great if you shared your version of this project with me 🙂
Great idea! TFS :o))
[…] que me gusten más que las fotografÃas por eso me encantan las manualidades con ellas, como esta linda caja álbum. Se trata de una delicada caja donde podrás guardar las imágenes que más te gusten para regalar […]
Hi, it’s the first time I visit your blog, and I have to say that it’s a great place! You have a new follower 😉
I specially loved this idea, I can’t wait to try it myself!
Thank you, Lucia. When you go ahead and make your own mini-album in a case, I’ll love to see it – as long as you feel like sharing 🙂
This is so adorable! I wish I’d looked at this yesterday, since I wast at my sister’s and she had the CUTEST paper. Oh well, I’m sure I’ll go again soon and then, I can’t wait to make this!
Thanks, Robyn. (and then, please share 🙂 )
Ok, I posted my pics on my blog!!
I really love your projects….. you do an incredible job on your presentation of them, thank you SO very much
🙂
Debi…
Thank you so much, Debbi. I really appreciate your feedback 🙂
Oh my! So many things to learn with you! Your work it’s fantastic! Thanks to share with us. Fabi.
Thank you so much for your kind words!
First of all thank you so much for posting this! I have a question. if i wanted to do a bigger cover
do you have a template for it? or should i just measure it to however big the CD cover is?
well thanks again!
I don’t have a template… Just measure and leave room at the front and back as well as room for the spine and closure… Thanks for your kind words!
Me encanto!!! 😀 gracias!